Westerbeke Diode Replacement - Help

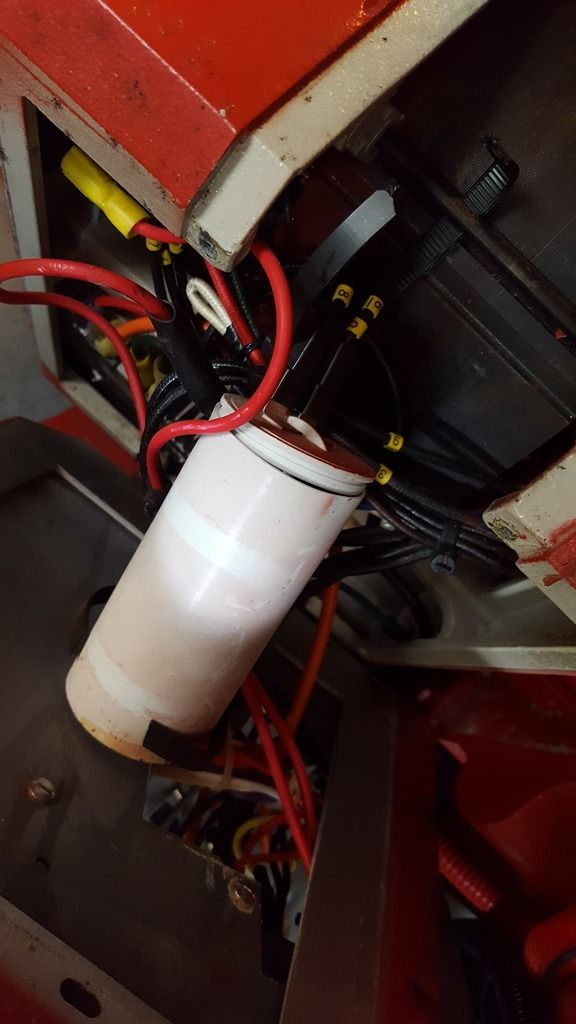
Mine is located inside the box where the start/stop switches are mounted.

There should only be a few screws holding the cover in place and it should only take a few minutes to do the job. No need to remove anything else. Just make sure you discharge the capacitor by grounding the two terminals with an INSULATED screwdriver.
 
You take off the control panel, then remove the control panel bracket, then remove the backend plastic cover (around the middle of the backend ) you will see the cap. Ours was tie wrapped to one of the backend thru bolts. Cut the ties and out she comes.

It is a little larger than two D batteries end to end.
 
Looks like the Capacitor is the problem. The cap is bulged out, and it failed the resistance test. New one is on the way. Hopefully this is the culprit - and the ONLY culprit.

 
I just replaced mine this weekend. It solved the problem. Make sure to discharge the old capacitor before removing it.
 
I just replaced mine this weekend. It solved the problem. Make sure to discharge the old capacitor before removing it.

Yup, already discharged and out of the unit. Just waiting on Westerbeke.

Other than the fact that I'm not a 4.5' tall, 67 lb. acrobat, and having a stripped screw in the worst possible place (which took most of the time) it wasn't too bad of a job.

Crap.... if this thing was on a workbench it would be a 3-minute job.
 
My Generator is once again 'generating'.... the capacitor was in fact the culprit. It's replaced, all good.

FYI - the capacitor has been superseded and the replacement part is bigger. But fear not, it still fits in the cavity.
 
Re: Westerbeke Diode Replacement - Help - Fixed


Great news! Looks like I'll be replacing the cap. Where did you order it from?
Hi, I have the same generator that you do, how did you get the capacitor out. The new one has a screw on the end. Does it twist out. Can’t see any way to grip it. Please let me know how you got it out. Thanks
 
If you have the BCGB generator, then the capacitors are held in place with one-hole clips that are fastened through the sides of the generator housing. If I recall, you need to remove the circuit breaker housing and you will find the head of the screw that holds the clip in place. The other screw that holds the other capacitor is on the backside of the housing (if you have the 7.0 ) If you have good access to the end of the generator, then this replacement is pretty easy. If not, like mine, getting the caps clamped back in is the hard part, as the clamps want to rotate when replacing the screws, so not so easy to slide them back in, as was my plan. The clips kept rotating back. But, if you can reach straight into it, it won't really be a problem.
 
That is exactly what my CAP looked like - you should be good with a new one !!!!!

I have a Sea Ray 340 with the westerbeke 4.5 bcbg generator. Was generating along when it surged and the ac voltage dropped to 1 or 2 volts. This thread was invaluable in diagnosing the issue. Removing the capacitor I found a blob of formerly molten metal affixed to the side of it. Taking it apart, it's thin layers of metal and a plastic material sandwiched together. On end, internally, had melted I to a solid core. The other end still had the layers. Am awaiting the new capacitor and will update once installed.


IMG_20200528_191957.jpg
IMG_20200527_071553_01.jpg
IMG_20200528_191933.jpg
IMG_20200528_192002.jpg
 
I have a Sea Ray 340 with the westerbeke 4.5 bcbg generator. Was generating along when it surged and the ac voltage dropped to 1 or 2 volts. This thread was invaluable in diagnosing the issue. Removing the capacitor I found a blob of formerly molten metal affixed to the side of it. Taking it apart, it's thin layers of metal and a plastic material sandwiched together. On end, internally, had melted I to a solid core. The other end still had the layers. Am awaiting the new capacitor and will update once installed.


View attachment 85694 View attachment 85696 View attachment 85697 View attachment 85695

Well, not surprisingly, it was the capacitor. Put the new one on, started it up, and Voilà! AC voltage. The voltage was up around 130, but reducing the no-load generator speed just slighly reduced it to 120. Ran it for an hour under load. No hiccups! I have also found on these generators that the carburetors are extremely sensitive to dirt in the fuel. I have a water separating filter, as well as a pre-filter installed. Prevents dirt from getting into the carburetor, which at least on mine, causes it to surge at no load and load.
 
For me it was remove the whole back end, and I have a 12.5KW. I did try the cap and rectifier, however and they did nothing. I also ohm'd out the windings and they seemed good but no output. So it could only be the diodes. After I got to the diodes I decided to try and find a new back end just to be safe. It cost me $2500, but I got a whole newly rewound, rebuilt back end. Best thing I could have done. I did it last year around this time.

If you are planning on keeping this boat for a while, it might be worth the peace of mind going that route. Good luck!

Can you please share where had your diodes rebuilt? I have a 15.0kW Westerbeke same issue.
 
Can you please share where had your diodes rebuilt? I have a 15.0kW Westerbeke same issue.

Sorry if I was unclear with that post. I replaced the whole backend from Broward Armature and very glad I did.

The diodes are located on the back end of the armature itself and are inter twined with the windings. You might be able to access then from the rear access cover, but will be real tough to do so. Which is why I decided to replace the whole backend. It wasn't worth all that work if I missed something and had to go back in and dismantle the housing again.
 

Forum statistics

Threads
113,117
Messages
1,426,452
Members
61,032
Latest member
Brock340
Back
Top