Marc Rainaldo
Active Member
When we did our own survey on our boat we noticed a soft spot around the windless and took that in our offer. Unfortunately after we transported the ship to Netherlands A lot of things suddenly broke. Finally, 1,5 year later, during the winter storage we had time to fix this soft spot. Almost forgot to tell that we spoke to many shiprepair shops what they would charge to fix this. We got offers between €4K an 7k and they all seemed not happy by doing this. As DIY guy I don’t get the right feeling by any of the spoken company’s that I started to do it myself.
speaking after the job I must say that it was a nice job but be aware, it isn’t a job that you do in short time. Omg you got to have patients.
My plan was to cut the top layer off, get rid of the rotten wood, build it up, place the topdeck back and repair the cuttingline.
The start:
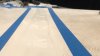
Before we even start we faced on of the most difficult part of the proces. Were do you begin. How far did the rotten wood go? I knocked, pressed with weight etc. If you go to far maybe the top layer won’t let go. If you do less you have to saw another piece. As you can see the spot was very big. Every time we were docking the deck made noices. Almost we were afraid to walk on it.

I bought from Dremel a small saw with a diamond saw blade. You can adjust the depth of the saw and it went pretty easy true the polyester.


After sawing all around my world almost collapsed. I didn’t get the topdeck off. Yes around the windlass area it was loose but on the sides no movement at all. What was I thinking to do this job? Did I f...ed it up? Because I started the job o had to move on and took a long crowbar and eat a popeye spinach and made my self very angry. Around the edges, especially in the back corners the topdeck was very hard to loosen but I did it. I had to relax for couple minutes because all my energy was gone.

Arghh all was so wet, almost unbelievable.

After cleaning the most I let it dry for couple days.

You can see on the picture above there are 2 slots. These slots contained 2 support beams that were completely gone. Unfortunately the support beams went all the way to the bow. I pressed on the polyester on the pulpit area and it felt good so I decided to leave that. With a screwdriver I scratched most wet wood out as far i could reach.
The products I gonna use are epoxy and cotton fiber filler and cotton mats.
The cottonfiber you add in the epoxy and makes the epoxy thicker and make it better attach.
I made 2 new hard wooden support beams. In the slots I poured the epoxymix and put the beams in.
From inside the boat i taped every hole and then from above I put a thin layer epoxy to make the holes “waterproof’. In the next fase when we glue new layers the epoxy won’t leak true that holes and mess up the anchor compartment.

All saw sides I scratched as far as I could reach as many wet wood out. The epoxymix I used for the beams I added some more cottonfiber to make the mix even thicker. This mix I use in the spaces around the saw sides.
On the picture above it’s a little hard to see but on the left and right side there was an wooden part that I couldn’t remove and that part was good. So problem was now that we face different thickness to fill. For now I let dry this for 2 days because want the support beams to hard good.
Meanwhile at home I use a grinder with sandpaper to remove all wood from the back of the topdeck.

On the right side on the picture above you see a missing part. That happened with my Popeye action. That part was not rotten and tore apart.
As mentioned before we faced different thickness to fill. At my local polyester shop they have pvc matts. Very nice material and whenever in the future there will come water from the windless it won’t rot. Problem is that the thinnest thickness is 1cm. The balsa wood that was used originally was 2 cm thick. Because we use a couple layers of epoxy mix I chooses for the pvc matt with a thickness of 1.5cm. For the thinner parts I use multiplex wood 0.7cm thick.

As you can see on picture above the pvc matt is build up with small pieces. The deck is curved so it will fits perfectly (I hope lol).
I cut everything in perfect shape (wood and the pvc).

It’s time to make a new epoxy mix with cottonfiber. I want a thick mix but not to thick, it has to flow. A bit like yogurt. With a wide putty knife my wife ( I don’t see 3D) spread out the epoxy mix and we lay the wood and pvc on their place. Now Squeeze a bit so that the epoxy mix is coming out a bit on the sides. Not to much because you don’t want the epoxy mix pressed out. Also important is that you level everything as good as possible.
speaking after the job I must say that it was a nice job but be aware, it isn’t a job that you do in short time. Omg you got to have patients.
My plan was to cut the top layer off, get rid of the rotten wood, build it up, place the topdeck back and repair the cuttingline.
The start:
Before we even start we faced on of the most difficult part of the proces. Were do you begin. How far did the rotten wood go? I knocked, pressed with weight etc. If you go to far maybe the top layer won’t let go. If you do less you have to saw another piece. As you can see the spot was very big. Every time we were docking the deck made noices. Almost we were afraid to walk on it.
I bought from Dremel a small saw with a diamond saw blade. You can adjust the depth of the saw and it went pretty easy true the polyester.
After sawing all around my world almost collapsed. I didn’t get the topdeck off. Yes around the windlass area it was loose but on the sides no movement at all. What was I thinking to do this job? Did I f...ed it up? Because I started the job o had to move on and took a long crowbar and eat a popeye spinach and made my self very angry. Around the edges, especially in the back corners the topdeck was very hard to loosen but I did it. I had to relax for couple minutes because all my energy was gone.
Arghh all was so wet, almost unbelievable.
After cleaning the most I let it dry for couple days.
You can see on the picture above there are 2 slots. These slots contained 2 support beams that were completely gone. Unfortunately the support beams went all the way to the bow. I pressed on the polyester on the pulpit area and it felt good so I decided to leave that. With a screwdriver I scratched most wet wood out as far i could reach.
The products I gonna use are epoxy and cotton fiber filler and cotton mats.
The cottonfiber you add in the epoxy and makes the epoxy thicker and make it better attach.
I made 2 new hard wooden support beams. In the slots I poured the epoxymix and put the beams in.
From inside the boat i taped every hole and then from above I put a thin layer epoxy to make the holes “waterproof’. In the next fase when we glue new layers the epoxy won’t leak true that holes and mess up the anchor compartment.
All saw sides I scratched as far as I could reach as many wet wood out. The epoxymix I used for the beams I added some more cottonfiber to make the mix even thicker. This mix I use in the spaces around the saw sides.
On the picture above it’s a little hard to see but on the left and right side there was an wooden part that I couldn’t remove and that part was good. So problem was now that we face different thickness to fill. For now I let dry this for 2 days because want the support beams to hard good.
Meanwhile at home I use a grinder with sandpaper to remove all wood from the back of the topdeck.
On the right side on the picture above you see a missing part. That happened with my Popeye action. That part was not rotten and tore apart.
As mentioned before we faced different thickness to fill. At my local polyester shop they have pvc matts. Very nice material and whenever in the future there will come water from the windless it won’t rot. Problem is that the thinnest thickness is 1cm. The balsa wood that was used originally was 2 cm thick. Because we use a couple layers of epoxy mix I chooses for the pvc matt with a thickness of 1.5cm. For the thinner parts I use multiplex wood 0.7cm thick.
As you can see on picture above the pvc matt is build up with small pieces. The deck is curved so it will fits perfectly (I hope lol).
I cut everything in perfect shape (wood and the pvc).
It’s time to make a new epoxy mix with cottonfiber. I want a thick mix but not to thick, it has to flow. A bit like yogurt. With a wide putty knife my wife ( I don’t see 3D) spread out the epoxy mix and we lay the wood and pvc on their place. Now Squeeze a bit so that the epoxy mix is coming out a bit on the sides. Not to much because you don’t want the epoxy mix pressed out. Also important is that you level everything as good as possible.