Flushing Raw water system with Rydlyme Cat 3116 99 400 Sundancer

peterkvs

Active Member
Nov 11, 2012
511
Guntersville, Alabama
Boat Info
400 Sundancer 1999
Engines
3116 Cats, 1000 hours
After I purchased my 1999 400 Sundancer I decided to do ALL the maintenance tasks for the boat in order to establish a maintenance baseline. One day while replacing a leaking hose on the transmission cooler I noticed that the cooler was 30% blocked, or more, and that the zinc had broken off and was a flower in the cooler. So I decided that I should flush the raw water system of both engines. After some research I decided to use Rydlyme. It had good reviews and was environmentally friendly and so easy to dispose of. It turns out this was a pretty easy DIY project and the results were excellent. I bought 5 gallons of Rydlyme and had it shipped to my office for about $125. I decided build a circulation system with a sump pump (from Harbor Fright) and hoses and flush the solution into the fuel cooler (which is the first thing after the strainer), and through the water pump, heat exchanger and transmission cooler. I started with the starboard engine and then plumbed from the output of the transmission cooler to the input of the fuel cooler on the port engine. I exited the transmission cooler and ran a hose up into the bucket with the sump pump. To run the solution this way, you must remove the water pump impellers, and if the zincs are good you need to remove them as well.

I closed the raw water intake valves for the engines ( I always put a note on the keys to remind me to open them) and removed the hoses from the fuel cooler input and transmission cooler output and measured the coupling. Then took off for Lowes to find suitable fittings to adapt to the sump pump.

After a bit of searching and thinking I built these two adapters to connect to the engines.

The first one connects to the fuel cooler and provides a 1.5” barb fitting to connect the hose to the engines.
Photo Jan 21, 2 44 06 PM.jpg

And this one connects to the output of the transmission cooler.
Photo Jan 23, 6 47 59 PM.jpg

Then I made a few more measurements and built some hoses using cheap sump pump drain hose. The hose was a bit of a pain to work with and leaked badly on the barbed fittings until I realized you could wrap some 6” pieces of hose around the hose and barb which would cushion the hose clamp and allow the pressure to distribute and seal the hose to the barb.

Hose from Sump Pump to Engine
Photo Jan 24, 9 22 59 AM.jpg

Hose from Starboard Engine to Port Engine
Photo Jan 24, 9 22 08 AM.jpg

Drain from port engine to bucket
Photo Jan 24, 9 22 40 AM.jpg

Picture of system installed
Photo Jan 23, 6 49 47 PM.jpg

That cheap flat hose likes to kink too, so you have to put some thought into how to run it so it doesn’t make any sharp bends. It also stretches like crazy, and I was afraid it would burst, but it did not. The solution really foams up the first hour or so and therefore I put the 5 gallon bucket in a large pail in case it overflowed.
Photo Jan 23, 6 46 45 PM.jpg

I ran fresh water through the system first in order to find and fix any leaks, which I did. Then I drained as much of the water as possible, poured the rydlyme into the 5 gallon pail, started the pump and kept topping up the bucket with a hose until I had a nice circulation going on. All the foam was from the rydlyme reacting with all the marine growth in the raw water system. I let it run for 4 hours. After about 2 hours the foaming went away and the solution just kept circulating. I suspect when the foaming subsided that most of the deposits were gone, but I just kept flushing to make sure.
Photo Jan 23, 7 23 28 PM.jpg

After four hours I stopped the system and reclaimed and saved as much of the rydlyme solution as possible so that I would have it to service the Gen Set and AC systems in the future. I put lots of water into the buckets and frequently changed it while circulating until it was basically clear water.

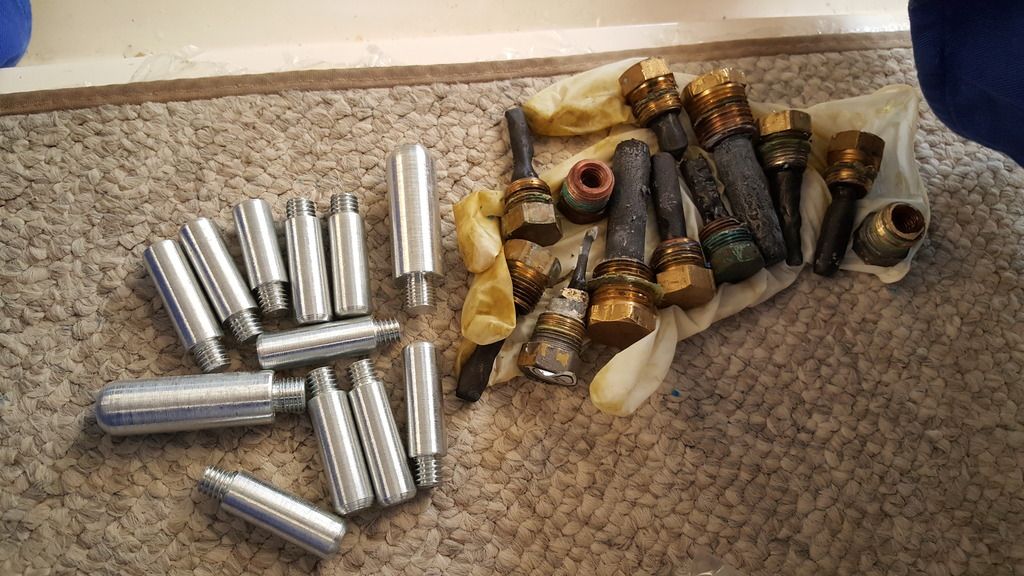
Then I replaced the impellers, installed new zincs, put the hoses back, opened the seacocks, bled the strainers, started the engines and checked for good flow and leaks. Upon inspection of the heat exchangers they were sparkling like new. Also, the operating temps came down about 10 degrees. I hope this helps anyone else that has the do it yourself curse like I do.

Cheers and good luck,

Pete
 
Pete, You are the 'FLUSHER" man of the hour. Great post and i thank you so much.
I was having a hard time seeing the output transmission cooler area in my mind. I am
1100 miles from my boat right now but getting ready for our late summer vacation. This helps alot. Thanks, JC
 
Great job, Pete. Thanks for sharing.
 
Pete, What size hose comes out of the Transmission cooler? I hate to ask but could you give the sizes and parts you used? Thanks, JC
 
Last edited:
JC, I don't have the written down size anymore, but I recall it was 1.75". I can tell you that the rubber coupling I bought that fit snuggly to the transmission cooler was made to join 1-1/4" PVC pipe which has an actual OD of 1.66". <br>
<br>
I fabricated the Transmission cooler adapter from a 1-1/4" x 1-1/4" rubber adapter, a short piece of 1-1/4" PVC pipe, a 1-1/4" x 1-1/2" PVC bushing, a 1-1/2" Female Pipe x 1-1/2" Female NPT fitting and a 1-1/2" NPT barbed fitting. I think the hose was 1-1/4" hose, though I may have said 1-1/2" earlier. <br>
<br>
Photo Jan 24, 9 22 15 AM.jpg<br>
<br>
I fabricated the fuel cooler adapter with a 1-1/2" x 2" rubber adapter, a 2" x 2" Street Elbow, a 2" pipe to 1-1/2" Female NPT bushing and the 1-1/2" Male hose barb for 1-1/4" hose.<br>
<br>
Photo Jan 24, 9 22 12 AM.jpg<br>
<br>
If I have to do it again I would make or buy some 90 degree and 45 degree hose barb to hose barb fittings that I could put in the hose where it was always trying to kink. Or you can go Cadillac style and purchase good rubber hose for $5 a foot, though none of the hose I could find was flexible at all. Hope this helps.<br>
<br>
Pete
 
Pete, I can not thank you enough. This will help alot! Thanks again, JC
 
After I purchased my 1999 400 Sundancer I decided to do ALL the maintenance tasks for the boat in order to establish a maintenance baseline. One day while replacing a leaking hose on the transmission cooler I noticed that the cooler was 30% blocked, or more, and that the zinc had broken off and was a flower in the cooler. So I decided that I should flush the raw water system of both engines. After some research I decided to use Rydlyme. It had good reviews and was environmentally friendly and so easy to dispose of. It turns out this was a pretty easy DIY project and the results were excellent. I bought 5 gallons of Rydlyme and had it shipped to my office for about $125. I decided build a circulation system with a sump pump (from Harbor Fright) and hoses and flush the solution into the fuel cooler (which is the first thing after the strainer), and through the water pump, heat exchanger and transmission cooler. I started with the starboard engine and then plumbed from the output of the transmission cooler to the input of the fuel cooler on the port engine. I exited the transmission cooler and ran a hose up into the bucket with the sump pump. To run the solution this way, you must remove the water pump impellers, and if the zincs are good you need to remove them as well.

I closed the raw water intake valves for the engines ( I always put a note on the keys to remind me to open them) and removed the hoses from the fuel cooler input and transmission cooler output and measured the coupling. Then took off for Lowes to find suitable fittings to adapt to the sump pump.

After a bit of searching and thinking I built these two adapters to connect to the engines.

The first one connects to the fuel cooler and provides a 1.5” barb fitting to connect the hose to the engines.
View attachment 30812

And this one connects to the output of the transmission cooler.
View attachment 30813

Then I made a few more measurements and built some hoses using cheap sump pump drain hose. The hose was a bit of a pain to work with and leaked badly on the barbed fittings until I realized you could wrap some 6” pieces of hose around the hose and barb which would cushion the hose clamp and allow the pressure to distribute and seal the hose to the barb.

Hose from Sump Pump to Engine
View attachment 30814

Hose from Starboard Engine to Port Engine
View attachment 30815

Drain from port engine to bucket
View attachment 30816

Picture of system installed
View attachment 30817

That cheap flat hose likes to kink too, so you have to put some thought into how to run it so it doesn’t make any sharp bends. It also stretches like crazy, and I was afraid it would burst, but it did not. The solution really foams up the first hour or so and therefore I put the 5 gallon bucket in a large pail in case it overflowed.
View attachment 30818

I ran fresh water through the system first in order to find and fix any leaks, which I did. Then I drained as much of the water as possible, poured the rydlyme into the 5 gallon pail, started the pump and kept topping up the bucket with a hose until I had a nice circulation going on. All the foam was from the rydlyme reacting with all the marine growth in the raw water system. I let it run for 4 hours. After about 2 hours the foaming went away and the solution just kept circulating. I suspect when the foaming subsided that most of the deposits were gone, but I just kept flushing to make sure.
View attachment 30819

After four hours I stopped the system and reclaimed and saved as much of the rydlyme solution as possible so that I would have it to service the Gen Set and AC systems in the future. I put lots of water into the buckets and frequently changed it while circulating until it was basically clear water.

Then I replaced the impellers, installed new zincs, put the hoses back, opened the seacocks, bled the strainers, started the engines and checked for good flow and leaks. Upon inspection of the heat exchangers they were sparkling like new. Also, the operating temps came down about 10 degrees. I hope this helps anyone else that has the do it yourself curse like I do.

Cheers and good luck,

Pete

Great write up Pete and thanks for sharing with pics.

In this year's maintenance I'd like to clean/flush/acid wash the coolers and exchangers of my Yanmars as they are 272 hours at the moment but 9 years old.

I was contemplating to do this by uninstalling and bringing them home until I saw your thread and have a few questions if you can answer.

I replaced my 1500gph Rule bilge pump and the old one is a working spare, so is it suitable for this task ?

I see that you used soft-flexible hoses, should I use wired clear hose as used for genny/AC water intake which I can found easily locally ?

How about the O-rings/seals of the coolers/exchangers ? Did you need to replace them ?

Thanks.
 
Peter I hope you read this or I'm gonna send you a pm for how much I can't thank enough to you.

Your flushing system gave me huge inspiration and I did the same as yours except different sump pump, hoses and connections/fittings and did both engines simultaneously.

I was seeing recently 50 psi oil pressure of engines at hot idle instead of 17,5 and 70-80 psi on plane at 3000 rpm, also running hot 85-90 C degrees of coolant temp.

[video]https://youtu.be/UQ557Muc2vQ[/video]
[video]https://youtu.be/HCINcSbOVQI[/video]

I didn't remove the impellers but bypassed the sea water pump and my first cooler is return diesel cooler which is after the sea water pump then aftercooler then oil cooler then transmission cooler then heat exchanger and finally to the exhaust elbow.

I connected wired clear hose to the output fitting of the sump pump and end of the hose to the inlet hose of port engine's return diesel cooler hose and an other hose from the output flange of heat exchanger to the return diesel cooler of starboard engine and a third hose from starboard HX to a 60liter drum where the sump pump is.

I poured 19 liters of descaler and 41 liters of water. Then started the pump and waited the solution to return and added some water to fully fill the return hose. But, a positive but, the returning amount of solution started to decrease even the desclaler was doing its job foaming and turning to a brown residue. So the blocked parts of coolers were opening/cleaning and filling with solution. Until the solution level in the drum was remaining same I added water to the system. In a half hour foaming ended then I pumped out the solution and circulated the engines with fully fresh water.

But did the flushing again and put 20 liters of descaler in case there were some blocked cooler cores and there was brown foam coming again but not as much as the first round and did add less amount of additional water to the drum.

After the flushing oil pressure decreased to normal level 17,5 psi at hot idle and 50 at cruise, also coolant temp stayed at 70-80C even at wot.

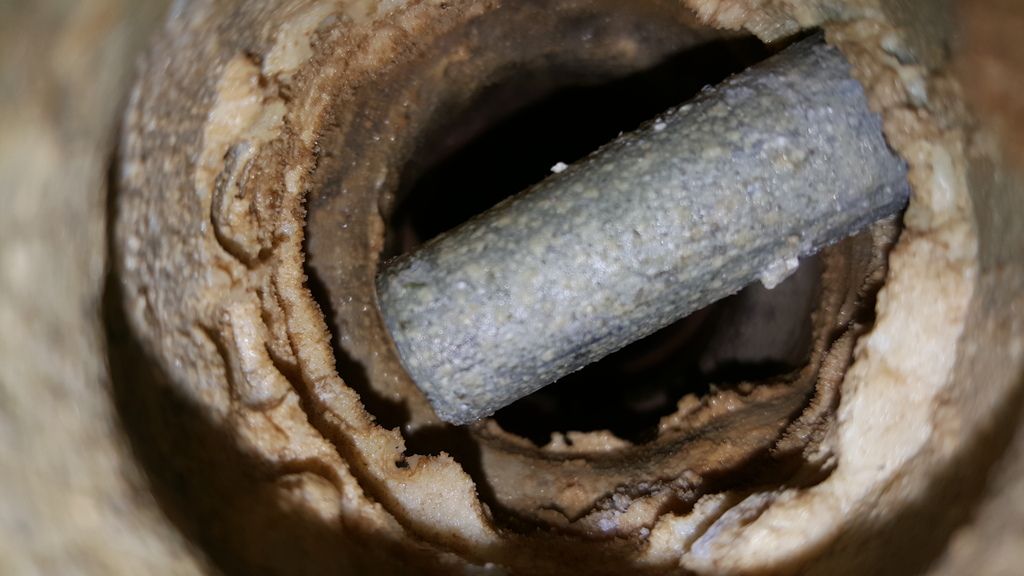
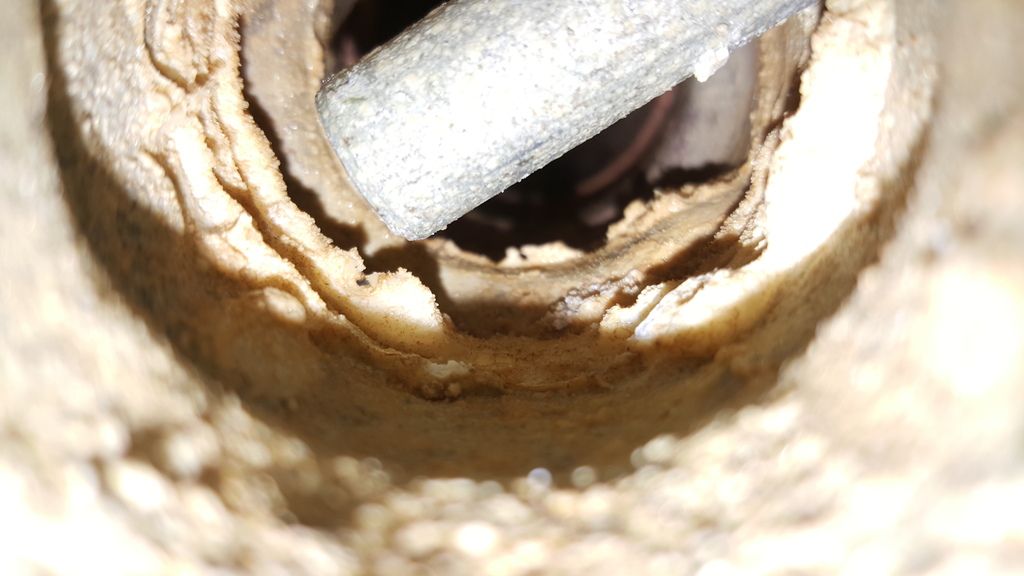
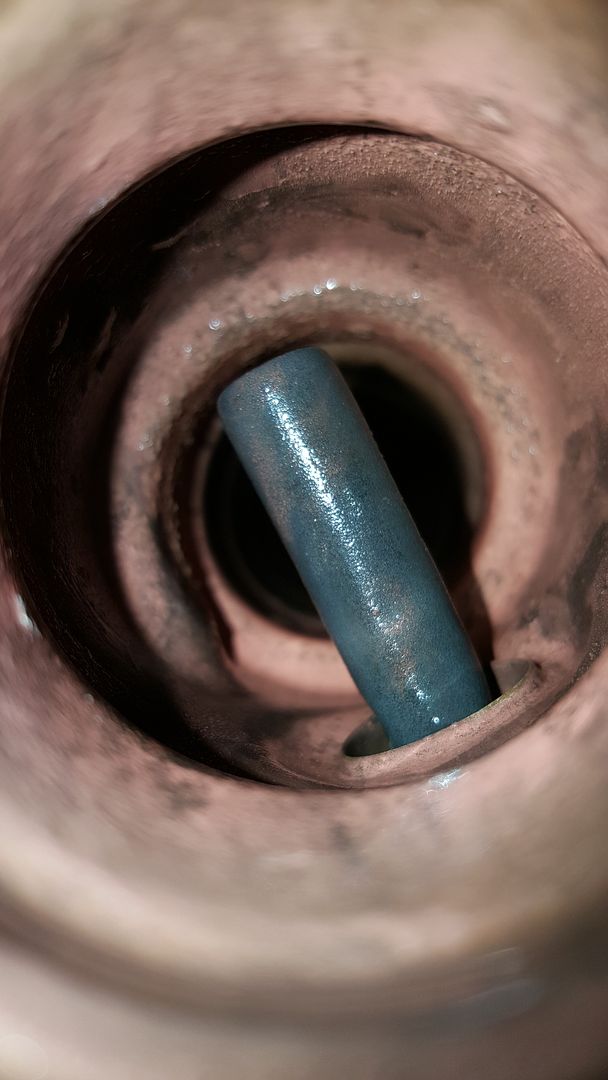
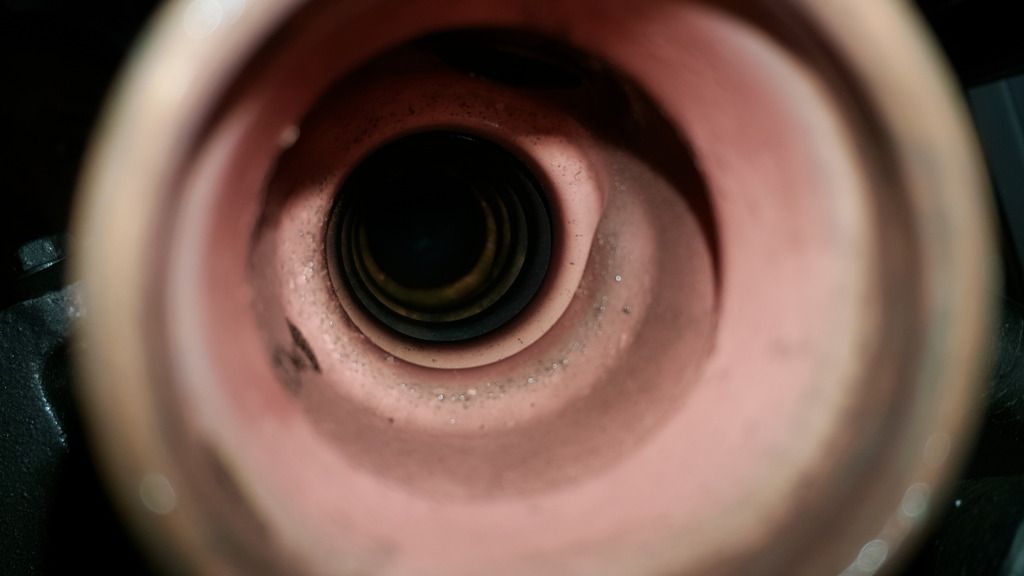
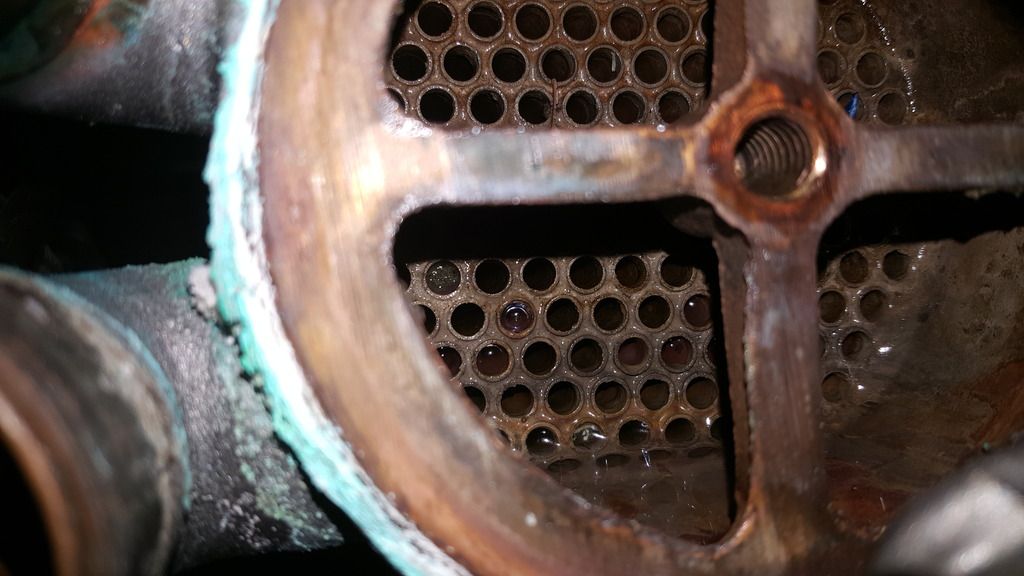
This photos are inside of before and after of return diesel coolers and note that they are vertically mounted and there don't remain totally with sea water like the other coolers mounted horizontally.


After of starboard oil cooler


After all I replaced the zincs with new ones.


Now all systmes are working like a brand new engine.

Once again great thanks.
 
That looks great...What do you guys do with the waste? What is the best way to discard it?

Thanks, I put the return hose in an other drum placed on the swim platform and then my marina's waste disposal stuff took it to their recycling place.
 
I bought 5 gallons of Rydlyme and had it shipped to my office for about $125. I decided build a circulation system with a sump pump (from Harbor Fright) and hoses and flush the solution into the fuel cooler (which is the first thing after the strainer), and through the water pump, heat exchanger and transmission cooler. I started with the starboard engine and then plumbed from the output of the transmission cooler to the input of the fuel cooler on the port engine. I exited the transmission cooler and ran a hose up into the bucket with the sump pump. To run the solution this way, you must remove the water pump impellers, and if the zincs are good you need to remove them as well.

Pete
This is an old thread, but I just found it and am intending to do the same to my Cat 3116s this weekend.

I have the pump and various hoses and fittings, hoping I got the right sizes. Question about the order you went, from the installed picture, it looks like you went to the Port engine first, then over to Starboard. Your description says the opposite though. Another video I found on YouTube from a marine tech doing basically the same thing, says to run the flow in reverse of the normal flow, so it seems like going from Starboard to Port then back to the bucket is the right way to go.

I think I know where to tap into the lines ahead of the water pumps, I just need to figure out where to tap in after the transmission cooler...

Kevin
 

Forum statistics

Threads
113,120
Messages
1,426,613
Members
61,037
Latest member
wojozobl
Back
Top