zool
Well-Known Member
- Oct 16, 2021
- 495
- Boat Info
- 1992 Sea Ray 330 Sundancer, twin 7.4 BWM Mercruiser/Vdrive
1991 Sea Ray 170BR, 3.0 MercruiserAlpha
- Engines
- twin Mercruiser 7.4 V-Drive
I took delivery of this rig last month and am just starting to address the some issues and deferred maintenance. I like to document my rebuilds and figured this was the best place to find intimate knowledge of what i'm working on. Ill post what i'm planning, along with methods and materials used.
I bought this well under market value knowing i need to do some significant upgrades, however, mechanically, it has been recently updated. I did an extensive structural inspection and it passed my requirements, at least as far as I had access to, which was plenty of alone time to climb around underneath and inspect the glass laminations, moisture testing, and the usual visual inspection.
Over the past 2 years, the previous owner (friend of a friend) did the following:
Whats new:
New starboard long block, new heads on the port side, along with new carbs, risers and manifolds on both, new props and dripless seals. New windlass, new stereo and speakers, new cabin fridge and new cockpit fridge.
Known broken items:
Water heater
search light
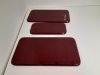
upholstery repairs
typical cabin leaks
lighting fixtures
stove removed.
gel repairs
some hardware replacement
Upgrades planned:
Electronics
Dash renovation
Cabinet refacing
Carpet removal and wood floors added, new carpet on vertical areas.
Upholstery upgrade inside and out.
Whatever else occurs to me to make it all pretty.
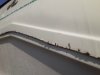
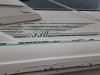
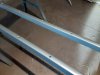
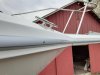
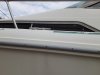
This is her as received.


The exterior needs a serious bath, the interior is relatively clean.
I bought this well under market value knowing i need to do some significant upgrades, however, mechanically, it has been recently updated. I did an extensive structural inspection and it passed my requirements, at least as far as I had access to, which was plenty of alone time to climb around underneath and inspect the glass laminations, moisture testing, and the usual visual inspection.
Over the past 2 years, the previous owner (friend of a friend) did the following:
Whats new:
New starboard long block, new heads on the port side, along with new carbs, risers and manifolds on both, new props and dripless seals. New windlass, new stereo and speakers, new cabin fridge and new cockpit fridge.
Known broken items:
Water heater
search light
upholstery repairs
typical cabin leaks
lighting fixtures
stove removed.
gel repairs
some hardware replacement
Upgrades planned:
Electronics
Dash renovation
Cabinet refacing
Carpet removal and wood floors added, new carpet on vertical areas.
Upholstery upgrade inside and out.
Whatever else occurs to me to make it all pretty.
This is her as received.
The exterior needs a serious bath, the interior is relatively clean.