New 1984 225SRV

Not sure if your deck would have to come off or not. It depends on how far forward you have moisture. You probably won't know until you remove the motor and start taking stuff out and poking around.
I know the guys doing the work will want plenty of room to maneuver around in there. They won't be happy in tight quarters.

I did the same thing you will be doing. I was uncomfortable plunging into this deal without any experience behind me so I hired a very experienced guy to do the work. Now, after watching and helping some, I feel comfortable enough that I could do it myself.

One word of advice, pick one of your shops where you don't mind a heavy coat of fiberglass dust on everything. This is a messy job with lots of grinding involved. Your shop will be completely coated with a thick layer of white nasty dust. Also, get those vacuum bags that go inside of your shop vac. I've filled 5 of them with fiberglass dust and sawdust over the life of this project. If you can, even run the vacuum (or put an air filter) in the area where they are grinding away. It will at least collect some of the dust while they are working.
I sand on cars in both of the shops from time to time so the thin layer of debris will just fit right in!:grin:

I found someone that I'm going to use, I've seen his work, he's actually done fiberglass on several previous boats. He agreed to a flat fee plus materials. Soooooo, looks like we're gonna keep the ol' gal and do her right. I really like the lines of this boat and have ALWAYS wanted one just like it so what the heck. I'll be pulling the engine and drive next week. He's going to start next Saturday on the transom. I'll take some pics of the teardown.

I'm excited about this now...
 
So I'm now officially digging into Quaisy.

Today I removed the out-drive and to my surprise, the inside of the drive looks good. The U-joints are brand new and the lube appears to be very, very clean. I may just have a local mechanic do the impeller and pressure test it. I'll be putting new lift arms and hydraulic hoses on it as well as all new rubber (bellows, boots, etc) and mounting hardware. Many of the fasteners are pretty corroded and thus holding fast to their respective parts. Lot's of penetrating oil...

I have the engine completely un-hooked and unbolted from the boat. Tomorrow it will come out along with the rest of the transom assembly. Then I can remove everything else and take the boat to the fiberglass shop for the transom work.

Here's a pic of today's results-
IMAG0003.jpg
 
YIKES! What a nasty sludge and filth laden place a bilge is!!! Got the motor out today and will remove the rest of the transom assembly/exhaust/wiring etc tomorrow. Ill be dropping the boat off later tomorrow afternoon for the wood work.

What's the gray bilge paint I see everyone using? I'm going to put that stuff in the entire engine/accessory room.

Here's a pic of the engine area with the engine out-
IMAG0006.jpg


Here's one of the old engine- What a mess!
IMAG0005.jpg
 
270,
I used Interlux Interprotect 2000 barrier coat. It will seal up your fresh glass nicely and make the bilge completely water proof and sealed.

My glass guy recommended barrier coating all of the fresh internal glass. I called Jay at Interlux and he supported what my glass guy said. They were right, the stuff dries like concrete and no water will penetrate into the new glass.
 
Thanks! That's exactly what I'm going to do too, then. Did you use any kind of sealant for the screws/bolts that penetrate the glass in the bilge area? I'm going to smooth the transition in the back of the bilge to the drain plug hole to help prevent water from sitting there even after the plug is out.

I'd also like to put a pump as far back as possible...but I'm concerned that going too far back will make replacing it impossible.

I used to keep a shop-vac on our cruiser to vacuum the last bit of water out of the bilge.

I like a DRY bilge...:grin:
 
I sealed any screw that was down far enough that water could get to it with the West Systems 105/205. If you get the book at West Marine ($6), it tells you how to do it properly. Any hole that went through the transom was drilled over-sized, then sealed with 105/205. Then I used 5200 to seal the bolt into the coated hole.

I had a lot of screws holding down tanks and pumps that are high enough that I did not bother sealing. They are up on supports that should never see water (if they see water, I'll have bigger problems then a wet screw:smt100).

I also have my bilge pump in front of the engine for easy access. My boat is a "trailer queen" so I can pull the plug and let the little bit left in the bilge drain out. The base of my bilge pump is epoxied to the bottom of the boat. That 105/205 stuff works great for just about everything!

Also, I did something different with my stringers and side supports. They are vented. I did not put the foam back in the stringers. I left them hollow and drilled a vent hole in the top and drain holes in the ends. Before we finished assembling the stringers, I painted the inside of them with the barrier coat so if water does get in there, it won't seep into the glass. I purchased those dock box vents from West marine and installed them in the top of the stringers. No more enclosed wet wood!

Also, everything down there has a nice big radius and slope toward the bilge. Everything was blended and ground down nicely. No more standing water anywhere.

 
Last edited:
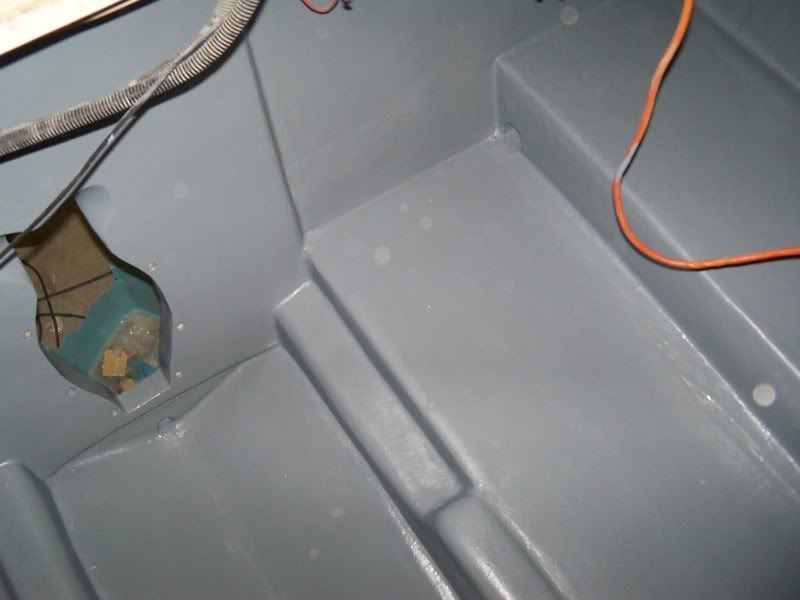
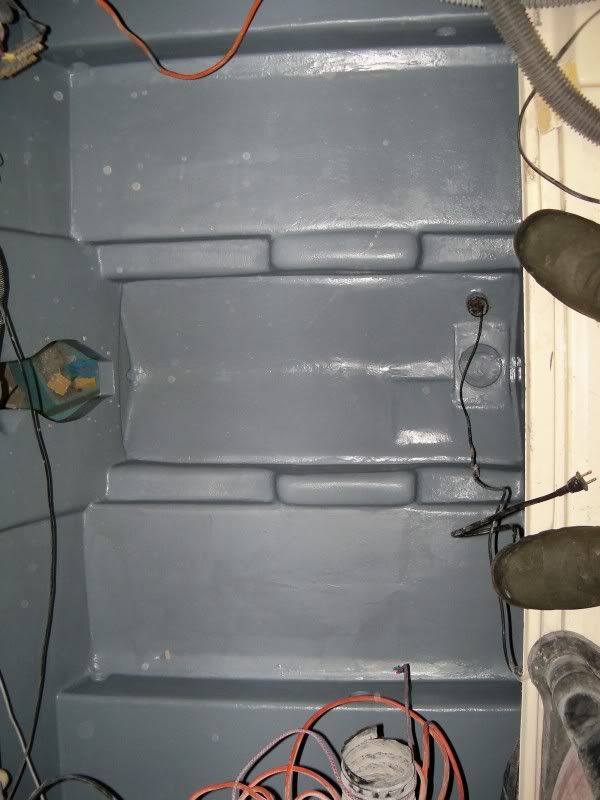
Here's a couple pics of the finished engine room (sorry for the water spots on my camera lens):

100_1435.jpg


100_1437.jpg


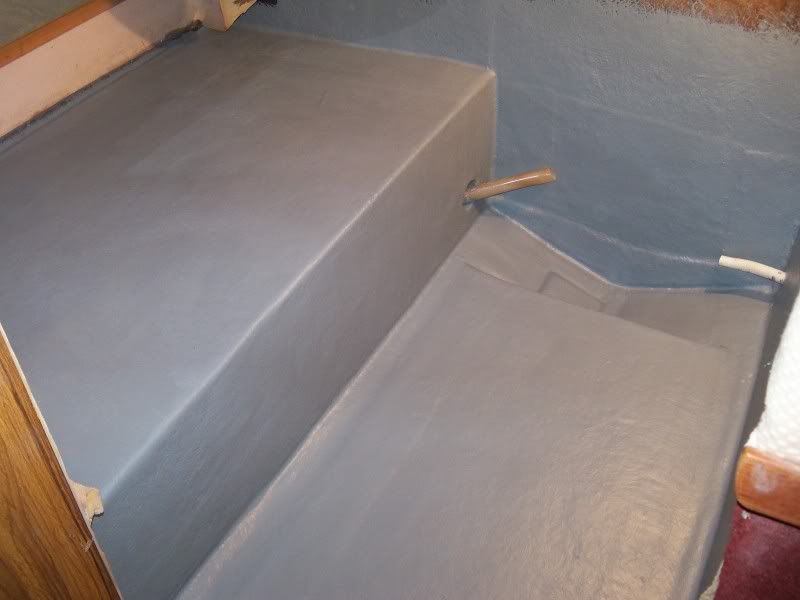
Here is a pic of the finished aft cabin.

100_1269.jpg
 
yeah, i want that foam junk out of my boat too. I found a lot more rot once i pulled the wiring, blower motor, trim pump motor and transom plate...it looked pretty bad to me, the glass guy said it was actually a pretty easy job from what he could see. we both think it might have gotten into the stringers to some extent on the sides where the foam is. If all that has to come out too then we'll do them exactly like what you did. He was highly impressed. Thanks for the pics. I now hope he does have to get into the stringers so that we can just do this all right one time and be done with it.

While it's at his shop we're going to make the hatches for the coolers and the anchor locker. I'm also going to put some Dyna-Mat onto the bottom and sides of the cooler to help with insulation from the engine heat...maybe it'll keep ice better.

I think I'm also going to put sealant into every single screw hole in the whole dang engine compartment...overkill? yeah maybe, but I want to keep this boat for a long long time so might as well make it better than new as I do each step.

I am only waiting to hear for sure from the glass guy that the entire boat isn't rotten before I order an engine. I'm still skeptical until he tells me he's seen first hand that it's not going to cost more than it's worth to do it.

Thanks again for the input and pics!!!
 
Last edited:
Looks like it's not as bad as I suspected...although the entire transom is going to be replaced, it only got about 6" up into the stringers so we're going ahead full steam on the restoration.

I'm planing to order the engine this week and I've already begun stripping the old motor down to use the tin and the intake. Anyone know of a good reason why I should go back with the thunderbolt ignition vs. buying a quality HEI setup?

My outdrive is going out to be completely inspected to make sure it's in good mechanical shape. I toyed with getting a new one from SE but decided that if this one is good I'll run it till it breaks.

I'm also ordering my "King Starboard" to rebuild my cooler door lids and anchor locker hatch. I also have to measure the hatch to order a new clear hatch, the original one is de-laminating and the ply is rotten around the edges.

Pics to come...
 
270win,

make sure to use the original "lids" as a template when you cut the new one's out of Starboard. They are not perfectly rectangular... Also, make sure you know where the Teak Trim came from, and put them in the same configuration. I didn't, and it took me a while to get it right so the hatches closed properly.
 
I had a1981 225 for 18 years 2 motors 3 out drives 4000 hours . Bought boat in 91 for $4000. sold in 07 3500. plus 12000 parts. Check out blocks under motor mounts not real wood like fiber board your boat has gell coated bilge very rare for searays 5200 all screw holes and just clean it up it will look like new. Check for fuel tank leakes tords back of tank on bottom they used rubber strips under tank.
 
Im trying to decide if I want to use the wood trim or not. I was thinking about having a set of snap on cushions made for the doors. With the railing that seems like a good place to hold on for slow cruising around while seated on top off the cooler lids. (with feet on the seats)
 
I had a1981 225 for 18 years 2 motors 3 out drives 4000 hours . Bought boat in 91 for $4000. sold in 07 3500. plus 12000 parts. Check out blocks under motor mounts not real wood like fiber board your boat has gell coated bilge very rare for searays 5200 all screw holes and just clean it up it will look like new. Check for fuel tank leakes tords back of tank on bottom they used rubber strips under tank.
Sorry, I apparently missed your post.
I plan to seal everything. I'll check those blocks as well. I like the gelcoat in the bilge area, but it's all getting a topcoat on Interlux once it's finally finished and ready for assembly.
 
I finally disassembled the old engine for the most part. There was A LOT of water in the oil pan. There's very little that's usable on this thing. The intake, brackets, flywheel/bellhousing, the engine coupler, pulleys and all the tin covers.
I'm thinking through carburetors, I like the way a Q-Jet runs when they're right...open to opinions though.

Glass guy says he'll be done next week. It's going to have a thicker transom this time.
 
You are moving along rather quickly. Can't wait to see how the glass work turned out.

Sounds like the motor is toast. Must have some internal cracks.

I'm with you on the Q-jets. I always liked them. Besides the Holly upgrades are rather pricey. We just put a carb kit in mine and she purrs like a kitten. My boat mainly trolls salmon/walleyes so I need a good idle more than I need anything else.
 
We ride around most of the time, usually below 2500 rpms. I think the Q-jets are more fuel efficient than the holley style carbs.

The engine has cracks below the deck on both sides that are about 4 inches long. I'm sure that when I pull the intake there will be cracks in the lifter valley.
 
Check out the carnage...and this was obviously a very low time and nice engine before it was damaged due to not being winterized. What a waste!

Check out the crack right below the deck
IMAG0064.jpg


Here's the other side, the freeze plug is also pushed out partially.
IMAG0063.jpg


Check out the lifter valley, the pics are of each side of the motor, the #1 and #2 cylinders are where the cracks occurred.
IMAG0066.jpg

IMAG0065.jpg


Look how good the starboard side looked...
IMAG0067.jpg


The port side is really bad, but the worst damage is just from sitting full of water.
IMAG0068.jpg


Number 7 is where the most water sat apparently.
IMAG0069.jpg


The crank journals look really good too.
IMAG0071.jpg


Don't know if this pic will show it well or not, but the rods and undersides of the pistons are brand new looking too...except for the water damage/rust.
IMAG0062.jpg


If this guy had pulled the engine, disassembled it and only replaced the busted block, he would have had a GREAT engine again.
 
I hate to see those castings ruined like they are. Too bad. Just 15 minutes worth of winterizing would have saved that motor.
 
I hate to see those castings ruined like they are. Too bad. Just 15 minutes worth of winterizing would have saved that motor.
you're right...but, he probably wouldn't have sold the boat to me for so cheap either. :grin:
 
Good point:thumbsup:.
 

Forum statistics

Threads
113,151
Messages
1,427,316
Members
61,060
Latest member
Danileo
Back
Top