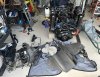
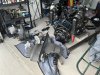
Can't be better than that! Just make sure that bonding strap is tied, the anode is installed, and the galvanic protection system is working. Just one scratch/scrape through that paint....View attachment 139577 View attachment 139578 View attachment 139579
I have come to a few conclusions:
This paint all sucks when brushed. I figured it will be gloppy no matter what so I decided not to bother with filler. It’s a 16 year old saltwater bravo 3. Send it!
I’ll be adding another coat of vivid yellow followed by 2 coats of black trilux once it’s hung on the boat.
My main concern is corrosion control. I’ll hide it underwater for long periods so aesthetically it doesn’t matter. If this doesn’t correct my galvanic reaction Neptune can have it
Navigation
Install the app
How to install the app on iOS
Follow along with the video below to see how to install our site as a web app on your home screen.

Note: This feature currently requires accessing the site using the built-in Safari browser.
More options
You are using an out of date browser. It may not display this or other websites correctly.
You should upgrade or use an alternative browser.
You should upgrade or use an alternative browser.
The official "Stray Current II" thread. '07 260DA
- Thread starter Stray Current
- Start date

Stray Current
Well-Known Member
- Oct 27, 2019
- 1,907
- Boat Info
- 2007 260DA
- Engines
- ‘07 6.2 Horizon MPI / ‘24 SeaCore Bravo III - ‘07
Kohler 5ECD
Can't be better than that! Just make sure that bonding strap is tied, the anode is installed, and the galvanic protection system is working. Just one scratch/scrape through that paint....
I went through the whole bonding system with my meters and also verified the isolator and mercathode system. All good.
I’m reasonably certain that it had the wrong type of paint at one time.
I will be making sure to grind the paint off the bonding collar on the upper port side stud location.
Stray Current
Well-Known Member
- Oct 27, 2019
- 1,907
- Boat Info
- 2007 260DA
- Engines
- ‘07 6.2 Horizon MPI / ‘24 SeaCore Bravo III - ‘07
Kohler 5ECD
First coat of Trilux! 1 more to go before it goes back on the boat and the transom assembly gets touched up! No regrets skipping the filler. Paint is mostly leveling it up enough. Who cares?
The swag has all been collected!
Nater Potater
Well-Known Member
- Oct 19, 2020
- 2,643
- Boat Info
- 1992 300DA Sundancer
- Engines
- Twin Merc Alpha I Gen II I/O's with 5.7 V8's
I spent way too much time on mine when it would have been better utilized on the mechanical aspects of the boat. Now the rest of the boat looks even rougher compared to the outdrives! I guess hull detailing comes next...View attachment 139889
No regrets skipping the filler. Paint is mostly leveling it up enough. Who cares?
techmitch
Well-Known Member
- May 1, 2008
- 8,325
- Boat Info
- 1999 270 DA
- Engines
- Twin 4.3s W/Alpa I Gen II's
Sorry for your trouble's man, but you gotta come clean.
Stray Current
Well-Known Member
- Oct 27, 2019
- 1,907
- Boat Info
- 2007 260DA
- Engines
- ‘07 6.2 Horizon MPI / ‘24 SeaCore Bravo III - ‘07
Kohler 5ECD
Sorry for your trouble's man, but you gotta come clean.
Man you’re quick, I nuked that because the pics didn’t attach
I’ll fix it in a bit
Stray Current
Well-Known Member
- Oct 27, 2019
- 1,907
- Boat Info
- 2007 260DA
- Engines
- ‘07 6.2 Horizon MPI / ‘24 SeaCore Bravo III - ‘07
Kohler 5ECD
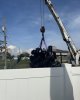
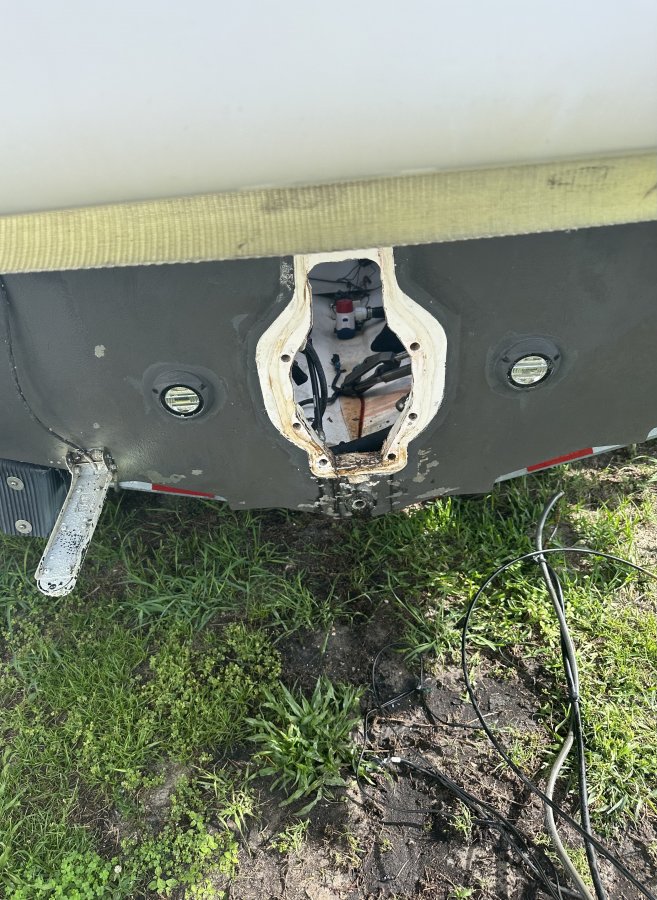
Well that was a whole lot of fun! The transom assembly seal must have dried out and shrunk in the 7 month layup post Ian.
The surveyor says the transom core is good so I gave it 2 weeks to dry out under a flood lamp and went ahead and reglassed and built up the edge of the cutout. The original hole was cut a bit too big and the seal was on the edge to begin with.
Back in the water and bone dry again!


The surveyor says the transom core is good so I gave it 2 weeks to dry out under a flood lamp and went ahead and reglassed and built up the edge of the cutout. The original hole was cut a bit too big and the seal was on the edge to begin with.
Back in the water and bone dry again!
Attachments

Nater Potater
Well-Known Member
- Oct 19, 2020
- 2,643
- Boat Info
- 1992 300DA Sundancer
- Engines
- Twin Merc Alpha I Gen II I/O's with 5.7 V8's
Boy, someone did a real "nice job" of cutting out the original opening. What, they couldn't afford the cardboard template? 'Glad to see you're able to bring it back.
Stray Current
Well-Known Member
- Oct 27, 2019
- 1,907
- Boat Info
- 2007 260DA
- Engines
- ‘07 6.2 Horizon MPI / ‘24 SeaCore Bravo III - ‘07
Kohler 5ECD
Boy, someone did a real "nice job" of cutting out the original opening. What, they couldn't afford the cardboard template? 'Glad to see you're able to bring it back.
i’m honestly not all that surprised with how sloppy the cuts along the bond flange were. It kind of looked like whoever cut the hole held the sawzall on an angle, and then just painted some gelcoat over the raw wood.
my neighbor gave me a hand and we built the edge up about a half inch all the way around with fiberglass, totally encapsulating the wood. Then it got a little white gelcoat and sanded smooth.
The assembly has a nice fit in the hole now, and the seal is completely engaged to the transom
I kinda wish I had taken more pictures of the finished product, but I was on a tight timeline to get the boat off the property
Stray Current
Well-Known Member
- Oct 27, 2019
- 1,907
- Boat Info
- 2007 260DA
- Engines
- ‘07 6.2 Horizon MPI / ‘24 SeaCore Bravo III - ‘07
Kohler 5ECD
Well, I guess I’ve been so busy with life, work, moving, and trolling the bikini thread that I haven’t really updated this.
I sold the house I bought in May just after reinstalling the engine and happy to be back free and clear in a rental. Especially since the rental has a dock! It’s not an ideal setup but it works. Due to the ridiculous local codes I now have to pay to store my trailer as well as rent that is more than my mortgage and slip were, but we’re using the boat a bit more and I’m offsetting the cost with 3 gas caddies vs marina fuel.

Some idiot found a hunk of coral in the channel plowing along at 9 knots and wrecked my props. I won’t name me here.
 Maybe if I had taken the time to track down the 0 degree element transducer I’ve needed for a year I’d have seen the issue creeping up. Here’s the part number for anyone who needs it.

Fortunately it seems like my drive skated on any issues from the impact. My props are currently off getting repaired and getting depitched an inch with a little cupping. I’ve got the 4 blade hill 18s on and they’ll be getting reworked to 19s as soon as my 3 blades are back.
I’m currently out of the water, defiantly parked in my driveway against municipal codes for drive service and anodes and touch up. It’s rained me out every day after work since I’ve hauled it, but I’m hoping to button up this weekend and relaunch Tuesday or Wednesday.

I’m not sure if it was the Pettit process or the change of venue, but no more bubbling paint and the anodes are much less reactive. I’ve found that the paint either didn’t bond well to the polyurethane or it dries up and shrinks in the sun. It’s just falling off! I touched some spots up and then the following day more sections were just flaking off. The polyurethane looks perfect underneath. I’ll be scraping and trying to salvage this weekend.
I’m seriously ready to either buy a used freshwater drive or a hurricane boat drive from a lift stored boat with oem paint and scuff and spray trilux or propspeed. To say it’s infuriating is an understatement!
Also, my port SeaBlaze x2 failed and I’ll be replacing it as well. Water ingress
My raw pump is developing a small drip. I’m considering a hardin marine stainless replacement. Not a bad run considering it’s sitting at 980 hours

I reglued my loose cone with $4 worth of rtv vs a new sub at $300! Still pounds just fine!

A few upcoming projects are:
relocate the ac temp sensor so I can cycle the blower. This will allow me to keep the cabin dehumidified at a warmer temperature as the condensation on the coils won’t re-evaporate into the airflow when temp is satisfied but the fan keeps running.
replace the water heater temp/pressure relief as it drips
shampoo cabin upholstery
remove the snaps from my cockpit carpet, cut scrap canvas “gussets” for lack of a better term for snap locations. Treat carpet backing with flex seal, bed “gussets” in flex seal and resnap. I had a local carpet company make me replacements and they’re a little lightweight and too stretchy without the rubber backing.
I’m conflicted about going for new vinyl and canvas for the cockpit. It’s definitely time but the way things are going with prices and rates for homes I may sell the boat and leave Florida altogether. I’ll never recover that cost on resale.
I sold the house I bought in May just after reinstalling the engine and happy to be back free and clear in a rental. Especially since the rental has a dock! It’s not an ideal setup but it works. Due to the ridiculous local codes I now have to pay to store my trailer as well as rent that is more than my mortgage and slip were, but we’re using the boat a bit more and I’m offsetting the cost with 3 gas caddies vs marina fuel.
Some idiot found a hunk of coral in the channel plowing along at 9 knots and wrecked my props. I won’t name me here.
Fortunately it seems like my drive skated on any issues from the impact. My props are currently off getting repaired and getting depitched an inch with a little cupping. I’ve got the 4 blade hill 18s on and they’ll be getting reworked to 19s as soon as my 3 blades are back.
I’m currently out of the water, defiantly parked in my driveway against municipal codes for drive service and anodes and touch up. It’s rained me out every day after work since I’ve hauled it, but I’m hoping to button up this weekend and relaunch Tuesday or Wednesday.
I’m not sure if it was the Pettit process or the change of venue, but no more bubbling paint and the anodes are much less reactive. I’ve found that the paint either didn’t bond well to the polyurethane or it dries up and shrinks in the sun. It’s just falling off! I touched some spots up and then the following day more sections were just flaking off. The polyurethane looks perfect underneath. I’ll be scraping and trying to salvage this weekend.
I’m seriously ready to either buy a used freshwater drive or a hurricane boat drive from a lift stored boat with oem paint and scuff and spray trilux or propspeed. To say it’s infuriating is an understatement!
Also, my port SeaBlaze x2 failed and I’ll be replacing it as well. Water ingress
My raw pump is developing a small drip. I’m considering a hardin marine stainless replacement. Not a bad run considering it’s sitting at 980 hours
I reglued my loose cone with $4 worth of rtv vs a new sub at $300! Still pounds just fine!
A few upcoming projects are:
relocate the ac temp sensor so I can cycle the blower. This will allow me to keep the cabin dehumidified at a warmer temperature as the condensation on the coils won’t re-evaporate into the airflow when temp is satisfied but the fan keeps running.
replace the water heater temp/pressure relief as it drips
shampoo cabin upholstery
remove the snaps from my cockpit carpet, cut scrap canvas “gussets” for lack of a better term for snap locations. Treat carpet backing with flex seal, bed “gussets” in flex seal and resnap. I had a local carpet company make me replacements and they’re a little lightweight and too stretchy without the rubber backing.
I’m conflicted about going for new vinyl and canvas for the cockpit. It’s definitely time but the way things are going with prices and rates for homes I may sell the boat and leave Florida altogether. I’ll never recover that cost on resale.
Stray Current
Well-Known Member
- Oct 27, 2019
- 1,907
- Boat Info
- 2007 260DA
- Engines
- ‘07 6.2 Horizon MPI / ‘24 SeaCore Bravo III - ‘07
Kohler 5ECD
Off we go!


Showing temp and depth of 8’ on the trailer again like I used to! Thinking positive thoughts!


Finally found the source of my coolant drip and tightened a few clamps!


New SeaBlaze X2 B/W white bedded in 4200. No leakage on the original so followed the same installation procedure.
Bottom and drive paint tomorrow, just changed the oil and gear lube, and hopefully a professional detailing Thursday
Showing temp and depth of 8’ on the trailer again like I used to! Thinking positive thoughts!
Finally found the source of my coolant drip and tightened a few clamps!
New SeaBlaze X2 B/W white bedded in 4200. No leakage on the original so followed the same installation procedure.
Bottom and drive paint tomorrow, just changed the oil and gear lube, and hopefully a professional detailing Thursday
Stray Current
Well-Known Member
- Oct 27, 2019
- 1,907
- Boat Info
- 2007 260DA
- Engines
- ‘07 6.2 Horizon MPI / ‘24 SeaCore Bravo III - ‘07
Kohler 5ECD
Progress! I repainted the drive with brush on trilux 33.
I went over the entire drive with a 25° nozzle on the 3100 psi power washer. I believe anything that stayed on the drive after that was solid enough to paint over.
I will be replacing this drive at some point with something that still has factory paint. keeping paint on it has been the bane of my existence for the last four years!
Mrs. Current went over the boat and touched up the bottom paint with Micron CSC where necessary.
The marina to which I paid entirely too much money to do a bottom strip and repaint did a piss poor job prepping in July 2021. ( no names, but it’s a mega conglomerate that has unfortunately become synonymous with Sea Ray)
Stray Current
Well-Known Member
- Oct 27, 2019
- 1,907
- Boat Info
- 2007 260DA
- Engines
- ‘07 6.2 Horizon MPI / ‘24 SeaCore Bravo III - ‘07
Kohler 5ECD
they really need the fire the through hull cut out guys that ran the line in 2007 if they haven’t already.
well, I was all set to go back in the water with my 19 inch props and my new depth sounder element…
And then I realized my garboard plug was leaking between the hull and the fitting just after taking on 80 gallons of gas on the way to the ramp. The good news is, there is no wood behind any of these penetrations. I’m going to clock the fitting 20° and drill new holes. Once it’s bedded in 4200 with the appropriately sized pilot holes, I should not have any more issues.
hard learned lessons with stray current: anytime you have the engine out, reseal, and replace everything that you can’t get to easily with the engine in! There is one through bolt with the bonding jumper. What a PITA to get a nut driver on it
Stray Current
Well-Known Member
- Oct 27, 2019
- 1,907
- Boat Info
- 2007 260DA
- Engines
- ‘07 6.2 Horizon MPI / ‘24 SeaCore Bravo III - ‘07
Kohler 5ECD
Off we go back into the water tomorrow morning!
Brite Idea
Active Member
- Nov 5, 2011
- 451
- Boat Info
- 2010 310 Sundancer
270 Sundancer 2000
- Engines
- twin 5.0 ECT Bravo III's
twin 4.3 TBI Merecrusier Alpha Gen II counter rotating drives
Do you paint your props? I started painting mine years ago because of growth but it also cuts down on corrosion. I used Pettit Prop Coat.
Stray Current
Well-Known Member
- Oct 27, 2019
- 1,907
- Boat Info
- 2007 260DA
- Engines
- ‘07 6.2 Horizon MPI / ‘24 SeaCore Bravo III - ‘07
Kohler 5ECD
Do you paint your props? I started painting mine years ago because of growth but it also cuts down on corrosion. I used Pettit Prop Coat.
I have been using either that or trilux. I didn’t paint them when the engine went back in in May because I knew I was going to be having some prop tuning done even before I damaged them. Once I get the 4 blades dialed in they’re getting treated with propglide and the 3 blades will be spares
Stray Current
Well-Known Member
- Oct 27, 2019
- 1,907
- Boat Info
- 2007 260DA
- Engines
- ‘07 6.2 Horizon MPI / ‘24 SeaCore Bravo III - ‘07
Kohler 5ECD
I like the numbers. It seems like I’ve given up about a half a mile an hour on the top end and picked up about 150 to 200 RPMs depending on the conditions. I went from 1.3 miles per gallon at wide-open doing 4675 to 4750 to 1.5 @4920
Whats really nice is at 4000 I only gave up about a mile an hour, but I hit almost 1.8 miles per gallon instead of 1.6
It also seems like the temperature hangs closer to 167 at 4000, used to hit 171 at that rpm
this will probably be the only time you can say you took an inch away from a her and it put her right where she needed to be

Looking forward to getting the four blades dialed in and on. I think that it’s gonna be really nice in that 4850 spot with a full tank of water and a normal “go out for the weekend”load
Whats really nice is at 4000 I only gave up about a mile an hour, but I hit almost 1.8 miles per gallon instead of 1.6
It also seems like the temperature hangs closer to 167 at 4000, used to hit 171 at that rpm
this will probably be the only time you can say you took an inch away from a her and it put her right where she needed to be
Looking forward to getting the four blades dialed in and on. I think that it’s gonna be really nice in that 4850 spot with a full tank of water and a normal “go out for the weekend”load
Brite Idea
Active Member
- Nov 5, 2011
- 451
- Boat Info
- 2010 310 Sundancer
270 Sundancer 2000
- Engines
- twin 5.0 ECT Bravo III's
twin 4.3 TBI Merecrusier Alpha Gen II counter rotating drives
I upgraded to the four blades last year. I went from 22 inch to 20's on Hill's recommendation and it was money well spent. The boat will now get on plane loaded without tabs. The cruise speed dropped 2 mph and cruise rpms went up 200 but the fuel economy also went up. I'm also able to hit 5K WOT where as before I barely hit 4600.
Stray Current
Well-Known Member
- Oct 27, 2019
- 1,907
- Boat Info
- 2007 260DA
- Engines
- ‘07 6.2 Horizon MPI / ‘24 SeaCore Bravo III - ‘07
Kohler 5ECD
My boat originally came with 20 pitch three blades, and I also went with the Hill Marine four blade 18s. I was originally getting between 4650 and 4750 with my typical load. I according to Hill Marine website when you go with the same pitch, you should lose about 200 RPMs so I figured going with the 18s I would pick up about 200. I actually picked up about 500.
I went from doing 27 at 4000 to 21 1/2 mile per hour, 30 wide open at 5200. Fuel economy went from 1.6 at 4000 to 1.3 and wide-open was 1.0. The bright side was I could definitely have pulled a skier out of the hole!
I think I’m going to have them rework the 18 to 19’s with a little bit of cupping.
This hull really seems to come alive at 32 mph and level off and ride much nicer but I don’t like pushing the engine that hard. I’m hoping the additional stern left of the four blades helps it level off a little better at lower speed and without lugging the engine as much the efficiency will go up. I really don’t mind losing a mile an hour or two of cruising speed because she’s already fat and slow, 2 miles an hour isn’t going to make much of a difference in getting anywhere, but 2/10 of a mile per gallon when you’re getting less than 2 miles per gallon is an appreciable difference in range over a tank.
I usually run around with the fuel and water tanks full, have a bunch of stuff stored in the cabin, biminis up, and have most of the options that add weight. I’m shooting for 4850 WOT so I cant overrev when I’m lighter.
4800-5200 is the spec on my engine
Stray Current
Well-Known Member
- Oct 27, 2019
- 1,907
- Boat Info
- 2007 260DA
- Engines
- ‘07 6.2 Horizon MPI / ‘24 SeaCore Bravo III - ‘07
Kohler 5ECD
The new props are definitely an improvement considering this was running into a 20mph headwind.
And then running back upriver into an outgoing tide. Looking forward to getting those 4 blades dialed in
