

Alex F
Well-Known Member
- Nov 14, 2006
- 9,166
- Boat Info
- 2005 420DB with AB 11 DLX Tender, Raymarine Electronics (2x12" MFDs) with Vesper AIS
- Engines
- Cummins 450Cs, 9KW Onan Generator, 40HP Yamaha for tender.
I have to admit that it took me a while to make up my mind regarding the ramps for my application. I’ve read most of the threads and got good response from few CSR members that built their own. I have to say that I was inspired the first time I saw Dom’s thread (I think it was in 2007 or 2008) when he posted his design using Weaver Receivers brackets and his “sandwiched attachment” the mounts for the ramps. I saw few other people successfully replicating the idea and some came up with similar idea using other materials. Although, I liked Dom’s davits very much there were two things that didn’t convinced me to do the same replica:
1. I don’t have a shop that can weld those brackets for me.
2. I didn’t like something like the Weaver Receivers on the swim platform to be toe stabbers for my kids.
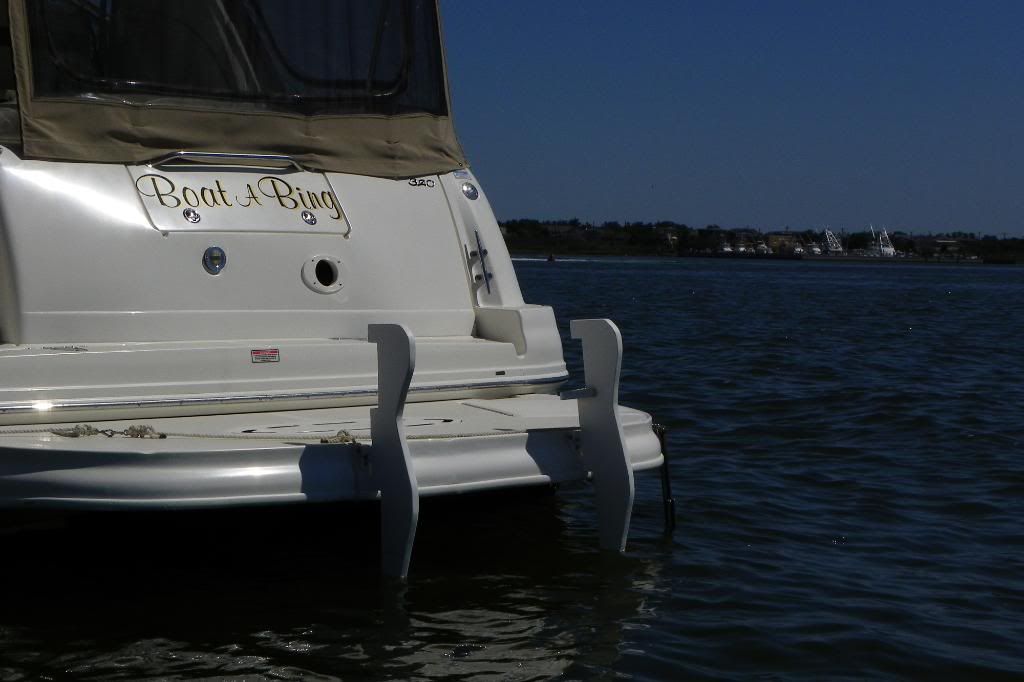
So, I decided to come up with my own design for the brackets that mounts on the side wall of the swim platform. I have to say that one of the hardest parts was filing those brackets to fit the curved platform side since the back side is not straight as on many other models. Thus, making this setup for those models where the back of the platform is straight will be a piece of cake.
Parts and Tools:
1. I used cardboard to create a template using Dom’s ramps as my baseline guide.
2. I’ve purchased 2 pieces of starboard 34” x 9” x 1” from eBay for about $80 or so.
3. I’ve purchased a new filing set for $15-$20 and set of blades for my jigsaw.
4. Set of stainless still bolts, washers and nuts.
5. Drill with set of bits.
6. Table saw for cutting large and straight parts.
7. Stainless still bolts, nuts and washers.
8. 4200 sealant.
9. U-shape brackets for tie-downs.
Building Process:
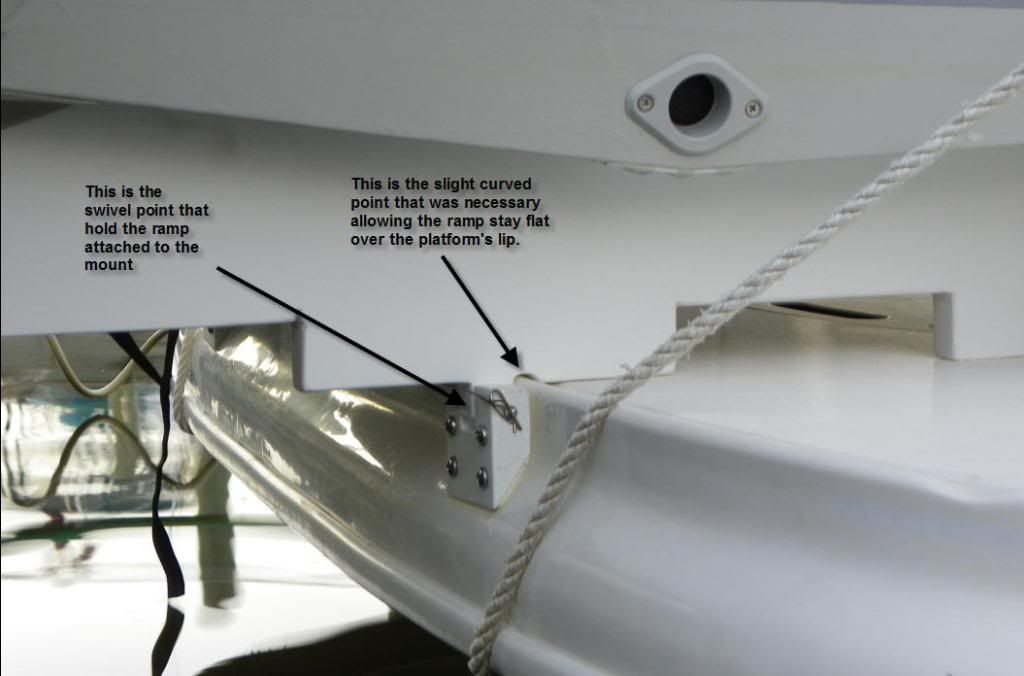
1. The first thing I did was cutting the cardboard to create a template using Dom’s ramps dimensions. But, since my ramps have different attachment to the mounts I had to cut the bottom of my ramps differently.
2. I’ve pre-cut some larger parts using table saw and for everything else I’ve used jigsaw. To make the final edges I’ve used the filing set.
3. I’ve pre-cut the mounts but had to finish them only while being by the boat. The difficult part was to fit the mounts flat on the curved platform. I’ve used jigsaw to cut the angle and the rest was just manual effort to create curved shape.
4. I was debating as to what would be the better approach to install the ramps, while the boat is on hard or in water. I decided that in water would be the better option since I’ll be able to have the dinghy lined up right there by the platform. So, I pulled the boat slightly out of the slip to leave just enough room for the dinghy to line up by the platform and was able to accurately install the mounts while making necessary adjustments right on the spot. It worked very well.
5. Before attaching each piece to the platform I prefilled each hole with 4200 preventing any water to come in contact with open fiberglass.
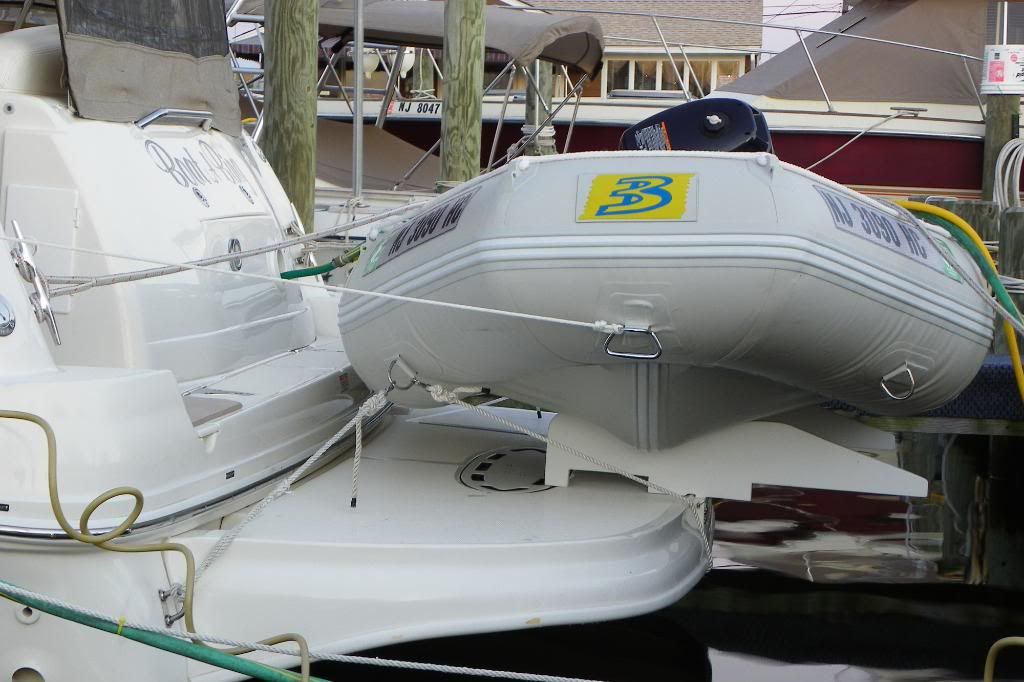
6. After the mounts were attached I attached the U-shaped brackets, which I’m using for tie-downs to secure the boat without drilling any more holes.
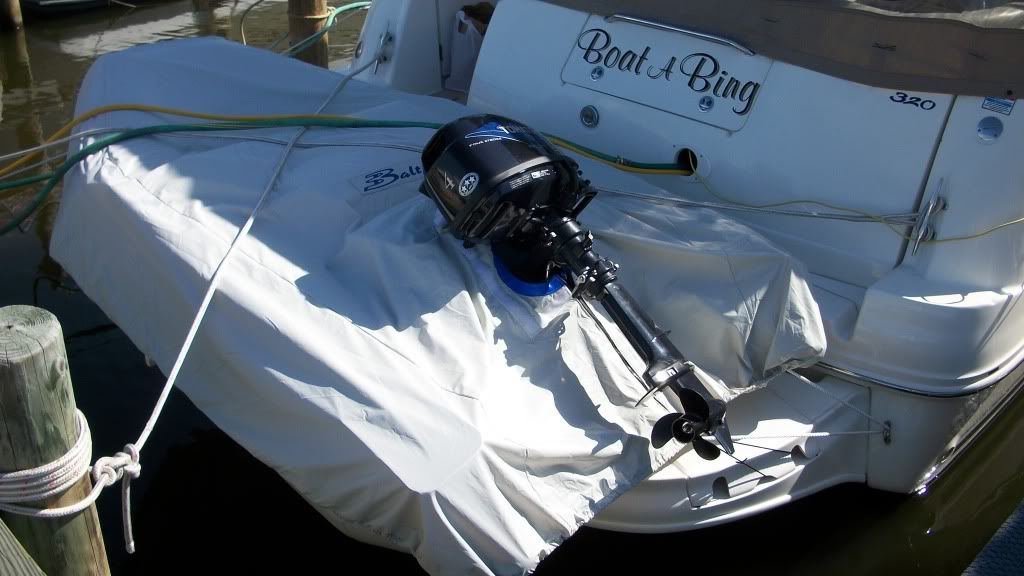
Here're some pictures:

The total cost for material and tools was about $100-$120 and it took me roughly a full day or so (although I did the project during few nights spending couple of hours here and there). The installation also took few hours.
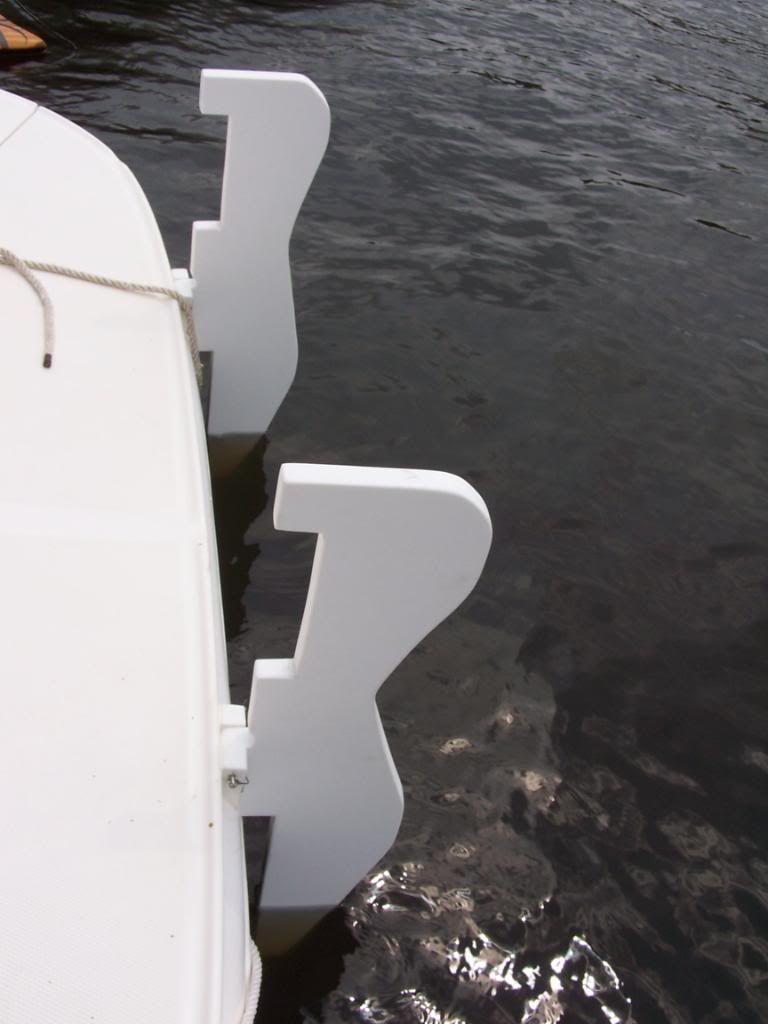
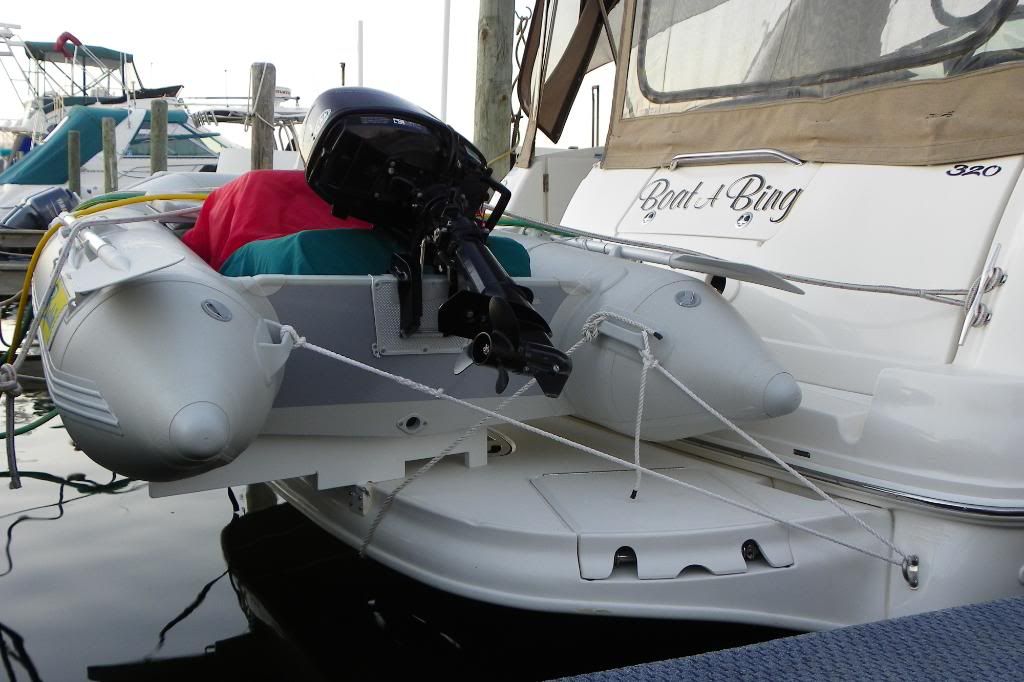
My dinghy rig weights approximately total of 130-140lbs between the 4hp motor and the dinghy. After using my davits with the dinghy a full season travelling for hundreds of miles in very different open ocean conditions I can say that I’m pretty happy with the way the setup is holding up.
I hope that this is timely thread that will give other folks an idea on how to make very nice davits setup by spending just over $100.
Cheers,
Alex.
1. I don’t have a shop that can weld those brackets for me.
2. I didn’t like something like the Weaver Receivers on the swim platform to be toe stabbers for my kids.
So, I decided to come up with my own design for the brackets that mounts on the side wall of the swim platform. I have to say that one of the hardest parts was filing those brackets to fit the curved platform side since the back side is not straight as on many other models. Thus, making this setup for those models where the back of the platform is straight will be a piece of cake.
Parts and Tools:
1. I used cardboard to create a template using Dom’s ramps as my baseline guide.
2. I’ve purchased 2 pieces of starboard 34” x 9” x 1” from eBay for about $80 or so.
3. I’ve purchased a new filing set for $15-$20 and set of blades for my jigsaw.
4. Set of stainless still bolts, washers and nuts.
5. Drill with set of bits.
6. Table saw for cutting large and straight parts.
7. Stainless still bolts, nuts and washers.
8. 4200 sealant.
9. U-shape brackets for tie-downs.
Building Process:
1. The first thing I did was cutting the cardboard to create a template using Dom’s ramps dimensions. But, since my ramps have different attachment to the mounts I had to cut the bottom of my ramps differently.
2. I’ve pre-cut some larger parts using table saw and for everything else I’ve used jigsaw. To make the final edges I’ve used the filing set.
3. I’ve pre-cut the mounts but had to finish them only while being by the boat. The difficult part was to fit the mounts flat on the curved platform. I’ve used jigsaw to cut the angle and the rest was just manual effort to create curved shape.
4. I was debating as to what would be the better approach to install the ramps, while the boat is on hard or in water. I decided that in water would be the better option since I’ll be able to have the dinghy lined up right there by the platform. So, I pulled the boat slightly out of the slip to leave just enough room for the dinghy to line up by the platform and was able to accurately install the mounts while making necessary adjustments right on the spot. It worked very well.
5. Before attaching each piece to the platform I prefilled each hole with 4200 preventing any water to come in contact with open fiberglass.
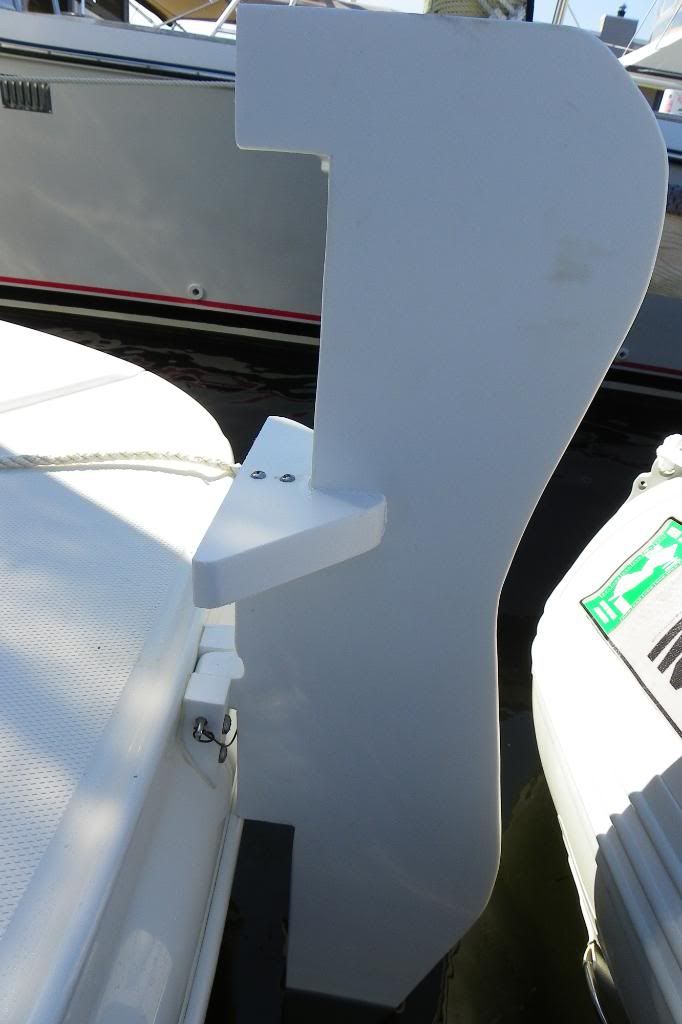
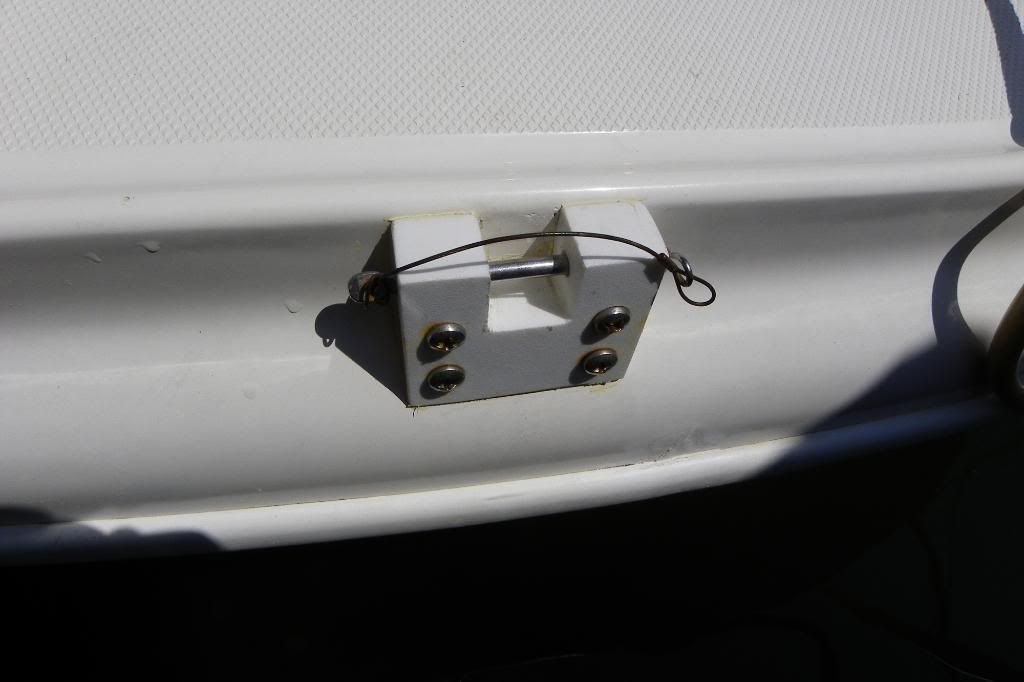
6. After the mounts were attached I attached the U-shaped brackets, which I’m using for tie-downs to secure the boat without drilling any more holes.
Here're some pictures:
The total cost for material and tools was about $100-$120 and it took me roughly a full day or so (although I did the project during few nights spending couple of hours here and there). The installation also took few hours.
My dinghy rig weights approximately total of 130-140lbs between the 4hp motor and the dinghy. After using my davits with the dinghy a full season travelling for hundreds of miles in very different open ocean conditions I can say that I’m pretty happy with the way the setup is holding up.
I hope that this is timely thread that will give other folks an idea on how to make very nice davits setup by spending just over $100.
Cheers,
Alex.
Last edited:
