- Feb 5, 2009
- 827
- Boat Info
- 560DB
2 x Raymarine e125's
Walker Bay Generations 360 Centre Console w. Yahama 60HP
2 Seadoos
- Engines
- CAT 3406e (C15's) @ 800HP
When I got my boat a year ago, it came with a very usable, but somewhat dated audio video setup. I decided that I would upgrade the set-up myself and thought that I’d post my project here in case it had some use to someone else. For those 560 owners looking to upgrade from the original tube TV (as per earlier e-mails), perhaps the pics of the cabinetry and set-up could be helpful.
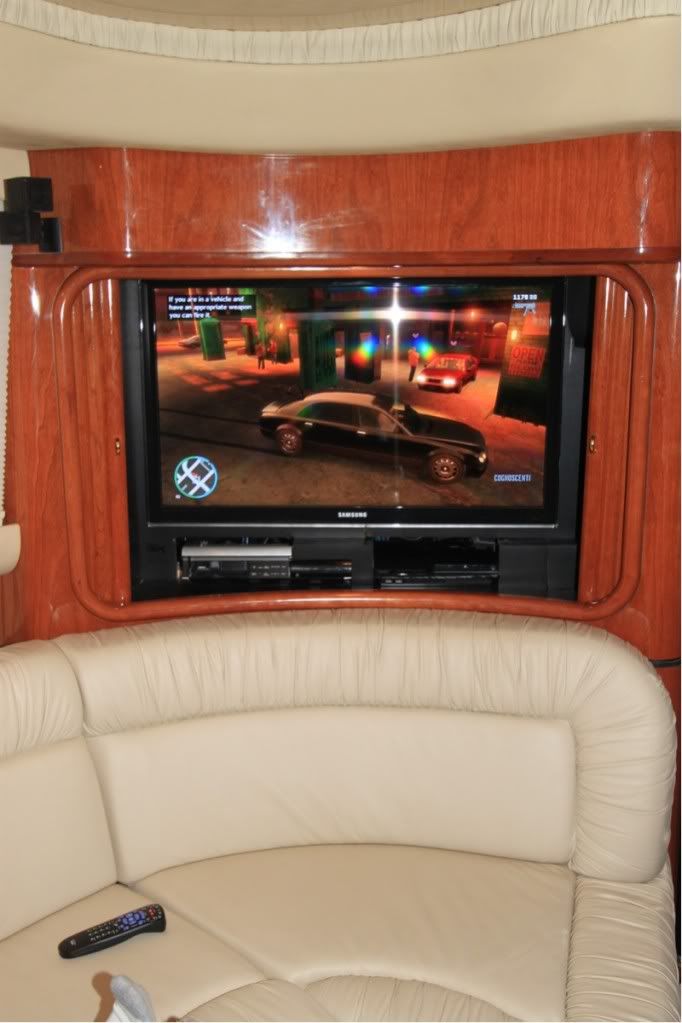
I’m not particularly an audiophile; however I wanted to add a PS/3 for the kids, didn’t need the VCR/DVD unit and was concerned that the 42” Plasma TV was probably a power pig. Unfortunately the way my kids like to enjoy a nice quiet anchorage is to play Grand Theft Auto on the PS/3, running off the inverter bank (because it’s a nice quiet anchorage and I don’t want to needlessly run the generator).
I decided to start looking at the new LED TV’s for the reduced power draw, took some measurements and decided that the new TV I would installed would be the Samsung 40C6300
(http://www.samsung.com/ca/consumer/tv-video/tv/led/UN40C6300SFXZC/index.idx?pagetype=prd_detail&returnurl=)
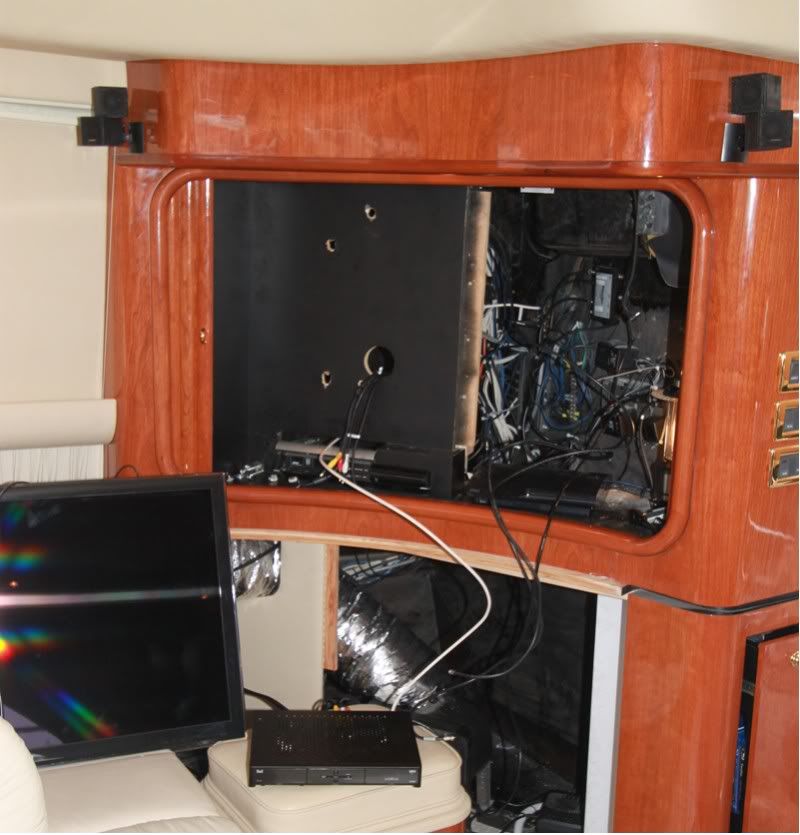
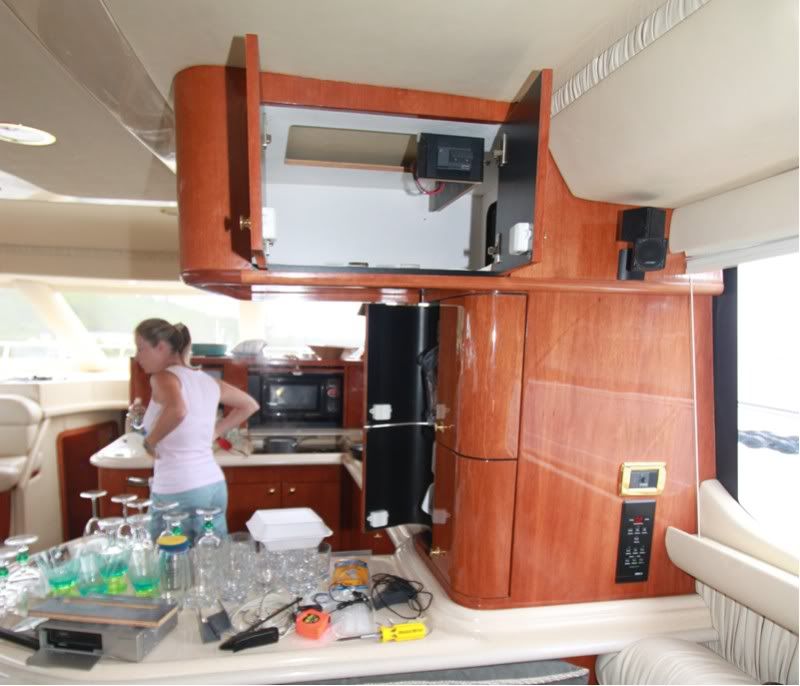
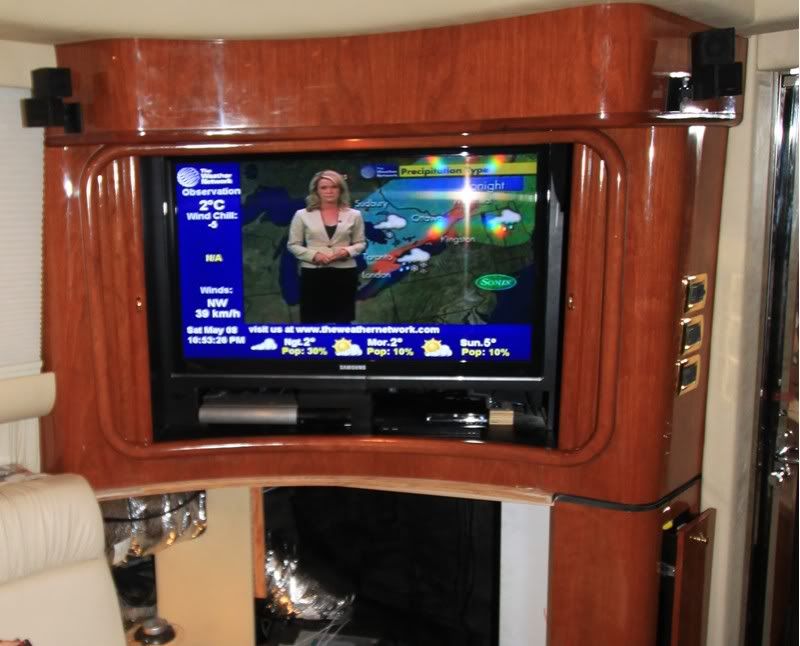
The first challenge was to figure out how to get the old TV out of the cabinet. I was sure that there must be some sort of release mechanism for the TV and had made a couple of attempts last season to find “the latch”. Lesson learned – there was no easy way. The only way to access the TV and the electronics was to take out part of the couch, remove a few panels and crawl up behind the TV. Here’s a shot of the original set-up with part of the couch removed.
The corner couch was screwed to the floor and removed fairly easily with the screws taken out. The trick is to then get up into the cabinet being mindful not to damage the air conditioning unit, negotiate through the cables and wires and not get too clawed up by the exposed screws.
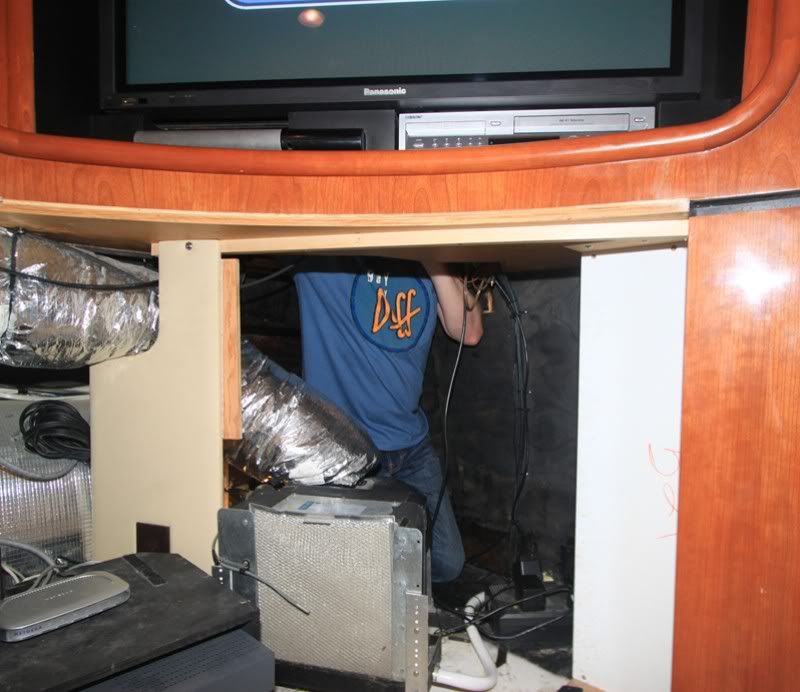
Here’s a pic of me after having crawled inside the cabinet.
Once I got inside, it was clear as to why I couldn’t find an alternate way to get the TV off the cabinet – it was bolted on. I had to have someone stand outside the hold the TV while I unbolted from inside and then take it off the wall. The Panasonic Plasma that I took off was every bit of 90 lbs so it’s probably not a job for the Admiral.
Once that was off, it was relatively straightforward to take off the plywood panels that had been fashioned to fill the front of the cabinet and provide the mounting surface for the flat screen TV. Just work. By the way, it will be hotter than Hades inside the cabinet if it’s warm outside.
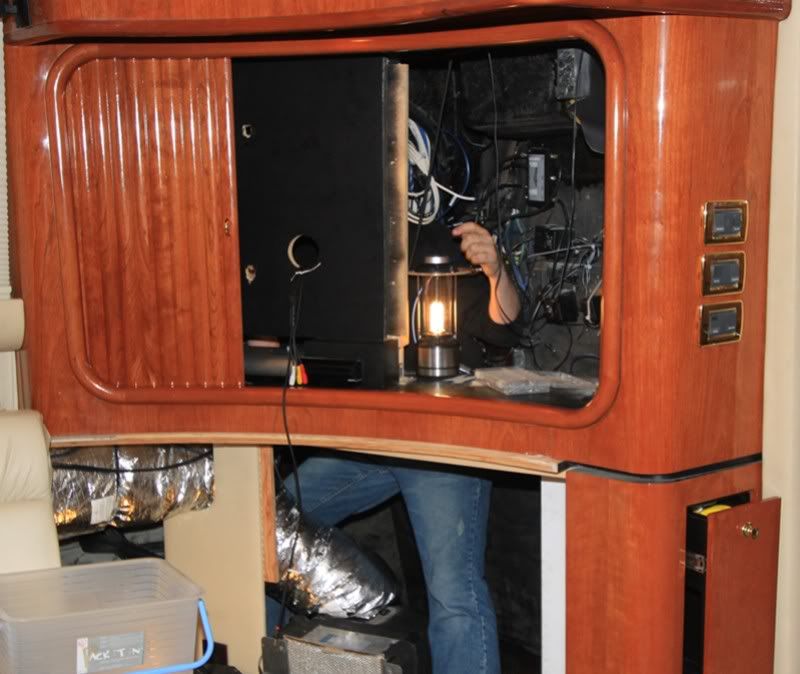
Here’s a shot of the cabinet now exposed.

Although I hadn’t seen another 560 of the era with the flat screen, I thought it must have been a custom order item from the factory because it was a very clean looking installation. However when I got it apart, it was clear that it was an early upgrade. The cabinet was just a mass of wires and cables as everything was left behind (i.e., the old cables from the initial installation were not pulled).
Again, for the benefit of fellow 560 owners, I’ll describe the cabinet modifications a little because it would not be that hard to modify an existing cabinet to install a flat screen once a tube TV is out. Essentially, my set-up had a vertical cross-member installed in the centre of the opening. The backing was made out of two pieces of ¾” plywood to fit the opening. If you used cardboard to make a template first, I don’t think it would be too bad of a job. Everything was sprayed flat black for finishing.
Next big step for me (probably needless) was to get rid of all of the excess cabling. This was a bit of a hunt and peck job for me - more like the kids game “pick-up-sticks” actually, yanking out one cable at a time while trying hard not to disturb anything structural or important J. An additional complexity that I had to contend with was the satellite internet set-up. My KVH set-up included something called TracNet, which provided mobile satellite internet. The technology was old though and the service was only offered to grandfathered DirecTV subscribers – so it was no use to me (let me know if there is anyone looking for parts). That meant that I also had to fish through what was essentially a server room below the couch and get rid of all those cables as well, without upsetting my SAT TV set-up.
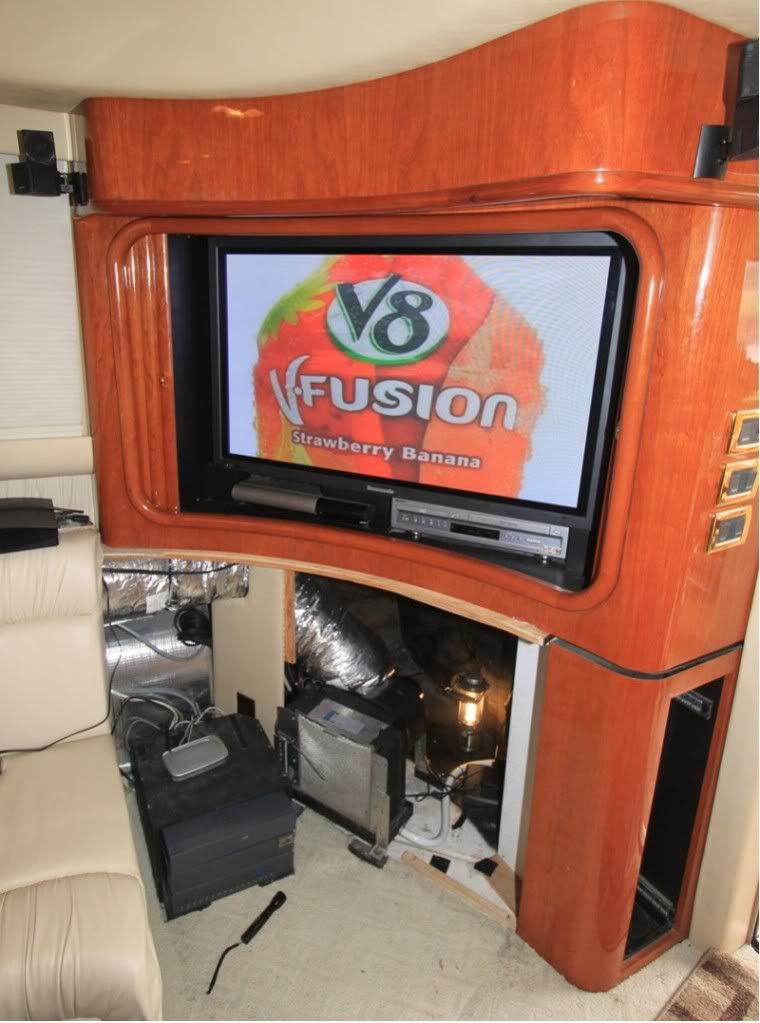
Once the cables were cleared, I hooked up the TV to the satellite box for a test – here’s a shot:

Unfortunately this working picture wasn’t my initial experience. Nothing worked at first and after an hour or so I had thought I lost it and was ready to give up and bring in a pro. The Admiral was being very “helpful” pointing out every possible solution, while I was trying to focus on tracing through the problem. Finally when she decided to have a nap – Eureka! When I was yanking out the excess wires I had moved one of the cables. Fixed – it worked.
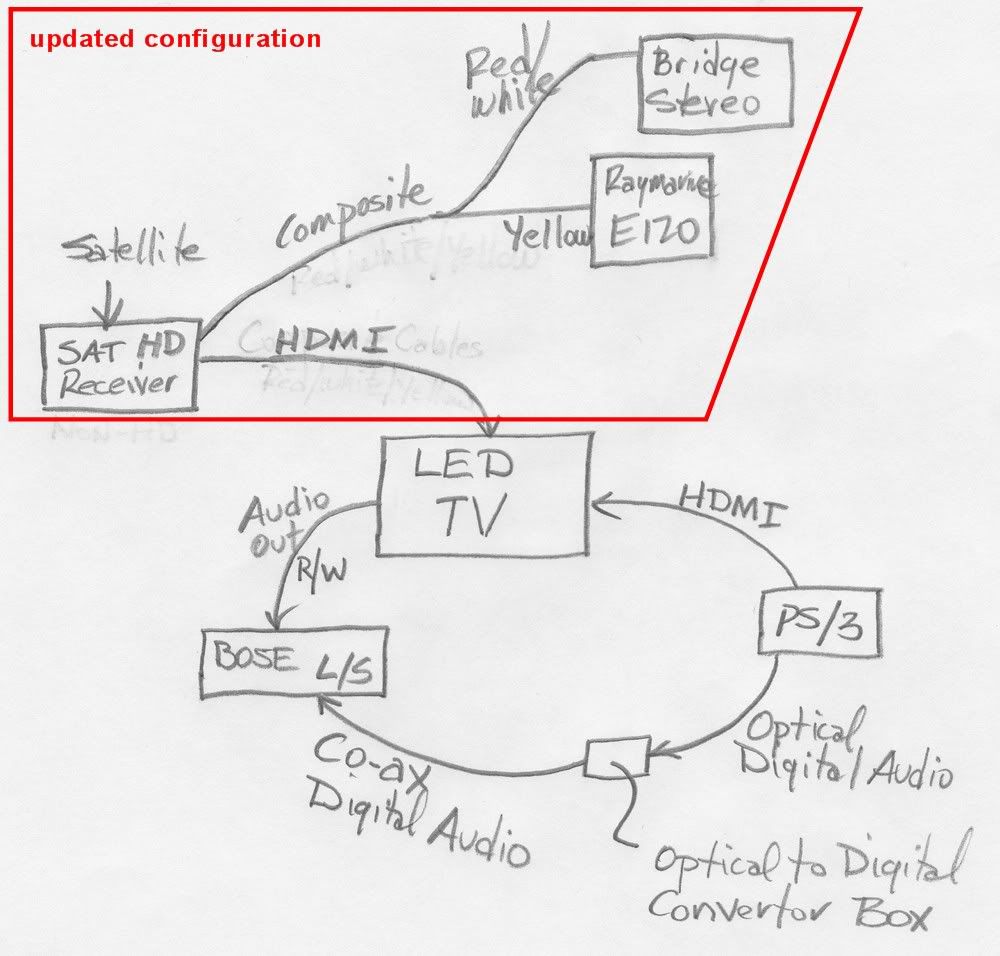
Next job was to wire everything up. Here’s my hand-drawn rough schematic of the cabling.

Given that I would be blending technical eras - I had to do a little research to get things hooked up. I would have been easier to replace the existing 9 year old BOSE Lifestyle system, but it’s a great stereo and I didn’t want to throw away bucks to “upgrade” to an inferior stereo. Keeping it though, meant that I couldn’t use the stereo receiver as an HDMI centre, which would have made everything easier. Also, it meant a couple of tricks to get digital audio working for BlueRay movies – you definitely want this working! The current standard is optical cabling, which is what the Sony PS/3 outputs, however the BOSE stereo would only take a coax input. I found a little powered converter box at The Source (used to be Radioshack) that would take optical digital in and spit coax digital out. Also a tip if you have the same stereo – it is odd in the way that you hook up digital audio. I was expecting that the receiver would have an input jack and when I didn’t see one initially, thought that it did not have the capability to accept digital audio. Turns out the powered speaker system had a remote cable into which you plugged the digital audio cable. I had to read the manual for that one (which I generally don’t like to do) and then had to hunt around for the cable which had been tucked in under some zip cables.
Another piece of older technology that I have is the KVH satellite dish which is not an HD device. As a consequence, I don't have an HD box. If I had the HD box, I would have use the HDMI cable to hook it up.
With everything now figured out and tested, it was time to start reassembling.
Note that in the picture, half of the plywood backing is installed in the cabinet opening.
Here’s the new TV hooked up and working. New TV is 25 lbs versus the original 90 lbs beast.
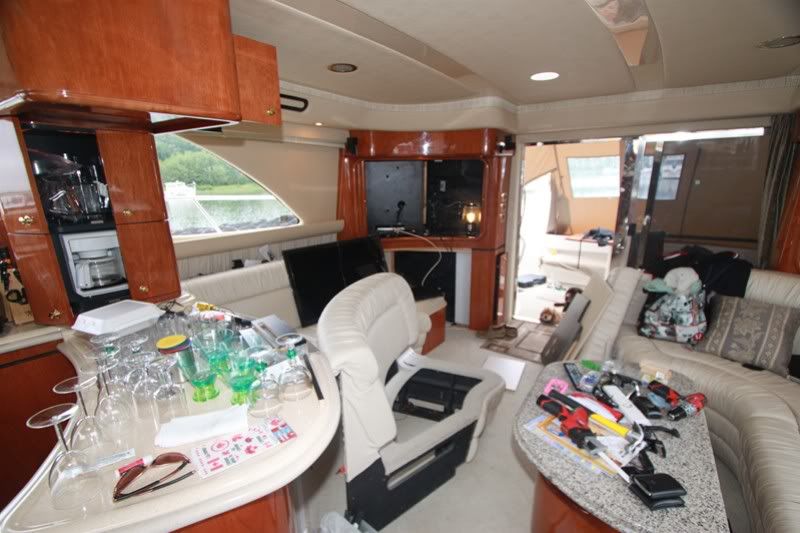
And finally, here’s everything reinstalled and still working...
The only little modification that I have to complete is a template to cover the gap around the PS/3. As part of the install process, I went and got one of the new 2nd generation smaller PS/3’s – it was slimmer to fit into the configuration, Sony was smart and moved the power switch to the front of the device (important for my set-up) and they also improved the power draw – now at 250 watts versus 360 watts for the previous generation – and less heat dissipation.
As I mentioned at the outset, one of my primary objectives was power maintenance (which is clearly what I say to the Admiral and not the spectacular picture quality in the new TV J ). Here’s how I added up the difference in power consumption for playing the PS/3.
In the old configuration to play a game, kids had to power up the TV (395 watts) which was only a monitor and therefore they also had to power up the stereo (350 W) and the powered speakers (300 W). The PS/3 was another 360 W and they had to turn on the Sony VCR/DVD player which everything ran through (which I’m guessing in powered down mode drew another 100 watts or so). So all together 1,505 watts or like running 15 x 100 bulbs off the batteries! (also note to any electronics experts out there, if I’m interpreting this stuff wrong – I’d appreciate your clarifying. Some of the devices included power draw in watts – other in amps – which I converted assuming 120v power supply).
For the new set-up, to play a game they need to turn on the TV – 100 watts (including internally amplified speakers) and the new PS/3 – 250 watts meaning a total draw of 350 for a 77% reduction in power consumption.
It was a satisfying project that only chewed up two afternoons. Plus - now I have a big screen TV for my office at home. :grin:
Long thread – sorry. Hopefully someone finds this useful or at least interesting.
Paul
I’m not particularly an audiophile; however I wanted to add a PS/3 for the kids, didn’t need the VCR/DVD unit and was concerned that the 42” Plasma TV was probably a power pig. Unfortunately the way my kids like to enjoy a nice quiet anchorage is to play Grand Theft Auto on the PS/3, running off the inverter bank (because it’s a nice quiet anchorage and I don’t want to needlessly run the generator).
I decided to start looking at the new LED TV’s for the reduced power draw, took some measurements and decided that the new TV I would installed would be the Samsung 40C6300
(http://www.samsung.com/ca/consumer/tv-video/tv/led/UN40C6300SFXZC/index.idx?pagetype=prd_detail&returnurl=)
The first challenge was to figure out how to get the old TV out of the cabinet. I was sure that there must be some sort of release mechanism for the TV and had made a couple of attempts last season to find “the latch”. Lesson learned – there was no easy way. The only way to access the TV and the electronics was to take out part of the couch, remove a few panels and crawl up behind the TV. Here’s a shot of the original set-up with part of the couch removed.
The corner couch was screwed to the floor and removed fairly easily with the screws taken out. The trick is to then get up into the cabinet being mindful not to damage the air conditioning unit, negotiate through the cables and wires and not get too clawed up by the exposed screws.
Here’s a pic of me after having crawled inside the cabinet.
Once I got inside, it was clear as to why I couldn’t find an alternate way to get the TV off the cabinet – it was bolted on. I had to have someone stand outside the hold the TV while I unbolted from inside and then take it off the wall. The Panasonic Plasma that I took off was every bit of 90 lbs so it’s probably not a job for the Admiral.
Once that was off, it was relatively straightforward to take off the plywood panels that had been fashioned to fill the front of the cabinet and provide the mounting surface for the flat screen TV. Just work. By the way, it will be hotter than Hades inside the cabinet if it’s warm outside.
Here’s a shot of the cabinet now exposed.
Although I hadn’t seen another 560 of the era with the flat screen, I thought it must have been a custom order item from the factory because it was a very clean looking installation. However when I got it apart, it was clear that it was an early upgrade. The cabinet was just a mass of wires and cables as everything was left behind (i.e., the old cables from the initial installation were not pulled).
Again, for the benefit of fellow 560 owners, I’ll describe the cabinet modifications a little because it would not be that hard to modify an existing cabinet to install a flat screen once a tube TV is out. Essentially, my set-up had a vertical cross-member installed in the centre of the opening. The backing was made out of two pieces of ¾” plywood to fit the opening. If you used cardboard to make a template first, I don’t think it would be too bad of a job. Everything was sprayed flat black for finishing.
Next big step for me (probably needless) was to get rid of all of the excess cabling. This was a bit of a hunt and peck job for me - more like the kids game “pick-up-sticks” actually, yanking out one cable at a time while trying hard not to disturb anything structural or important J. An additional complexity that I had to contend with was the satellite internet set-up. My KVH set-up included something called TracNet, which provided mobile satellite internet. The technology was old though and the service was only offered to grandfathered DirecTV subscribers – so it was no use to me (let me know if there is anyone looking for parts). That meant that I also had to fish through what was essentially a server room below the couch and get rid of all those cables as well, without upsetting my SAT TV set-up.
Once the cables were cleared, I hooked up the TV to the satellite box for a test – here’s a shot:
Unfortunately this working picture wasn’t my initial experience. Nothing worked at first and after an hour or so I had thought I lost it and was ready to give up and bring in a pro. The Admiral was being very “helpful” pointing out every possible solution, while I was trying to focus on tracing through the problem. Finally when she decided to have a nap – Eureka! When I was yanking out the excess wires I had moved one of the cables. Fixed – it worked.
Next job was to wire everything up. Here’s my hand-drawn rough schematic of the cabling.
Given that I would be blending technical eras - I had to do a little research to get things hooked up. I would have been easier to replace the existing 9 year old BOSE Lifestyle system, but it’s a great stereo and I didn’t want to throw away bucks to “upgrade” to an inferior stereo. Keeping it though, meant that I couldn’t use the stereo receiver as an HDMI centre, which would have made everything easier. Also, it meant a couple of tricks to get digital audio working for BlueRay movies – you definitely want this working! The current standard is optical cabling, which is what the Sony PS/3 outputs, however the BOSE stereo would only take a coax input. I found a little powered converter box at The Source (used to be Radioshack) that would take optical digital in and spit coax digital out. Also a tip if you have the same stereo – it is odd in the way that you hook up digital audio. I was expecting that the receiver would have an input jack and when I didn’t see one initially, thought that it did not have the capability to accept digital audio. Turns out the powered speaker system had a remote cable into which you plugged the digital audio cable. I had to read the manual for that one (which I generally don’t like to do) and then had to hunt around for the cable which had been tucked in under some zip cables.
Another piece of older technology that I have is the KVH satellite dish which is not an HD device. As a consequence, I don't have an HD box. If I had the HD box, I would have use the HDMI cable to hook it up.
With everything now figured out and tested, it was time to start reassembling.
Note that in the picture, half of the plywood backing is installed in the cabinet opening.
Here’s the new TV hooked up and working. New TV is 25 lbs versus the original 90 lbs beast.
And finally, here’s everything reinstalled and still working...
The only little modification that I have to complete is a template to cover the gap around the PS/3. As part of the install process, I went and got one of the new 2nd generation smaller PS/3’s – it was slimmer to fit into the configuration, Sony was smart and moved the power switch to the front of the device (important for my set-up) and they also improved the power draw – now at 250 watts versus 360 watts for the previous generation – and less heat dissipation.
As I mentioned at the outset, one of my primary objectives was power maintenance (which is clearly what I say to the Admiral and not the spectacular picture quality in the new TV J ). Here’s how I added up the difference in power consumption for playing the PS/3.
In the old configuration to play a game, kids had to power up the TV (395 watts) which was only a monitor and therefore they also had to power up the stereo (350 W) and the powered speakers (300 W). The PS/3 was another 360 W and they had to turn on the Sony VCR/DVD player which everything ran through (which I’m guessing in powered down mode drew another 100 watts or so). So all together 1,505 watts or like running 15 x 100 bulbs off the batteries! (also note to any electronics experts out there, if I’m interpreting this stuff wrong – I’d appreciate your clarifying. Some of the devices included power draw in watts – other in amps – which I converted assuming 120v power supply).
For the new set-up, to play a game they need to turn on the TV – 100 watts (including internally amplified speakers) and the new PS/3 – 250 watts meaning a total draw of 350 for a 77% reduction in power consumption.
It was a satisfying project that only chewed up two afternoons. Plus - now I have a big screen TV for my office at home. :grin:
Long thread – sorry. Hopefully someone finds this useful or at least interesting.
Paul
Last edited: