jsed
Active Member
- Feb 21, 2008
- 301
- Boat Info
- 2002 360 Sundancer
Zodiac 310 RIB, 15hp Johnson
- Engines
- Twin 8.1S
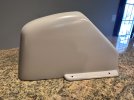
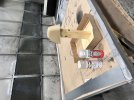
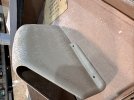
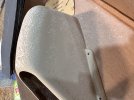
I see!Curiosity got the best of me about a month ago and I opened that panel to see what was there. I went in there looking to see where the water that enters that small drain hole gets routed to, and best I could tell it just runs along the floor to the starboard side. Here are two pictures - one looking to the starboard side (you can see the bottom of the insulated 'ice bucket') and one looking down & slightly to the port side. There is not much of anything back there. My boat is a 2002 360 Sundancer.
So there's nothing really back there, and the water just goes along the floor? It's not routed anywhere? Very strange.....
Great pics, and I appreciate the quick response!
Mines an 02 as well.