- Nov 26, 2006
- 7,628
- Boat Info
- 2008 44 Sedan Bridge
- Engines
- Cummins QSC-500's
Straight Drives
1) Close Sea Cocks.
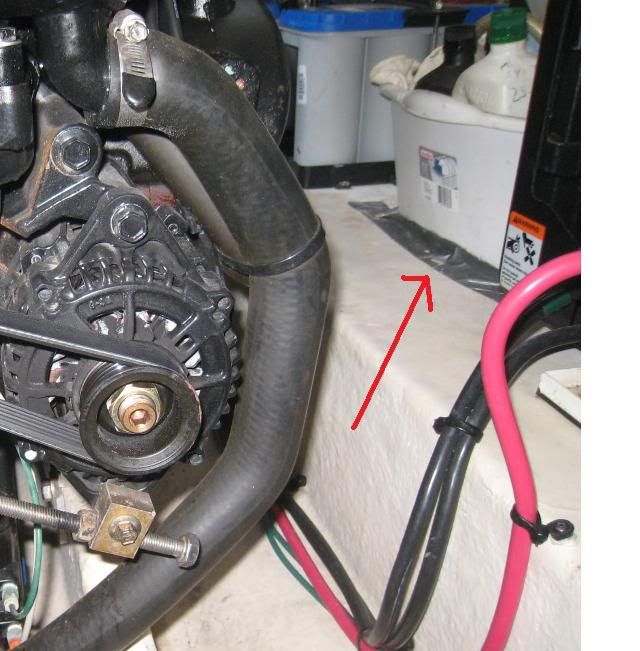
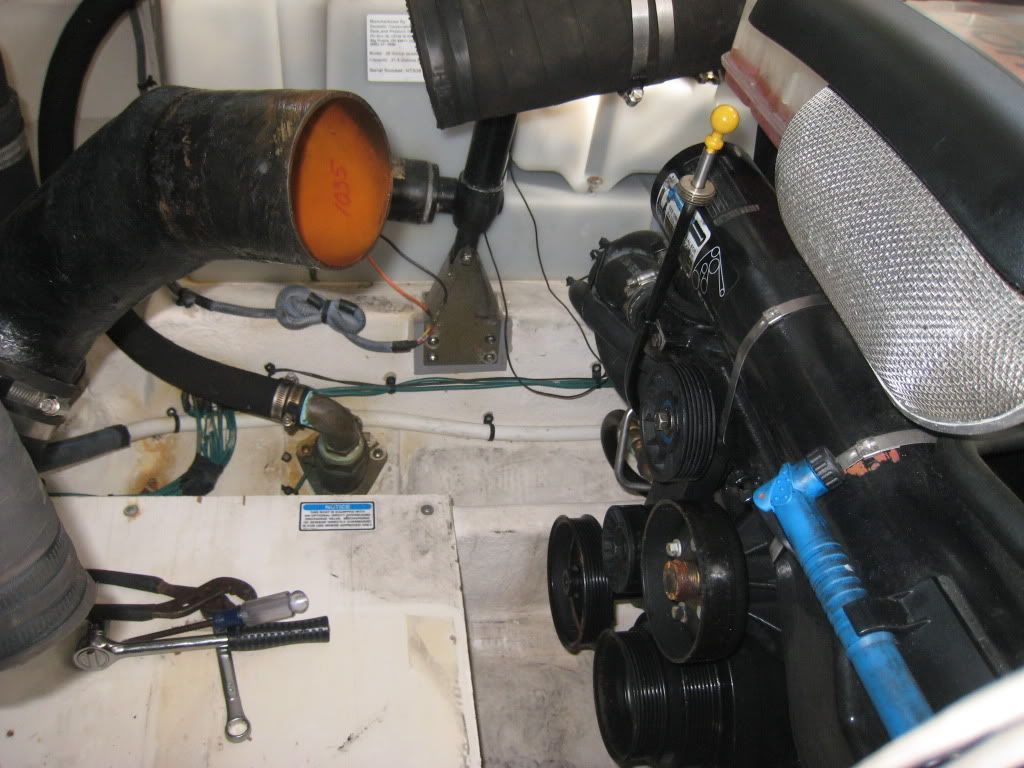
2) Remove Serpentine Belt: Note free play, then loosen alternator tensioning assembly as follows: Loosen the nut nearest the center of the engine and spin it over about and inch. Loosen the bolt at the end about an inch and allow the alternator to swing inward to loosen tension on the belt. If it doesn't swing, loosen the bolt that acts as a hinge at the top of the alt. Swing alt in and slide belt toward you off of one of the pulleys that doesn't have ridges. Keep track of direction of belt by laying it down without turning it over.
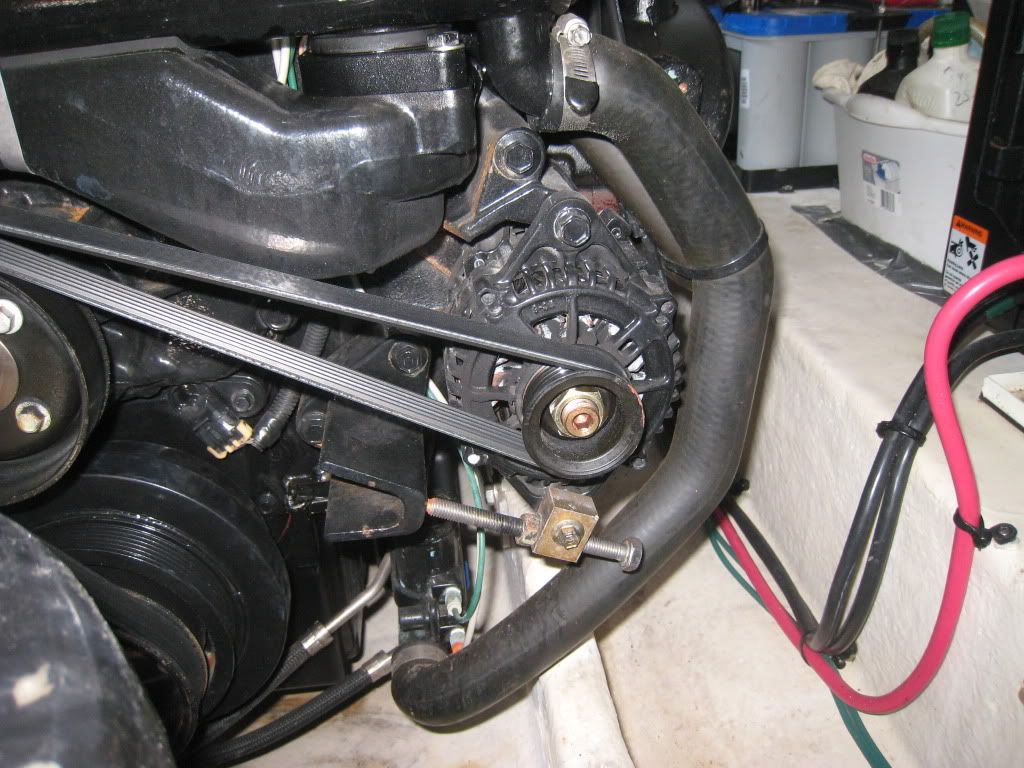
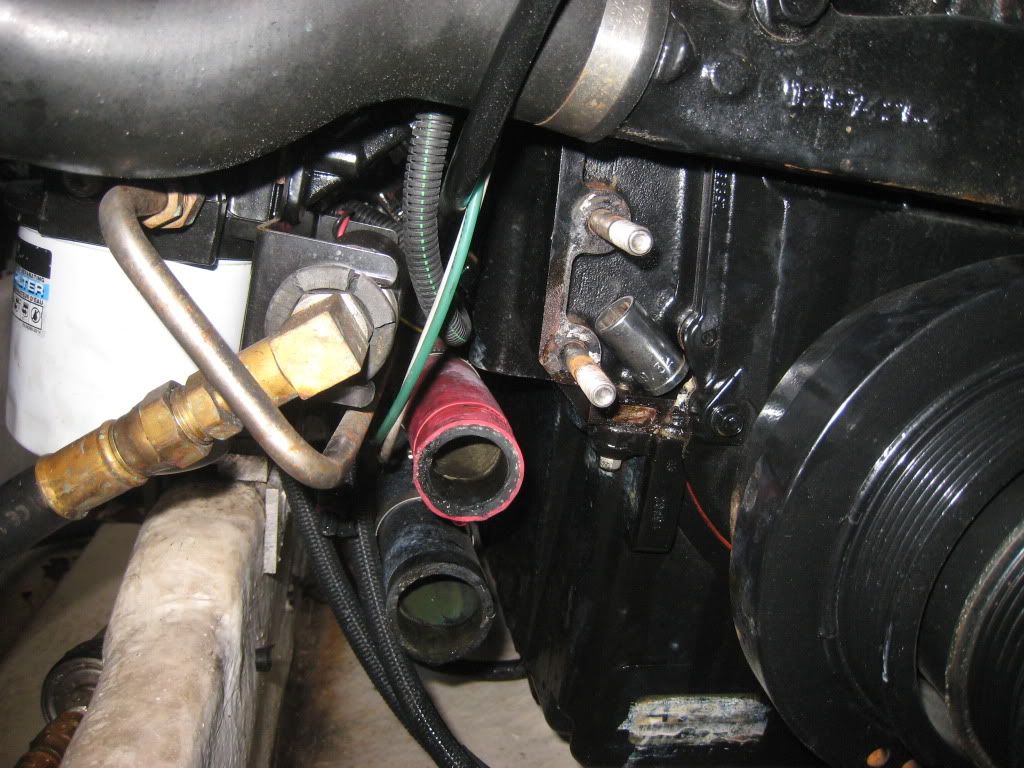
Once the belt is off, remove the 2 nuts and 1 bolt that hold the pulley bracket and raw water pump (impeller pump). The bottom 2 are of one size, are nuts, and secure the pump. The top one is a bolt of a slightly different size and only holds the pulley bracket.

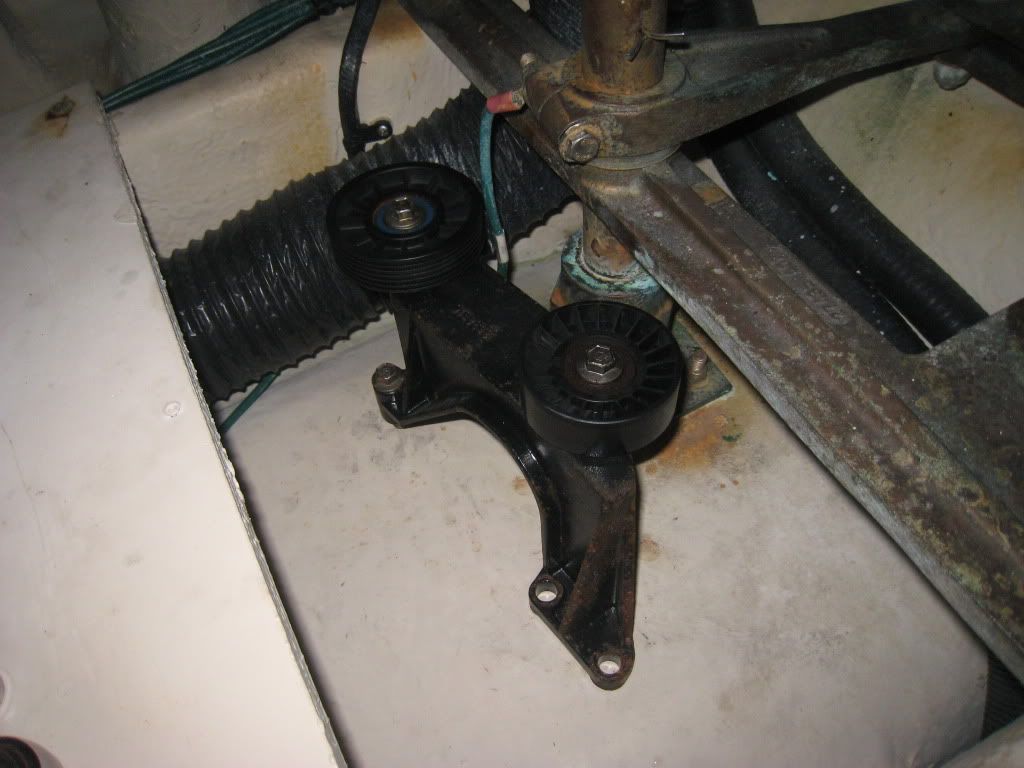
Remove the pulley bracket and 2 pulleys and set aside.
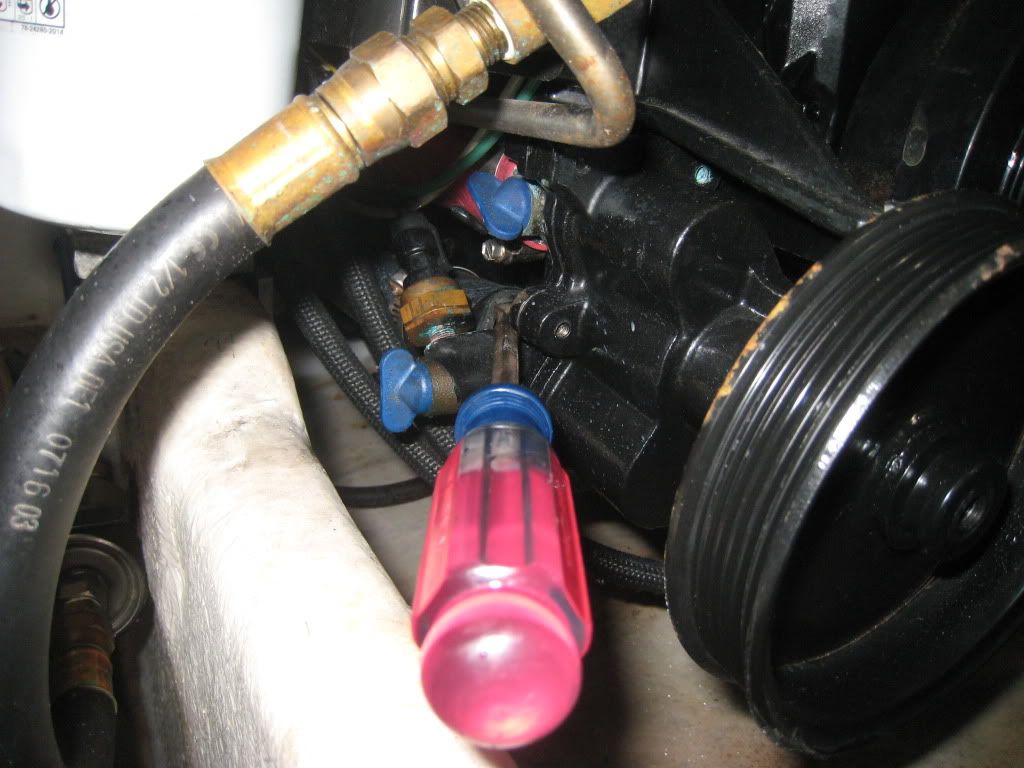
Reach behind the port side of the pump and remove the two, blue plastic wing-bolt style plugs and set aside. Keep track of the O-rings. Remove the two hose brackets off of the two hoses. The bottom is outgoing and is somewhat plyable. The top one is red and is the incoming, vacuum hose (withstands vacuum from the pump). It is short and not very plyable. Remove the wire harness to the sensor from the back of the pump. There is a small tab which extends the entire length of the black plastic housing. Lift the tab and separate the two halves of the sensor housing to free the wiring. It is a lift tab.
Try to work the hoses loose by the least aggressive method possible. Try using your hands, then perhaps and awl, and in the worst case, a big ass screwdriver like me.
Once the hoses are loosened up, the pump should, theoretically, pull off straight. In reality, it won't. Put your right hand behind the top, right side of the pump and begin to pull it off of the bolts and away from the hoses. Work it up and down and back and forth. As you begin to get it out away from the block, put a large socket piece between the pump and the block from the top right to hold them apart at the top. Then, pull the pulley (bottom of pump) away working side to side. Finally, give up on brut force and work a large screwdriver between the left side of the pump and the block. Make sure you do not put any pressure on any fuel lines, sensors, or other sensitive parts. Pry the pump free of the hoses.
Remove the 10mm nuts from the back of the pump. There are 3 lengths. 2 long ones hold the bracket. Several short ones hold the pump together. 1 medium one holds the base of the bracket to the side of the pump. Don't forget this one.
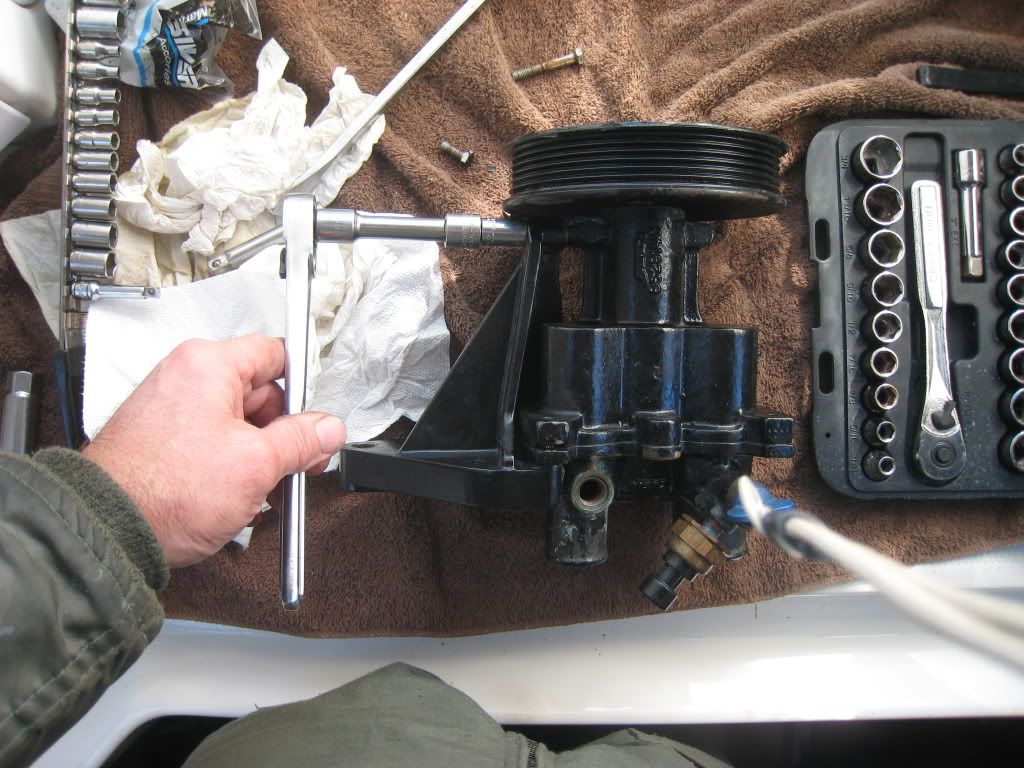
Lay pump on pulley and remove other half. Observe rotation of Impeller.
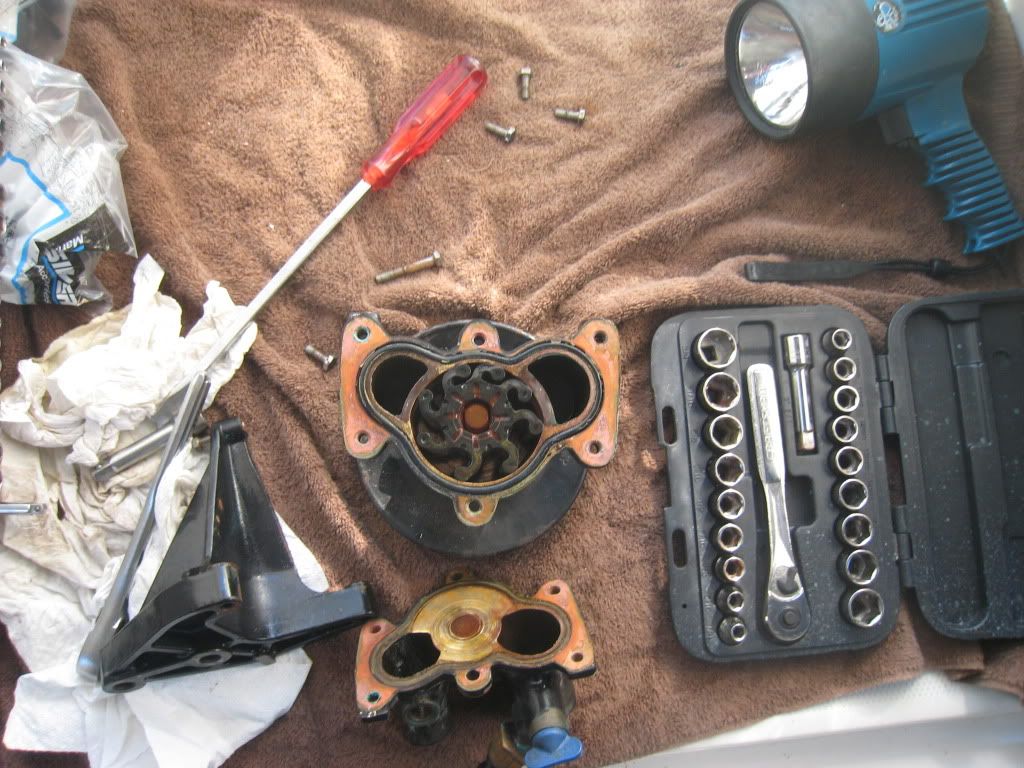
Check for wear of the housing. If it's worn, replace it - the labor is the hard part, not the cost of an entire pump.

Take the impeller out. I used to flat screwdrivers on opposite sides prying it out at the same time. Set it down in the same position to reference spin direction. Begin to insert new impeller while bending vanes over as you go around the circumference to get it started into the pump. Once you get it started, spin the pump using the pulley as a base plate and push down on the impeller to get it to go in. (I didn't notice until I got home that in the video below the pulley was slipping on the towel so you can't see the rotation of the impeller, but you get the idea.) Lube the impeller with soap or something.

Put the new O-ring into the slot. I "Glued" mine in 2 1/2 years ago with grease to get it to stay. It showed zero wear. This time, I just held it in place while slowly sliding the other half of the pump in place to keep the O-ring from coming out of the groove. Once I had it in place, I looked around the side of the pump to make sure it matched perfectly to ensure the O-ring wasn't crimped. Put your favorite product on the bolts and replace them. Put your favorite product on the hose nipples to make them come off next time. Push pump back in place while aligning hoses. Bolt on with pulley bracket in place. Replace hose clamps carefully - in place and straight. Replace sensor wiring plug. Replace blue, plastic wing bolts.
Put serpentine belt back on the way it came off, sliding it on over a smooth pulley as the last part. Use other engine or guide sticker on engine as a guide. Re-tighten the bolt on the end. Re-tighten the securing nut. Re-tighten the hinge bolt (I still have to do that on the port side - I forgot). Tighten the alternator adjustment until you can just displace the longest stretch of the belt 1/4" with pressure from your thumb.
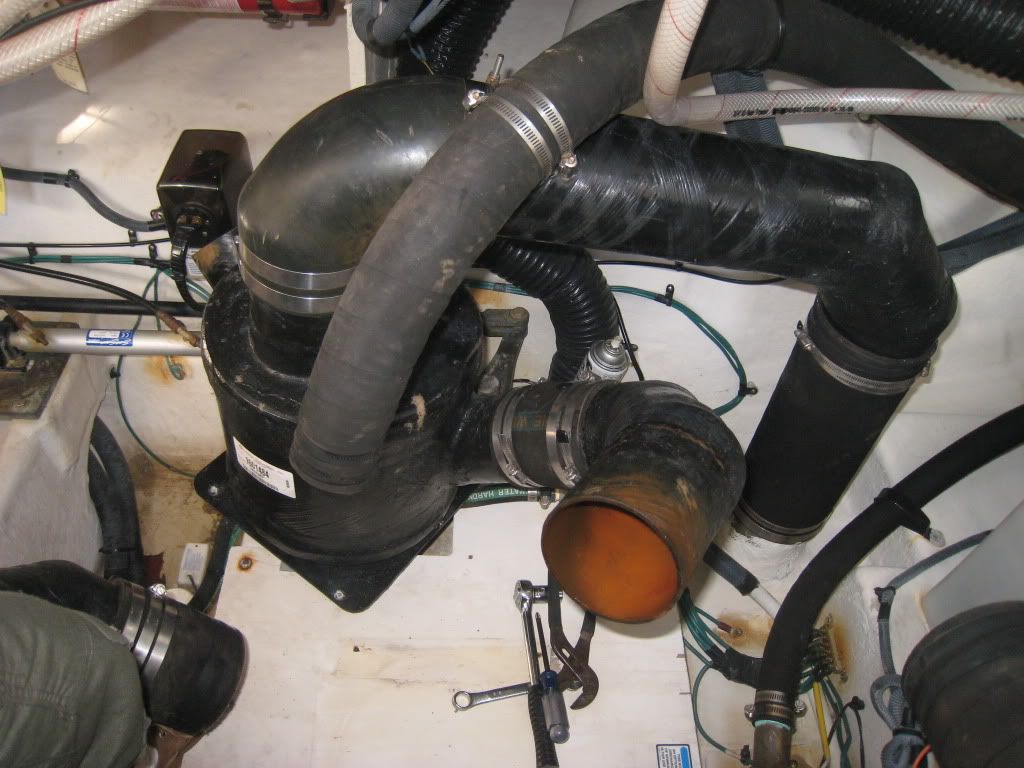
For port engine in a 2003 1/2 - 2008 340DA, move the muffler out of the way. Remove 4 base screws. Remove a couple of the exhaust hoses strategically to allow the unit to be moved aft without taking it all apart.
OPEN THE THROUGH HULLS!
Then, loosen one of the Blue Plastic Wing Bolt Plugs until water flows out to prime the lines. If you open the "Out" side port (where water flows out of the pump) and get some water, then the pump should be primed and good to go. If no water comes to that one, then open the other to get very close to a good prime. Shut those also.
Today, this took a total of 3 hours for both engines. Total cost - less than $100.
2) Remove Serpentine Belt: Note free play, then loosen alternator tensioning assembly as follows: Loosen the nut nearest the center of the engine and spin it over about and inch. Loosen the bolt at the end about an inch and allow the alternator to swing inward to loosen tension on the belt. If it doesn't swing, loosen the bolt that acts as a hinge at the top of the alt. Swing alt in and slide belt toward you off of one of the pulleys that doesn't have ridges. Keep track of direction of belt by laying it down without turning it over.
Once the belt is off, remove the 2 nuts and 1 bolt that hold the pulley bracket and raw water pump (impeller pump). The bottom 2 are of one size, are nuts, and secure the pump. The top one is a bolt of a slightly different size and only holds the pulley bracket.
Remove the pulley bracket and 2 pulleys and set aside.
Reach behind the port side of the pump and remove the two, blue plastic wing-bolt style plugs and set aside. Keep track of the O-rings. Remove the two hose brackets off of the two hoses. The bottom is outgoing and is somewhat plyable. The top one is red and is the incoming, vacuum hose (withstands vacuum from the pump). It is short and not very plyable. Remove the wire harness to the sensor from the back of the pump. There is a small tab which extends the entire length of the black plastic housing. Lift the tab and separate the two halves of the sensor housing to free the wiring. It is a lift tab.
Try to work the hoses loose by the least aggressive method possible. Try using your hands, then perhaps and awl, and in the worst case, a big ass screwdriver like me.
Once the hoses are loosened up, the pump should, theoretically, pull off straight. In reality, it won't. Put your right hand behind the top, right side of the pump and begin to pull it off of the bolts and away from the hoses. Work it up and down and back and forth. As you begin to get it out away from the block, put a large socket piece between the pump and the block from the top right to hold them apart at the top. Then, pull the pulley (bottom of pump) away working side to side. Finally, give up on brut force and work a large screwdriver between the left side of the pump and the block. Make sure you do not put any pressure on any fuel lines, sensors, or other sensitive parts. Pry the pump free of the hoses.
Remove the 10mm nuts from the back of the pump. There are 3 lengths. 2 long ones hold the bracket. Several short ones hold the pump together. 1 medium one holds the base of the bracket to the side of the pump. Don't forget this one.
Lay pump on pulley and remove other half. Observe rotation of Impeller.
Check for wear of the housing. If it's worn, replace it - the labor is the hard part, not the cost of an entire pump.
Take the impeller out. I used to flat screwdrivers on opposite sides prying it out at the same time. Set it down in the same position to reference spin direction. Begin to insert new impeller while bending vanes over as you go around the circumference to get it started into the pump. Once you get it started, spin the pump using the pulley as a base plate and push down on the impeller to get it to go in. (I didn't notice until I got home that in the video below the pulley was slipping on the towel so you can't see the rotation of the impeller, but you get the idea.) Lube the impeller with soap or something.
Put the new O-ring into the slot. I "Glued" mine in 2 1/2 years ago with grease to get it to stay. It showed zero wear. This time, I just held it in place while slowly sliding the other half of the pump in place to keep the O-ring from coming out of the groove. Once I had it in place, I looked around the side of the pump to make sure it matched perfectly to ensure the O-ring wasn't crimped. Put your favorite product on the bolts and replace them. Put your favorite product on the hose nipples to make them come off next time. Push pump back in place while aligning hoses. Bolt on with pulley bracket in place. Replace hose clamps carefully - in place and straight. Replace sensor wiring plug. Replace blue, plastic wing bolts.
Put serpentine belt back on the way it came off, sliding it on over a smooth pulley as the last part. Use other engine or guide sticker on engine as a guide. Re-tighten the bolt on the end. Re-tighten the securing nut. Re-tighten the hinge bolt (I still have to do that on the port side - I forgot). Tighten the alternator adjustment until you can just displace the longest stretch of the belt 1/4" with pressure from your thumb.
For port engine in a 2003 1/2 - 2008 340DA, move the muffler out of the way. Remove 4 base screws. Remove a couple of the exhaust hoses strategically to allow the unit to be moved aft without taking it all apart.
OPEN THE THROUGH HULLS!
Then, loosen one of the Blue Plastic Wing Bolt Plugs until water flows out to prime the lines. If you open the "Out" side port (where water flows out of the pump) and get some water, then the pump should be primed and good to go. If no water comes to that one, then open the other to get very close to a good prime. Shut those also.
Today, this took a total of 3 hours for both engines. Total cost - less than $100.
Last edited: