Trying to track down a leak and found hull and deck separation.

May 21, 2016
134
Pensacola
Boat Info
240 Sundancer 2007
Engines
5.0 Bravo 3
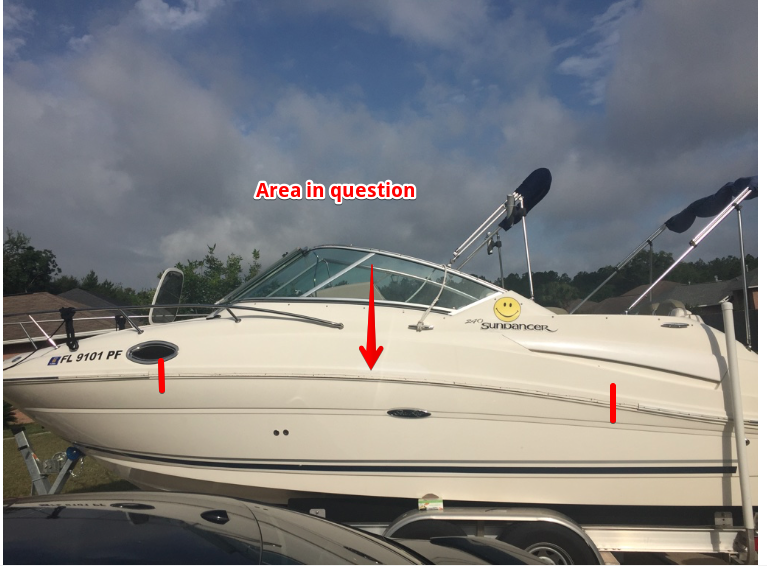
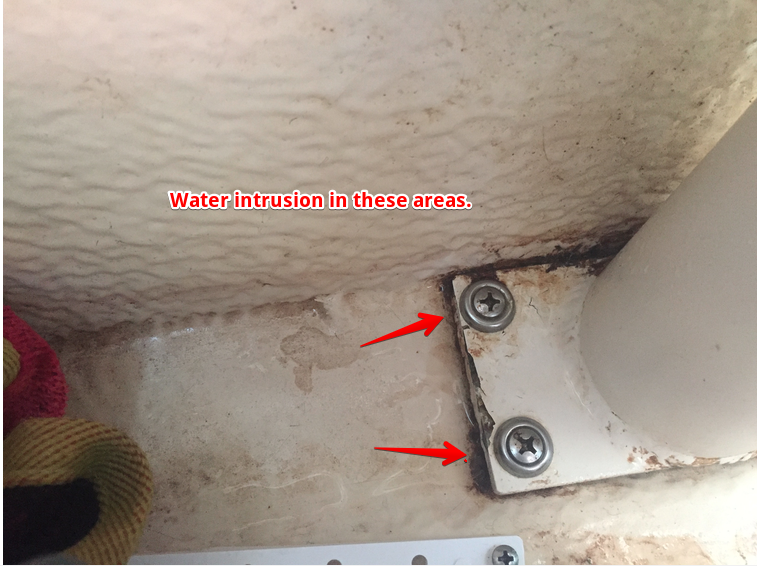
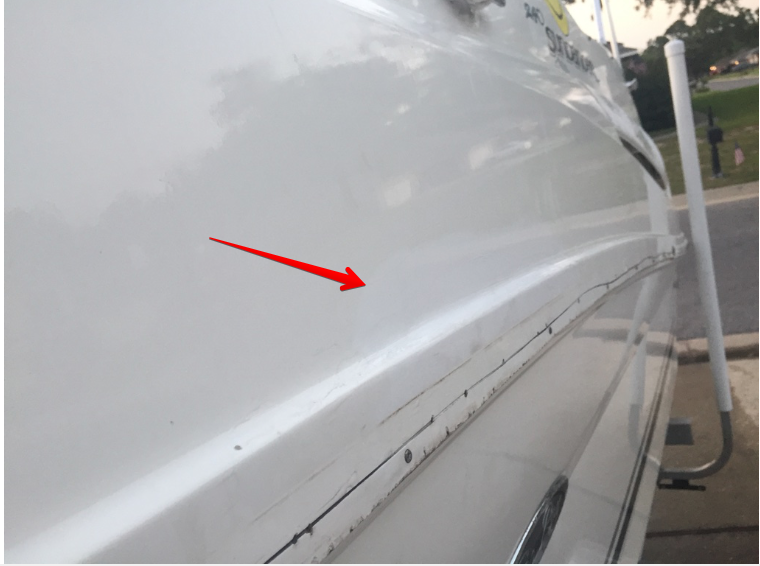
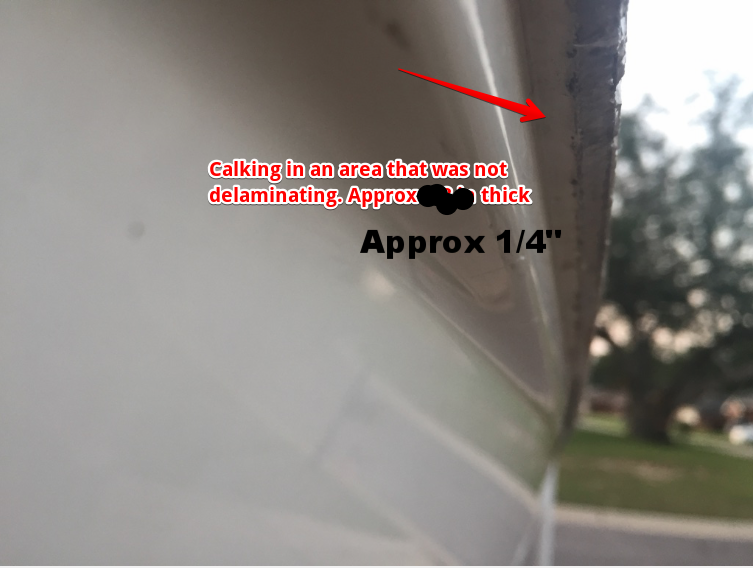
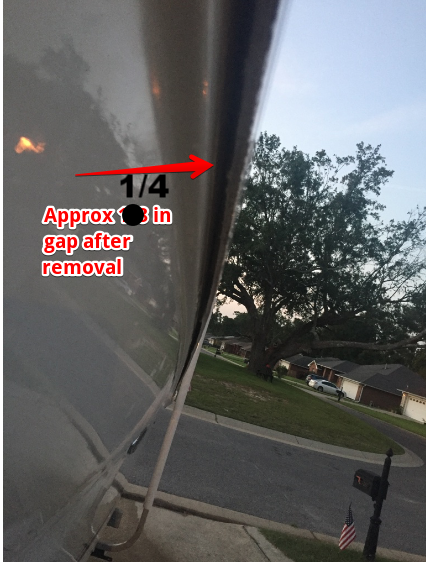
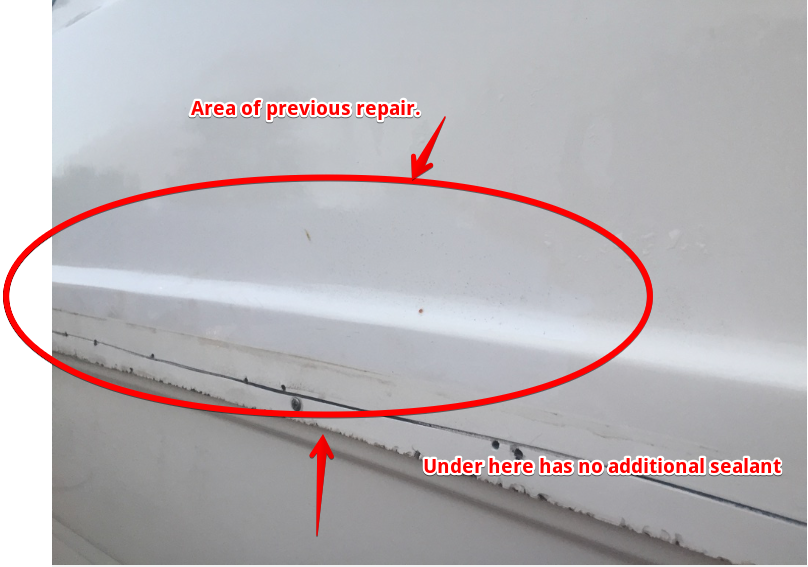
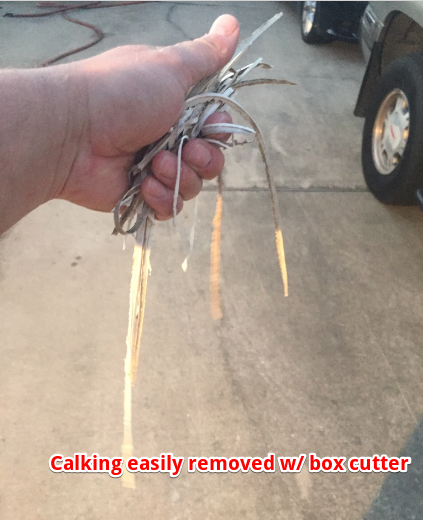
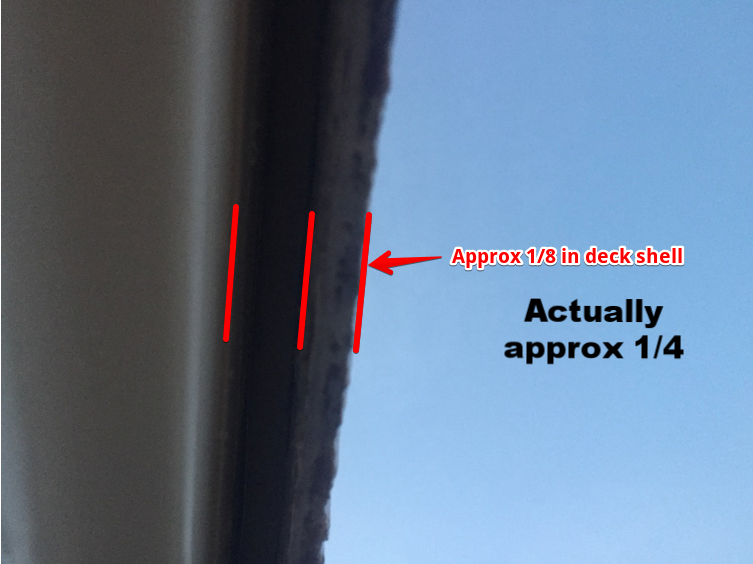
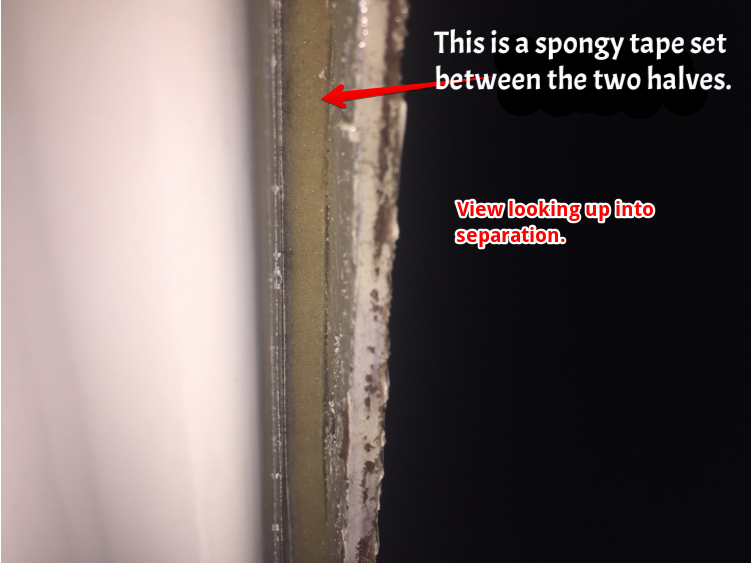
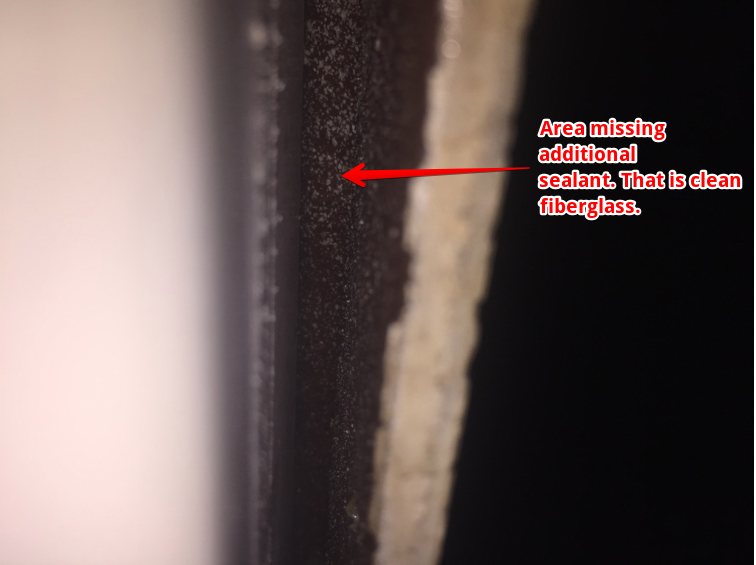
So I have been trying to track down a leak into the lower step area in the front cabin area. I noticed that the carpet was getting wet with sea water after sleeping overnight the last few times we stayed in the boat. I initially thought that maybe I wasn't screwing in the drain plug tight enough but took care of that and still managed to have sea water entering. I checked under the stair step where the shower sump is and after cooking up the water I found that the water is coming into the lower step area through the screws that hold down the support that holds the floating entry step. (Pics attached) Throughout the following day, I noticed the water receding and eventually drained from under the stairs presumably back through the screws??. This past weekend, while sleeping in the cabin, (2 adults and 1 child) I still had sea water enter under the stairs but seemed to be a little worse this time, approx an inch of standing water, and thinking about it, we had a bit more bow porpoising on our ride out which may help in determining where the water is coming from. Again, after cleaning up the water would only seep back into the cabin but mostly stopped from coming in from under the stair support which leads me to believe there is not a steady source of water entering the boat...The whole time the bilge never reached the level to be able to pump anything overboard and we were out for 24Hrs. On the way back in, we had an increased amount of porpoising due to 2-3 ft chop we were plaining through. Once back at the marina, I manually turned on the bilg pump and it pumped maybe several gallons of water overboard before stoping. So when I got back home I began to check the back of sleeping bunk and found that the back wall down by the floor was wet on the port side and so was the sleeping pad that was up against the wall. I then checked outside at the rubrail area and began to hear hollowness behind a repair in the fiberglass just above the port side rubrail midship. I decided to remove the rubrail and found the following. The screws that were holding the hull and deck together were not pulled tight and it looked as though sealant was applied to fill the gap instead of tightening down the screws to close the gap. Is this normal?
http://s66.photobucket.com/user/emckissack/slideshow/Sea Ray leak


VIDEO:


I have read the following posts about this issue and will most likely follow the same procedure.
http://clubsearay.com/showthread.php/83083-Resealing-the-hull-to-deck-joint
Questions:
1. How would water get into the area under where the step support is attached. Is it possible that it could be entering from the side?
2. I have read that 3M 5200 should be used to reseal the hull to the deck. Can anyone confirm if this is what I should use based on experience or is there something else I should use? another option is Life Caulk???
3. When I go to seal everything up, should I squeeze the calking into the gap first then run the screws back into the fiberglass and tighten them down squeezing the calking together and not leave the gap that was there previously?

Any insight and advise will be much appreciated.
 
Last edited:
check the trailerwinch pickup at the front. its very close to the waterline on a 240 and bolted thruhull into the watertank compartment . when you sleep with three persons in cabin you push it below waterline and when the sealant there is faulty it will take water into the front compartment , may find its way down and wet the carpet. it also may overflow into the v berth lockers .

you should find acceess via the left locker to touch into the watertank compartment and i bet its full of water . i had it last year on my 2006 240 sundancer.
 
good luck ! i removed the cushions ( its a pain because of a million screws ) to take a visual on the thru hull bolted hook from inside of the boat then put several people on foredeck to push it underwater and saw the water slowly leaking inside the boat . the hook was pretty tight but the sealant was gone .
 
I've got to do this same repair in the next couple of weeks. Please be sure to update this with any info you think would be helpful to those that are doing this in the future.

I've been on CSR for about 10 years now, it seems to me that posts about this particular issue are way up this season. I'm thinking that without the sealant the screws start backing themselves out pretty quickly by the time the boat is 7-10 years old. I checked my rub rail after I read about this issue for the very first time when ChuckW posted about it back in June, 2009. Everything was tight. 8 years later, I have one area on my port side that has about a 3/8" gap and I can easily see the screw going into the hull. There is another section about 6' towards the stern, and at least 2 areas on the starboard side. The gaps are smaller everywhere else.

What I've noticed is that the problem seems to be prevalent in 24' to 27' boats manufactured in the [FONT=verdana, arial, sans-serif]Riverview Plant (HIN Starts with SERR) between 2005 and 2007. [/FONT]

I think you're spot on here. My boat is a 27', the HIN starts with SERR. Many of the screws were backing out when I took of the rub rail. They snugged up nice and tight so the fiberglass wasn't stripped, but the pounding loosened the screws because there was virtually no sealant (IMO).
 
th_IMG_3359_zpsqomt895t.mp4
[/URL]

I have read the following posts about this issue and will most likely follow the same procedure.
http://clubsearay.com/showthread.php/83083-Resealing-the-hull-to-deck-joint
Questions:
1. How would water get into the area under where the step support is attached. Is it possible that it could be entering from the side?
2. I have read that 3M 5200 should be used to reseal the hull to the deck. Can anyone confirm if this is what I should use based on experience or is there something else I should use? another option is Life Caulk???
3. When I go to seal everything up, should I squeeze the calking into the gap first then run the screws back into the fiberglass and tighten them down squeezing the calking together and not leave the gap that was there previously?

Any insight and advise will be much appreciated.

BTW, that's my thread you referenced. I think I put a lot of good detail in there that will help you. Some other notes:
  • I used 3M 5200 Fast Cure. It's advertised as being intended for structural use such as deck joints. I don't want it to come apart. The Fast Cure sets in 24 hours vs. 7 days for the regular.
  • Clean the joint with MEK or similar. There was LOTS of dirt in there. A rag on the end of a plastic scraper worked well.
  • My caulk method was this: Stick tip of the tube into the gap. Run enough caulk to get a nice continuous bead. Ensure that the screw holes get some caulk to ensure water tightness. In areas where the gap is very small, I used some plastic wedges to open it up for the caulk.
  • After caulking, run the screws back in to close the gap. Ensure there is some caulk in the screw hole; if not add a dab. Some caulk will squeeze out of the joint. You need to run in the screws to get a good structural connection.
  • I removed virtually all the screws on each side. DO NOT remove all the screws at the bow!!! Wait to do this area until the side screws are reinstalled! The deck wanted to spring up at the bow and I would never have been able to get it back in place if all the screws were removed at the same time.
  • I HIGHLY recommend running some masking tape long the bottom of the gap before caulking. That way when the caulk squeezes out it will be easier to clean up. I mistakenly thought that the rub rail would cover everything, but that wasn't the case.
  • After screwing everything together, I cleaned up the oozed caulk and ran a clean bead at the joint to ensure a watertight seal.
  • The rub rail was very dirty. I cleaned both the plastic and stainless rails before reinstalling.
  • Installing the rail was pretty easy. I started with the bow section. A helper is useful here. Before starting, add a dab of caulk to each screw hole to seal it.
  • Screws. A couple of screws stripped; most were just fine. For the stripped screws I used upsized screws of the same lenght (from #8 to #10). Worked just fine. Plan on getting a handful of larger screws, perhaps 10-15. Get a couple of longer screws as well.
  • Oh, and WEAR RUBBER GLOVES when caulking. The stuff gets everywhere. Much easier to slap on fresh gloves. I went through about 25 pair of nitrile gloves. Have plenty of smallish rags on hand for cleanup too.

All in all, this isn't a terribly hard job but it is a process and will take time. All in it was about 3 days working mainly by myself.
 
it would be nice when the thread starter would give a feedback what he found before we can give further hints.
 
Sorry for the slow updates. Is has been raining on the weekends so I have not been able to move forward with any repairs. I will update this weekend weather permitting.
 
So I was able to complete the repair, so I think. LOL I ended up using 5200 down the seam and screwing the top and bottom back together and I think it went pretty well. The rub rail now sits flush against the hull and looks much like the rest of the boat now.
So here are some pics after applying the 5200 and screwing the halves back together. I managed to clean up the seam as much as I could. I feel that if that was the point of entry, it is fixed now. Once I get back out on the water I should be able to confirm. If not, I will check the tow hook for looks there.


good work ! but i cannot imagine how you got seawater via the rubrail being moored at the pier and sleeping in the boat even when its leaky and need to be resealed . its pretty high above the waterline .
 
What I gathered was that the water was intruding while under way and only made its way forward when we slept. I noted the water levels throughout the trip and only noticed an increase of the water in the bilge after beg underway.. ie to and from the mooring area. So, water collected on the way out and more water collected on the way back in so I am guessing it mad t's way in from he waves splash up on the bow. I should find out in the coming weeks.
 
Is the chrome insert concave or flat on the back side? I need to replace a section of mine, and I see both types listed in the Taco catalog.
 
Is the chrome insert concave or flat on the back side? I need to replace a section of mine, and I see both types listed in the Taco catalog.
I have detailed pics if you need. Just let me know.

Sent from my SM-G930V using Tapatalk
 

Forum statistics

Threads
113,209
Messages
1,428,619
Members
61,111
Latest member
rvlewis
Back
Top