So after I got the Quote back from the guy that installed my floor in the 310 with a 1/2" subfloor for under 3k told he me it would be 13k to do my 340. So it looks like I'm going to do it myself. This isn't a problem just a pain cause the boat is 2 hrs. away. My only question is how to cut in the storage covers? I'm using Plasteak Ez Sole which is similar to Pergo. I'll make new cover out of 3/4" ply wood.
Navigation
Install the app
How to install the app on iOS
Follow along with the video below to see how to install our site as a web app on your home screen.

Note: This feature currently requires accessing the site using the built-in Safari browser.
More options
You are using an out of date browser. It may not display this or other websites correctly.
You should upgrade or use an alternative browser.
You should upgrade or use an alternative browser.
Vinyl flooring
- Thread starter dvx216
- Start date
Stee6043
Well-Known Member
So after I got the Quote back from the guy that installed my floor in the 310 with a 1/2" subfloor for under 3k told he me it would be 13k to do my 340. So it looks like I'm going to do it myself. This isn't a problem just a pain cause the boat is 2 hrs. away. My only question is how to cut in the storage covers? I'm using Plasteak Ez Sole which is similar to Pergo. I'll make new cover out of 3/4" ply wood.
Are you talking about the hatch covers? I used a router to cut mine. Finish the floor over top, router around the edges...

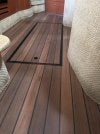
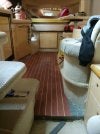
This is my 310 that I just finished up. I cheated by hiring a local guy to rip out the old carpet and scrape the floor. Didn't need to add a subfloor, as the existing floor was smooth enough. It just depends on how solid and thick the old carpet glue is.
For the hatch, I used ½" plywood and built up the flange on which it sits to insure the hatch sits even with the surrounding floor. In my case, ¾" + the thickness of the flooring would have had the hatch sit too high. Not only that, but ¾" would have been a lot heavier.
I couldn't reuse the old hatch because removing the carpet left a huge gap all the way around.
For the trim, I used ½" 'L' molding, cut to size and glued down with clear silicon on both the hatch and the opening.
Attachments
So did you use 3/4" plywood to make the new covers ? Did you router out the flooring around the opening then matched up different pieces on the covers to the floor and used a router on them.Are you talking about the hatch covers? I used a router to cut mine. Finish the floor over top, router around the edges...
370Dancer
Well-Known Member
- Oct 2, 2006
- 2,489
- Boat Info
- 1998 370 Sundancer
- Engines
- 380hp MAG MPI Gen VI with V drives
search the forum for "Jonny Corners"
Stee6043
Well-Known Member
So did you use 3/4" plywood to make the new covers ? Did you router out the flooring around the opening then matched up different pieces on the covers to the floor and used a router on them.
Mine were 1" so I glued two pieces of 1/2" together to make the hatches.
I used the flooring that I cut out to cover the hatch covers. That way they'd match perfectly.
And +1 on Jonnycorners...

How did you make the cuts and know where the opening's edge was once you covered it with the flooring.Mine were 1" so I glued two pieces of 1/2" together to make the hatches.
I used the flooring that I cut out to cover the hatch covers. That way they'd match perfectly.
And +1 on Jonnycorners...
Stee6043
Well-Known Member
How did you make the cuts and know where the opening's edge was once you covered it with the flooring.
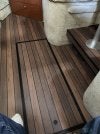
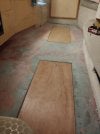
It takes some planning for sure.
The photo below shows roughly where I would have started routing. Cut from the opening, then install the last piece (to the left) and finish the cut on that piece after the others have been removed.
The worst part is trying not to step on the floor over the hatches during this process
")
370Dancer
Well-Known Member
- Oct 2, 2006
- 2,489
- Boat Info
- 1998 370 Sundancer
- Engines
- 380hp MAG MPI Gen VI with V drives
You might want to clear out the bilge lockers first. I didn't have that kind of time.....How did you make the cuts and know where the opening's edge was once you covered it with the flooring.
Where'd you get the finish trim.Mine were 1" so I glued two pieces of 1/2" together to make the hatches.
I used the flooring that I cut out to cover the hatch covers. That way they'd match perfectly.
And +1 on Jonnycorners...
Jimmy Buoy
Well-Known Member
- Dec 3, 2008
- 2,468
- Boat Info
- 2003 Cobalt 293
- Engines
- Twin Volvo-Penta 5.0 270hp & DuoProps
That's a great looking floor - what's the material if you don't mind sharing the info?This is my 310 that I just finished up. I cheated by hiring a local guy to rip out the old carpet and scrape the floor. Didn't need to add a subfloor, as the existing floor was smooth enough. It just depends on how solid and thick the old carpet glue is.
For the hatch, I used ½" plywood and built up the flange on which it sits to insure the hatch sits even with the surrounding floor. In my case, ¾" + the thickness of the flooring would have had the hatch sit too high. Not only that, but ¾" would have been a lot heavier.
I couldn't reuse the old hatch because removing the carpet left a huge gap all the way around.
For the trim, I used ½" 'L' molding, cut to size and glued down with clear silicon on both the hatch and the opening.
It's made by NautikFlor. Defender sells it.That's a great looking floor - what's the material if you don't mind sharing the info?
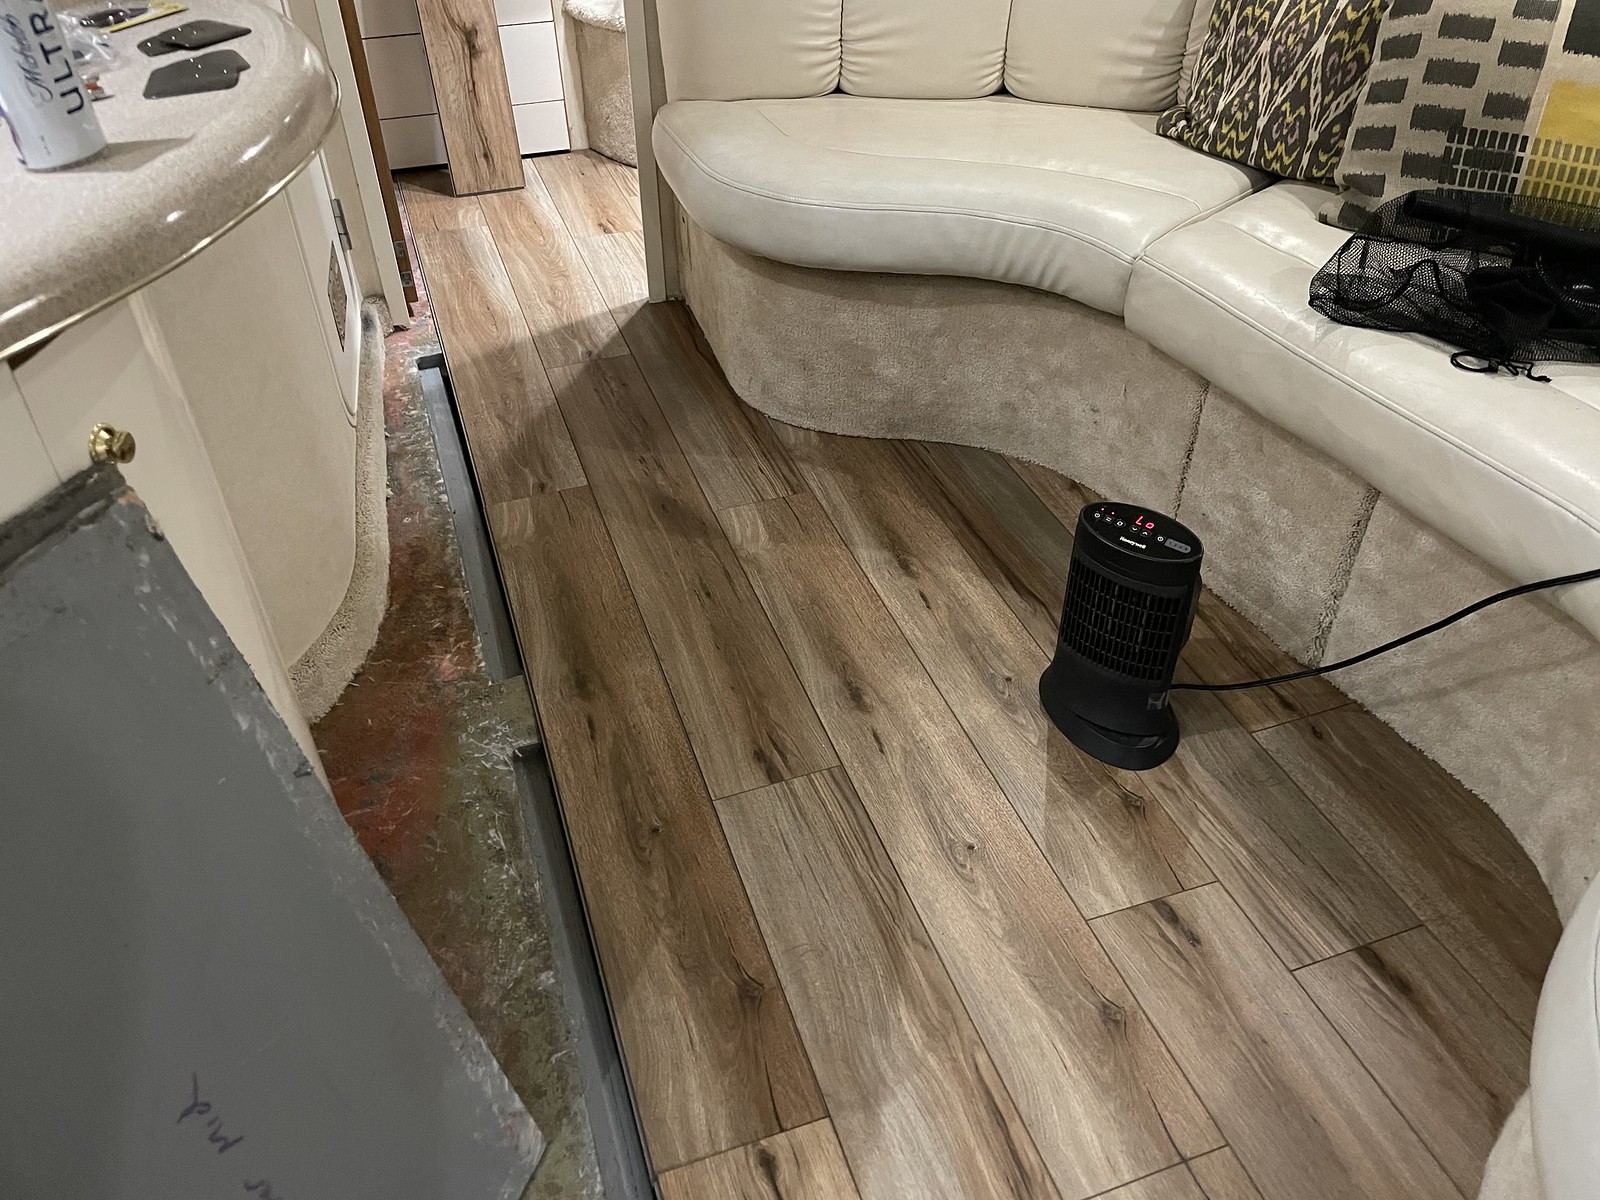
Spent the day yesterday with a band sander leveling out the floor around my forward floor hatch. The storage cover supports were over a 1" lower then the floor. Instead of trying to build them up I'm going to replace them all together.
Okay got a question . Sea Ray got carried away when gluing down the floor around the forward floor storage opening. There is a spot about 8" long that humps up a 1/4" above the cover that is flat. The floor is a 1/2" thick Ply. I was thinking I could go under the floor with my oscillating tool cut it free level out the high spot then glue and screw it back down.
- Apr 26, 2009
- 5,821
- Boat Info
- '97 330 Sundancer, Raymarine C80 suite with radar, Mercury 310 Hypalon w/8hp Yammie 2stk
- Engines
- 2X 454 carbs w/ vDrives
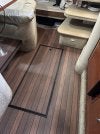
Looks fantastic. Its still on my list or projects to replace the carpet in my 97 330 with vinyl. How many hours do you think you have invested in your project?One step closure.
Fancy pants
New Member
- Dec 8, 2020
- 6
- Boat Info
- 380 Sundancer 2003
470 Sundancer 2012
- Engines
- Mercury 8.1
Cummins with zeus
What are you using for the edging on the step going to the aft? I’m in the process of doing the same thing on my 38.One step closure.
Plasteak sells a 2'x4' vinyl sheet that matches the floor that I will make a trim piece out of along with floor trim.
6 to 8 hrsLooks fantastic. Its still on my list or projects to replace the carpet in my 97 330 with vinyl. How many hours do you think you have invested in your project?
