tlrlc
Member
- Sep 13, 2013
- 251
- Boat Info
- 2007 310 sundancer
- Engines
- mercury 6.2 horizon x 2
vdrive/bow thruster
I did the same thing but even manual doesn’t explain key needs to be in ON position for vacuum to work
Follow along with the video below to see how to install our site as a web app on your home screen.

Note: This feature currently requires accessing the site using the built-in Safari browser.
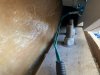
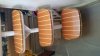
I'm going to be hinging mine after Christmas.View attachment 76125 View attachment 76127 Taking down my arch on my 2008 310 for shipping from TN to Fort Lauderdale.
Here are some relevant pictures:
Lonseal Teak and Holly.Anybody decide what to do with the ugly ‘pinkish’ cabin steps? I mean, they are driving me crazy!
Lonseal Teak and Holly.
Can you just give that advice out here? I'm fixing to do that to mine.Lowered my radar arch for transport. Not too bad a job. Tennessee to Fort Lauderdale.
Anybody need advice pm me.
Nice write up! Thanks!Happy social distanc … er, I mean Spring everyone. Over the winter I replaced an old, worrisome Inteli-Power PD2130 with a shiny new, worry-free Promariner Pronautic 1240P Battery Charger and wanted to share some lessons learned in hopes of saving anyone interested in taking on this project some potential heartburn. While there has been plenty written on this topic there was still a substantial amount of information that had to be discovered firsthand. To be honest it took longer to do the research than it did to make the swap, but that doesn’t mean it was easy. It took the Admiral and I about 6 hours to complete.
Disclaimer: I am NOT an ABYC Certified Marine Electrician or any type of electrician for that matter and this is by no means a step-by-step accounting of the work involved, but a listing of things I as a DIYer encountered and thought might prove helpful for the next guy. It is assumed if you are going to take this project on you don’t need me to tell you to disconnect the shore power, batteries, use marine grade wire, shrink tube, etc. As usual the Sea Ray Parts and Owner’s Manuals provided very little guidance.
The boat: 2008 SR 310 DA - 6.2L MPI’s, Bravo 3’s, factory bow thruster, 5ECD genny.
Lessons Learned …. Somewhat in order of importance:
1) The 40amp charger was not my first choice. However, due to the Carling Series-A breaker chassis size we are limited to a 50amp capacity DC breaker in the Main DC Panel which assuming you follow Promariner’s recommended breaker sizing and without doing extensive DC bus bar modifications the charger is by default limited to 40amps. Now, that being said, if you were so inclined you could by-pass the factory DC breakers and utilize ANL style fuses you could indeed move up to a larger capacity charger. I went with the largest charger recommended based on the limitations of the available direct replacement breaker capacities.
2) In total the larger capacity charger required upgrading the AC breaker (10amp to 15amp), the DC breaker(s) (30amp to 50amp), both AC and DC wiring associated with the charger and the circuit and case ground wiring.
3) Existing configuration: On the Main DC breaker panel / battery switch the boat had 1ea. 30amp factory breaker installed with Battery Chargers No. 2 and No. 3 blanked off. I changed this configuration and utilized Battery Charger No. 1 and No. 2 breakers by landing one of the 2 positive legs from the charger on to the Line side of each new 50amp breaker then, like the factory wiring, jumping over to the lugs on the bus bar from the Load side.
4) The Carling breaker model numbers are derived from a Di Vinci Code level ordering scheme, once the existing breakers were in hand I found the breaker codes were outdated and couldn’t be used to order new breakers. Eventually and with input from Carling's Tech Service I was able to get through the riddle of the ordering scheme only to find the Carling suppliers didn’t stock the incredibly specific 14-digit model number and just stocked a basic/generic breaker. See Materials List below for model numbers as received.
5) There are 2 choices as to where to land the DC side of the power: A) straight to the batteries through ANL fuses or B) back to the Main DC Panel which will allow you to use shore power to power things like the hatch, radio, etc. directly through the charger even if the batteries are out of the boat. For this reason I chose option B.
6) You have 3 ways to safeguard the wiring and electrical systems: A) Upgrading the breakers B) using the proper ANL fuses or C) you could conceivably do both. I chose A and replaced the factory breakers.
7) It would help to have small hands and a part-time, at a minimum, helper is a must.
8) The 40amp and larger Pronautic chargers use .25 in. lugs for connecting the DC positive and negative cables and a No. 6 hold down type screw on the AC side. All the breakers were ordered with the screws to match the factory bus bar connections. I think they are No. 8. The correct connection sizes are embedded in the model numbers listed below.
Materials:
1) 2ea. 50amp Carling guarded rocker style circuit breakers, yellow lettering, ignition protected, text & symbols. They came as model number AO1-X0-0X-XXX-XX3-I. For reference the existing 30amp breaker model number was: AO1-X0-06-057-X63-I
2) 1ea. 15amp Carling circuit breaker, white lettering, ignition protected, text & symbols. Model Number: AD1-B0-34-6xx-x11-I. For reference the existing 10amp breaker model number was: AD1-X0-10-582-X11-I
3) I used roughly 40 feet of 6ga awg (Red), 2 feet of 6ga awg (Black), 2 feet of 8ga awg (green), 25 feet of 3 conductor #14 for the AC power, 20 feet of 1.5 in. wire loom (DC) & 25 feet of 1” wire loom (AC), zip ties with screw holes, heat shrink tubing, connectors, etc.
Specialty Tools:
1) Large diameter cable cutters
2) Adjustable type cable crimper
3) Wire Tracer - not a single wire I touched was numbered on both ends.
4) Amp/volt meter
5) Ridged fiberglass wire fish rods came in handy.
I am not sure if I am allowed to say specifically where I bought the parts, but everything was ordered on-line.
Best of luck!
Keith