Any 270sdx or 290sdx owners with windlass - pictures needed

paulswagelock

Well-Known Member
Oct 25, 2010
2,198
pa
Boat Info
2018 SDX 270 OB 300 Verado
Engines
Verado 300
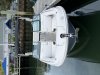
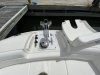
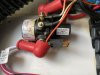
I didn’t like the aesthetics of the windlass when I ordered my boat, so I did not check the box. Now I am regretting it and want to add it. I could use a picture or two (from a 2017 or newer ideally) from above looking down at the windlass with the hatch open and closed, and one from inside the center bow seat cavity looking up at the underside of the windlass. I need to see if they add support to the structure or just glue and bolt the hdpe board in place and mount the windlass.

thanks in advance.
 
Last edited:
Here's what I have to show right now. I can take some more photos next time I'm at my marina - especially the inside of the locker. Hopefully next weekend, weather permitting. Any other specifics or measurements you need - let me know, happy to help.

This is a 2019 SDX 270. A couple things to note:
  • There are two switches at the helm: one that turns power to the windlass on and off and another that actually moves the motor in/out. The first switch turns on/off a latching relay in the bilge that supplies power to the windlass (photo #3). Not sure if there are any regulatory reasons for this setup. I guess it's nice to have the peace of mind when you're done and you turn off the windlass, but I always thought it was a waste of a switch.
  • The end of the anchor rode is tied in a big ole knot on the inside portion of the bow towing eye. It's a nice security measure in case the windlass fails but the anchor rode *always* gets snagged on it. Every time I drop the hook I have to run to/from the bow and untangle the rode as I pay it in/out. I'm currently working on a fix and will post my progress here soon!
  • With the hatch fully open, the vinyl upholstery sits on top of the starboard nav light which eventually causing a tear you'll have to fix . After these photos were taken I installed a short line of paracord that stops the hatch from fully opening. If you do this from the onset you can eliminate the tear altogether!
 

Attachments

  • 2020-05-03 12.35.56.jpg
    2020-05-03 12.35.56.jpg
    185.8 KB · Views: 243
  • 2020-05-03 12.39.14.jpg
    2020-05-03 12.39.14.jpg
    148.9 KB · Views: 251
  • 2020-05-12 19.19.21.jpg
    2020-05-12 19.19.21.jpg
    154.7 KB · Views: 255
Last edited:
Thanks so much.
I would like to see the paracord. I already had that vinyl replaced under warranty as it was ripped from the factory on delivery - known issue that I spoke to Sea Ray directly about.
Could you look or feel underneath. I want to verify there is no additional support structure added. The fiberglass is almost an inch thick up there, so I do not believe anything was added.
I worried that there was not sufficient clearance for the rode to wind and fall properly, you confirmed there is an issue.
Also, is there a make and model number on your windlass?

Appreciate your help.
 
Here's what I have to show right now. I can take some more photos next time I'm at my marina - especially the inside of the locker. Hopefully next weekend, weather permitting. Any other specifics or measurements you need - let me know, happy to help.
This is great information! Thank you for sharing! I have a 290 on order, and I will definitely take this advice. I'll get a paracord or some other type of holder so the lid doesnt strike the light. I wonder if you could make some sort of plastic or vinyl piece that would cover the through-bolts to stop the rode from snagging on them? Maybe someone with a 3D printer could come up with something.
 
I have a 290 ss so not entirely the same but I added a windlass where it was a factory option but not installed. There was no additional support under the decking from what I learned and has worked flawlessly for a couple years. Wiring can be a bitch and I had to use some marine board to cover the existing hole as it did not line up perfectly with the windlass. Thankfully the mounting screws were not affected. I have not yet installed the solenoid to use the dash switches. Haven't found the wires yet so I use the foot pedals on the bow instead. You will probably have to install a breaker too. Unless you have power wires already up there and I doubt it, its quite a job but well worth it.
IMG_1584 (1).JPG

The original hawse made a mess of the gelcoat when removed.
IMG_1628 (1).JPG
IMG_1647 (1).JPG
IMG_1650 (1).JPG
IMG_1780 (1).JPG
Yes, I put a new rubber seal around the base!
IMG_1797 (1).JPG
 
Last edited:
Thanks for your write up. I think pulling the wires would be the worst part on my installation. I wouldn’t put switches at the dash. Last boat had them but I never used them, I like to be at the bow to watch the anchor chain and rode. I think I would skip the master power solenoid as a result and use a master power switch at the batteries to keep the circuit shut off when not in use.
 
Last edited:
Yeah, I've been ok not having the dash switches attached. Using the foot pedals is more convenient because you can watch if the rode gets bound up or stops feeding. Shouldn't be as hard because you won't have to remove interior stuff. I had to pull the microwave and some cabin panels. There was also very little access to the anchor locker. I wired my power downstream from the battery switches so its off when the batteries are off. Good luck!
 
@paulswagelock Here's a bunch of photos of my Sea Ray factory installation. Note the paracord I added to keep the hatch from opening too far. Simple, but gets the job done. Still working on the fix for the tangled rode. Will update if I ever get around to it.

2020-09-07 08.32.52.jpg 2020-09-07 08.33.18.jpg 2020-09-07 08.33.31.jpg 2020-09-07 08.33.37.jpg 2020-09-07 08.34.40.jpg 2020-09-07 08.34.56.jpg 2020-09-07 08.35.06.jpg 2020-09-07 08.37.32.jpg 2020-09-07 08.37.44.jpg
 
@paulswagelock Here's a bunch of photos of my Sea Ray factory installation. Note the paracord I added to keep the hatch from opening too far. Simple, but gets the job done. Still working on the fix for the tangled rode. Will update if I ever get around to it.

View attachment 91843 View attachment 91844 View attachment 91845 View attachment 91846 View attachment 91847 View attachment 91848 View attachment 91849 View attachment 91850 View attachment 91851
Spectacular, thanks. The factory told me the hatch is reinforced for the windlass but clearly it is not. You have provided everything I need. Thanks so much.
 
Hate to dig up an old thread, but looking to add a windlass to my 2017 270SDX. The hatch currently doesn't have the opening for a windlass, has anyone added a windlass and purchased an OEM hatch with the cut out? or just custom cut their existing?
 
Hate to dig up an old thread, but looking to add a windlass to my 2017 270SDX. The hatch currently doesn't have the opening for a windlass, has anyone added a windlass and purchased an OEM hatch with the cut out? or just custom cut their existing?
See my reply on this thread, http://www.clubsearay.com/index.php?threads/2012-260-sundeck-windless-install.114082/
You can cut the existing hatch. Finding 6 year old fiberglass parts new-in-box might be difficult.
 
Thank you! how long ago did you do it and did $6500 include everything including parts etc.? Did you use the switches at the helm? Looks great btw.
Installed winter 2023, price was complete turn key, out the door. Currently using the helm switches. I might add a foot switch or handheld remote this winter.
 
Installed winter 2023, price was complete turn key, out the door. Currently using the helm switches. I might add a foot switch or handheld remote this winter.
I'll have to see if I can find someone down here to do that. Do you know what windlass was used. Looks really clean with the stainless piece underneath
 

Forum statistics

Threads
113,186
Messages
1,428,171
Members
61,097
Latest member
Mdeluca407
Back
Top