Grill Pedestal Install

I e-mailed Magma customer service about the water pooling issue and got this reply:
We also had the same concerns and thoughts, but it does no good to plug the threads as the spring button hole will also fill.

I would suggest no deck adhesive or sealant be used between the plate and deck as to allow the water will run out. I also suggest flushing the deck hardware with fresh water before storing the boat.

Unfortunately, we are not the manufacturer or the designer of this product, and as it's design is patented, we cannot produce our own modified version at this time. If sales demand allow, we will most likely design our own pedestal in the future.

Great, NOW they tell me not to use deck sealant? Interesting that they sell what isn't their own design. Not an unusual occurrence though. I'll just have to live with the bit of water pooling up. I'm not bothered enough by it to go ripping it back up again. But if I did I'd probably alter the base to allow water to drain. Probably by positioning the base so the release button was toward the low side, and then using a dremel to cut drain grooves suitable for the tilt. Of course that'd be 'one more thing' to keep from of debris. I'd be hesitant to raise the base up on washers due to corrosion and weigh distribution issues.
 
I e-mailed Magma customer service about the water pooling issue and got this reply:

Great, NOW they tell me not to use deck sealant? Interesting that they sell what isn't their own design. Not an unusual occurrence though. I'll just have to live with the bit of water pooling up. I'm not bothered enough by it to go ripping it back up again. But if I did I'd probably alter the base to allow water to drain. Probably by positioning the base so the release button was toward the low side, and then using a dremel to cut drain grooves suitable for the tilt. Of course that'd be 'one more thing' to keep from of debris. I'd be hesitant to raise the base up on washers due to corrosion and weigh distribution issues.

Bill,

Thanks for following up on this for us! My pedestal mount should arrive later this week and having read the various posts on the subject of water pooling in the mount, I appreciate your creative mind! I think I'll have a look at using my Dremel tool to create those drain grooves you eluded to. Any other thoughts on the subject would be appreciated!

Cheers!
 
If the area you're going to use has a slope to it then it might be worth trying to align the release button on either the upward or downward side of the slope. Then work a groove into the base to allow water to drain. The trouble with this idea is the top of the pedestal has only two positions for making the grill 'square' with deck below. So you might get lucky and when the pedestal is screwed tightly into the base, with the grill mounted, the base may be able to align at a useful drain angle.

And add it to your winterization checklist. I wouldn't want the moisture left in to freeze. I'm not sure how I'll work around THAT. I'm still leaning toward making some sort of cap to cover it. One... more... ToDo list item...
 
The extended swim platform is pretty level when the boat's at rest. But since I trailer her, it would be nice for the base to drain when she's being pulled up the launch ramp. Thankfully, the swim ladder cover of the swim step will keep any rain water out - not that it ever seems to rain here in California. I wonder, if it would be possible to attach some sort of cap or plug to this swim step ladder cover in such a way that it's perfectly aligned with the pedestal base, thus covering or plugging it every time one closes the cover? Hummm... sounds like a lot more work that simply machining a couple of grooves into the base.
 
Bill, I had a thought about your cap. It would be pretty simple to epoxy a disc of plastic or aluminum to a short length of 2" tube. However, if the goal is to keep the water and crud out, you can't put a finger hole in it to help you remove it.........guess if the fit was loose enough you could grab it by the edges.

We have a vast selection of plastic plugs we use to plug ports in our products prior to shipping. I'll go see if we have anything in the 2" range.........

cheers,

Bill
 
My two bobs worth on the pedestal mount.

I don't think these mounts were designed initially for outside use, i have had these on my sailing boat for the dining table for some years now, the idea was to remove the dining table to extend the lounge area into a bed.

They sell these pedestals by themselves here in Ozz and when I suggested to the store to use them as a mount for the magnum griller the store person replied haven't heard of that but hey might work.

To remove water and sand you could grind some lots between the bolt holes using an angle grinder

Ozzie
 
Just got my grill and pedestal in last night and was 'dry' fitting everything. The top part that releases is very tight, plus it seems the weight of the grill pushes it down to further exacerbate the issue. Anyone have a problem after install of lifting it off?
 
Yep, it is rather tight. I've learned to untwist the pedestal from base a bit first, pop the grill off the top and then untwist and remove the pole. Otherwise the pole is too tight, either screwed into the base or wedged in the grill base. I'm guessing it'll loosen up over time, but that'll probably introduce other issues. So it's probably better to have it a bit tight.
 
Just an update here are recent pictures with the final install.
Has worked out better than I thought.
And cools down in under 15 min to be put into dockbox.

Just waiting for the Fresh Salmon from neighbors outing!

P1010060-1.jpg


P1010061-1.jpg


P1010059-1.jpg
 
DT,
Looks good. Soak the fish in some soy sauce with wasabi powder for 30 mins. Then, Melt some butter, baste it on your fish. Spread brown sugar coated evenly over the fish,
I usually grill for 50 minutes on cedar planks that have soaked for 2 hours at least, but I haven't used soaked cedar on the boat yet. Anyway, use foil at 375-400 degrees(Med-Low or LOW setting) for 25 minutes.
 
Todd
We usually just grill Salmon Filets with the skin on.
Marinate for 30 min in soy sauce, garlic and a little ginger root shavings.
Grill meat side down on med-high until fish releases from grill.
Turn and grill skin side 1/3 the meat side down time and with spatula slid under the skin will release meat with beautiful grill marks on it and still moist.

Neighbor fisherman and wife supply fish
Admiral and I cook and supply wine.
Life doesn't get much better on the Great Lakes!!

Nice.
I cook Halibut that way, but never have cooked Salmon on the meat. To me it drys out too quick.
The garlic and Ginger root I'll have to try.

The Admiral really likes the brown sugar. It sets up as a crust on, and with the wasabi kick it's a nice balance.
 
Todd
If you cook it meat side down with the marinade, basically the fish is cooked when it releases from the grill.
Turning over for 1/3 the time of release just finishes the meat.
Until Weber changed there instructions on this ( 2006 ) my cooked fish was always either too dry or too moist or almost poached for me.
Try it and let us know.

Dan
 
This is where it will end up being mounted. Looks like it should be straight forward with just a small amount of contorting. I will probably make a backer plate for the underside also. I will get this pic thing figured out and post pics of the install. Once again my apologies for the multiple posts,
Proposedlocationofmount.jpg

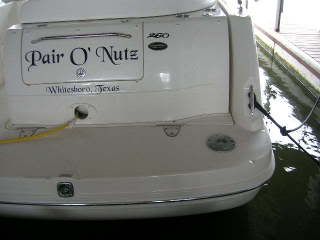
Hey Pair O' Nutz!

How did is the install going on the grill?

We just so happened to buy the same Magma Newport Grill and pole just yesterday ($203 at www.wholesalemarine.com - great prices and delivery - class act) for our 2006 260 Sundancer. We are looking for the best place to mount the pole also. I my put it near the existing cockpit table mounting plate near the starboard wall - will know more tomorrow. (by the way , we are the "Newbies" on Lake Texoma you e-mailed a month ago - I asked you about rear entry on a slip).

On another subject: Does your bilge pump area look like this? I'm wondering where all the water is coming from? The MarineMax tech says it is normal... what does yours look like if you could post a picture.

Hope to see you soon on the lake!
 

Attachments

  • Image00001.jpg
    Image00001.jpg
    73.8 KB · Views: 260
  • Image00002.jpg
    Image00002.jpg
    32.8 KB · Views: 236
Last edited:
What a weekend! Spent Saturday figuring out how to best mount my party kettle bbq to the pedestal. Turned out to be easier than I thought! I think Todd previously suggested to utilize the L-bracket that comes with the kettle and functions as the attachment point for the various mounts such as the pole holder mount we'd been using up until now. The old L-bracket is smooth, the new one scored for better clamp friction. Anyway, I had the bend the L-bracket to make it into a perfect 90-degree angle bracket. I then took a couple of pieces of 1.5"x1.5"x1/8" aluminum angle stock and cut 2 length measuring 3" long (the same length of the plastic mounting plate of the pedestal. I then scored the old angle bracket of the kettle bbq radiating out from the mounting hole to give it more grip, once mounted. I then drilled a hole into both aluminum angles centered and near the top of one of the sides. This is were the bbq L-bracket would mount to, sandwiched in between the aluminum angles set back to back. Anyway, now it was just a matter of installing the L-bracket sandwiched between the aluminum mount I had just fashioned, lay it on top of the plastic base, mark and drill the 4 needed mounting holes into the aluminum brackets and voila - we have a mount.... well, almost. Turns out, that an ideal aluminum angle bracket would measure 1.5"x2" in order for the gas feeder tube of the bbq to clear the bracket itself. So I had to notch mine out about 3/4" wide in the bottom center to allow for sufficient clearance (that, plus a couple of washers to act as spacers between the brackets and the plastic base. Anyway, even with this minor adjustment the installation is VERY clean and VERY solid. We tested it out on the lake yeasterday and absolutely love it (like others, I mounted the base underneath the lid of the ladder of the extended swim step).

Thanks all for the various suggestions you've made towards this project! I'd post pictures, if I only knew how!

Cheers!
 
One point that was brought up last weekend was positioning the base. If you're going to raft up with people and want the grill to be usable then it might be better to position it at the center of the platform. Putting it at the sides means you're not going to be able to walk from another platform through that area. Not a big deal, and some might argue against the idea of having a hot grill in an active walking area. But it's something to think about.

I've seen a couple of platforms with a table style socket mounted into them. The removable base is a little taller, but has a rounded edge. The socket type base, of course, requires drilling a much larger (4 inches?) hole. That and the socket for the grill has to be trimmed to fit the underside, and is about an inch higher than the removable one.

I picked up a table post and socket setup last season expecting to just bite the bullet and cut the hole. Now that I've got the removable one I'm glad I didn't. It's a little smaller and lighter and saved me from the hole saw...

So there's definitely a number of choices to consider.
 

Forum statistics

Threads
113,202
Messages
1,428,458
Members
61,109
Latest member
Minnervos
Back
Top