

- Oct 12, 2006
- 1,974
- Boat Info
- "On Vacation"
2006 40 Sundancer
Raymarine E125 & HD Radar + Garmin 5208
- Engines
- QSB5.9 380 Cummins
Our microwave blew-out last week. It would run for exactly 37 seconds and stop. As with most electronics that are 10+ years old, it has been discontinued and no one has parts. Buying a replacement for home use - no problem. However, as we all know, replacement on a boat has other considerations mostly around the size of the unit. After considerable time researching the size and features of many many microwave out there(and the purchase of not one, but TWO wrong sized units) I have located a replacement which is the correct size. I also will share a 'special technique' I came-up with for replacing the old Panasonic Inverter Microwave, which by the way is used in several Searay models.
Here are the details you need.
Original OEM model:
Panasonic Genius Model NN-T695SF
Which looks like this.

Replacement Unit
LG Electronics Model # LCS1112ST
Which looks like this:
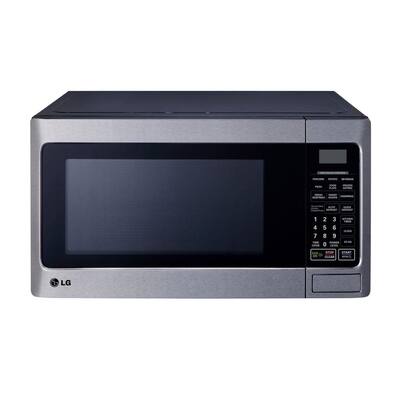
The replacement unit doesn't have inverter technology and is a bit smaller in power and capacity (1.1@1000watts vs 1.2@1300watts cf). However, the LG has one KEY feature: the right dimensions to fit in the opening! It is actually approx 3/8" shorter but almost same width across. I purchased it from Home Depot online.
The 'special technique' I used to make this job even easier is to SWAP the BOTTOM plates between the microwaves. Why go through that process? Searay uses a wood filler piece at the bottom of the OEM microwave to allow the microwave to be mounted within the cabinet opening and also to give it that 'custom' look without seeing the space at the bottom of the microwave. The filler piece screws into the microwave on one side, and is secured by screws from underneath the shelf. A common technique used by Searay and other boat manufacturers. In the picture of the OEM microwave above, you can see the 'legs' protruding down... these are hidden by the black filler piece.
By swapping the metal bottom plates, you can USE THE SAME wood filler piece without any modifications to the cabinet or the filler piece!
Details regarding the swap technique: The LG bottom plate is actually about 1/4" larger on each side but that's fine since you won't really see it back there. You need to remove the transformer from the base plate AFTER you remove all the screws from the outside edges of the base plate. Don't unscrew the transformer in the middle as it will drop, damaging your unit. Once the old plate is centered on the new microwave, use a drill to drill holes where appropriate and screw the plate back on. Make sure it is centered. and that the door opens and closes. I ended up flipping the three small metal tabs in the front, and under the plate.
You can also opt not to use the filler piece at all but then you will have a less professional looking installation and will still have to figure out how to keep the new microwave in place. Or you can modify the old filler piece but this would be somewhat difficult given the difference in design between the two plates.
I'll post pictures of the finished installation next week. PM me if this is a job you need to do for more details.
Here are the details you need.
Original OEM model:
Panasonic Genius Model NN-T695SF
Which looks like this.
Replacement Unit
LG Electronics Model # LCS1112ST
Which looks like this:
The replacement unit doesn't have inverter technology and is a bit smaller in power and capacity (1.1@1000watts vs 1.2@1300watts cf). However, the LG has one KEY feature: the right dimensions to fit in the opening! It is actually approx 3/8" shorter but almost same width across. I purchased it from Home Depot online.
The 'special technique' I used to make this job even easier is to SWAP the BOTTOM plates between the microwaves. Why go through that process? Searay uses a wood filler piece at the bottom of the OEM microwave to allow the microwave to be mounted within the cabinet opening and also to give it that 'custom' look without seeing the space at the bottom of the microwave. The filler piece screws into the microwave on one side, and is secured by screws from underneath the shelf. A common technique used by Searay and other boat manufacturers. In the picture of the OEM microwave above, you can see the 'legs' protruding down... these are hidden by the black filler piece.
By swapping the metal bottom plates, you can USE THE SAME wood filler piece without any modifications to the cabinet or the filler piece!
Details regarding the swap technique: The LG bottom plate is actually about 1/4" larger on each side but that's fine since you won't really see it back there. You need to remove the transformer from the base plate AFTER you remove all the screws from the outside edges of the base plate. Don't unscrew the transformer in the middle as it will drop, damaging your unit. Once the old plate is centered on the new microwave, use a drill to drill holes where appropriate and screw the plate back on. Make sure it is centered. and that the door opens and closes. I ended up flipping the three small metal tabs in the front, and under the plate.
You can also opt not to use the filler piece at all but then you will have a less professional looking installation and will still have to figure out how to keep the new microwave in place. Or you can modify the old filler piece but this would be somewhat difficult given the difference in design between the two plates.
I'll post pictures of the finished installation next week. PM me if this is a job you need to do for more details.
