300 Sundancer questions.

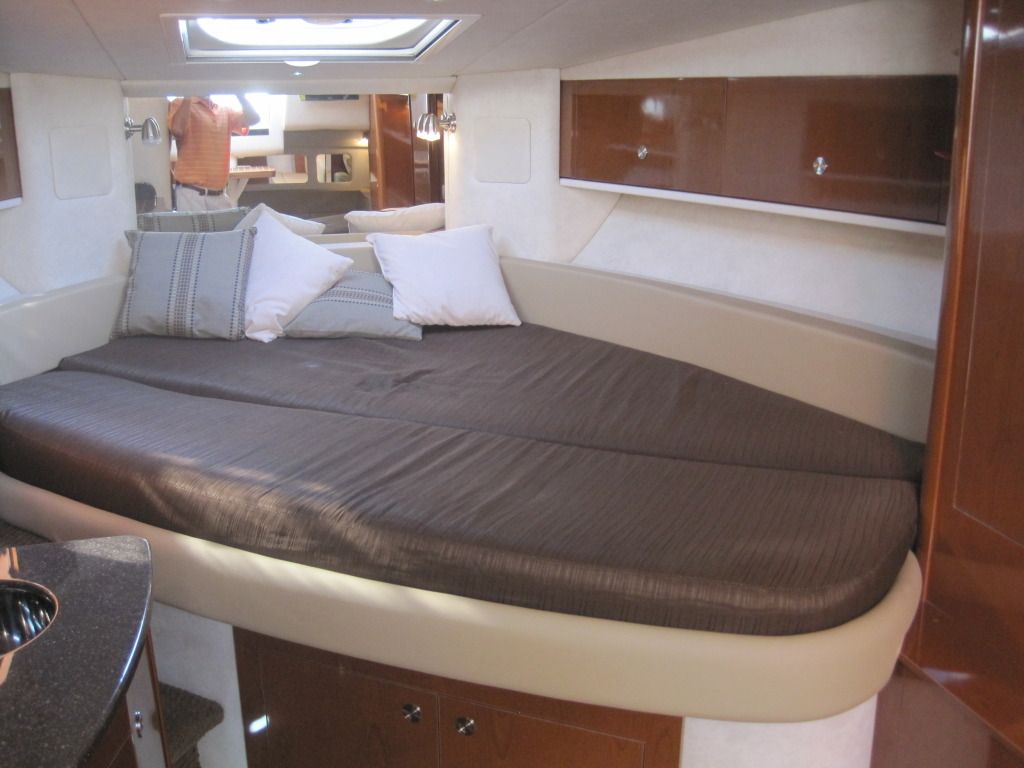
Yeah the water literally hugs the window frame and slips behind the fiberglass. I tested what I thought was happening (with a garden hose) and I had everything apart in the aft, and the water did exactly as I described. I suspect every 300 does it. I'm not sure if the starboard side windows do it (mainly bcause I never opened those) but water does come in the windows if I don't snug the latches down. I've seen the water accumulate under the windows but it eventually disappears so it probably makes its way down the wall somehow.

Yup, skiing can have some downsides. She caught an edge while following my 8 year old and landed on the one rock under the snow. Total fluke. Paralyzed from the waist down and in a wheelchair forever. Real ****ty deal... Anyway, life goes on. Lots of piggy-back rides in and around the boat these days.

Saratoga is a nice town. Hope you were there during track season. Much nicer down-town then Lake George.
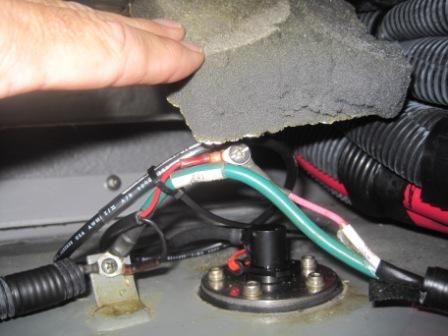
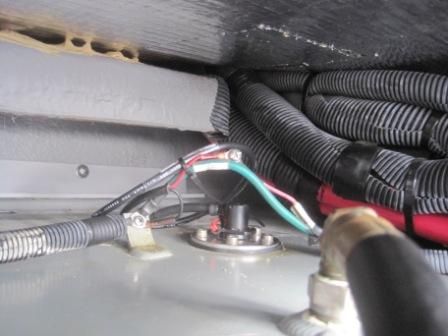
 
Battery question - Turned my fridges on night before we went out and left them on battery power. When we loading the boat I noticed that 12V guages were pretty far below 12V, forget how far but gennie would not start. Batteries are three seasons old so probably time for replacement. Luckily, could plug to shore power for an hour and charged batteries, engine started fine.

Questions:

1) Dont want to replace them until next season (ony 6 weeks or so left in NE season). How far do you let 12V meter drop below you are concerned about motors starting?

2) Does the emergency battery cross over work for starting gennie too?

3) Any recommendations on batteries? Many seem to lean towards AGM but I see some replacing certain loads with AGM and other house loads with different batteries. Any thoughts here?

4) Key question - Manual shows 4 batteries and I only have 3. I know 2 are wired in parellel and one is stand alone. I would ASSUME that house loads (fridge, 12V lights, head system, etc.) run off 2 batteries?

Thanks in advance.
 
Last edited:


1) Dont want to replace them until next season (ony 6 weeks or so left in NE season). How far do you let 12V meter drop below you are concerned about motors starting?

2) Does the emergency battery cross over work for starting gennie too?

3) Any recommendations on batteries? Many seem to lean towards AGM but I see some replacing certain loads with AGM and other house loads with different batteries. Any thoughts here?

4) Key question - Manual shows 4 batteries and I only have 3. I know 2 are wired in parellel and one is stand alone. I would ASSUME that house loads (fridge, 12V lights, head system, etc.) run off 2 batteries?


1. First determine if your batteries are really "dead". Make sure they are fully charged by genset or shorepower. Then switch off all loads possible and leave batteries to rest for 1/2 hour. Then measure the voltage. If >12.5 batteries are in fine condition. If they are about 12.3-12.4 it is time for new batteries in the new season. If they are < 12.2 it is time for new batteries now. My 210Sel with 5.0 MPI would start with 10.5 volt on a G27 battery. (Full charge is until charger light is green + add some safety time). All measurements should be done with a multimeter. Do not rely on SmartCraft to show you the right voltage.

2. don't know

3. Just get all AGM's - Good quality. Rolls, Lifeline, Sears? & Optima is what people seem to like. In my opinion Lifeline are the best of the bunch.

4. Upgrade to 4 :) - and normally in twin installations you have one battery bank wired to each engine as far as I understand. But I'm new at twins.

General recommendation: Get a Multimeter (for Volt & Ohm measurements) and maybe a cheap AMP meter (clamp) that can measure DC Amps. Makes all the debug easier. I always have a cheap multimeter on the boat and fresh batteries for it.
 
Battery question - Turned my fridges on night before we went out and left them on battery power. When we loading the boat I noticed that 12V guages were pretty far below 12V, forget how far but gennie would not start. Batteries are three seasons old so probably time for replacement. Luckily, could plug to shore power for an hour and charged batteries, engine started fine.

Questions:

1) Dont want to replace them until next season (ony 6 weeks or so left in NE season). How far do you let 12V meter drop below you are concerned about motors starting?

2) Does the emergency battery cross over work for starting gennie too?

3) Any recommendations on batteries? Many seem to lean towards AGM but I see some replacing certain loads with AGM and other house loads with different batteries. Any thoughts here?

4) Key question - Manual shows 4 batteries and I only have 3. I know 2 are wired in parellel and one is stand alone. I would ASSUME that house loads (fridge, 12V lights, head system, etc.) run off 2 batteries?

Thanks in advance.


1. Have never gotten to the point that my motors wouldnt turn over so no help here.

2. Never thought about the emergency start boosting for the generator turning over. Aside from a logistics challenge (emergency start on the helm & generator switch on electrical panel or from bilge) I would assume that would work, at least in my setup. (4 batteries wired into 2 banks, one for port and one for starboard/generator).

3. So earlier this season I changed out my charger to a Pro Mariner 1240P smart charger and replaced all 4 of my flooded cell group 27s to group 31 AGMs. Although no one had any feed back on here about the brand, I went with "Autocraft" AGMs from Auto Zone. These are AGM tractor batteries which they had in my local store but not on the website.

Although intially concerned, I checked (and double-checked) the warranty before giving it a go. They have a 2 year full-replacement warranty and a 3rd year pro-rated replacement warranty. So while they are SIGNIFICANTLY less expensive than all the other brands mentioned (especially when you piggy back some of the sale upons), they have one of the best warrantys I could find which is a good backup plan. I hope not to have to exercise the warranty coverage, but will report back if I do, and how much of a hassle it is/was. So far I've been very pleased, with both the batteries and charger which I replaced myself.

4. I have 4 batteries wired into two banks. The batteries for each bank are "cross wired" to appear to the charger as one big battery as opposed to two individual batteries in that bank. I can snap a picture to show you what I mean if that's not making sense. It's how my boat was originally wired anyway, not a mod from me, but was also recommended by the tech support guys at Pro Mariner.

James

Edit - It seems if you elect to check into the autocraft warranties with different stores over the phone trying to confirm what you are told, you will get varying reports, or at least I did. That said, I saw what was listed in the store's computer WRT the warranty for the batteries when I was purchasing them in person. I felt better then, but almost had backed off the idea when i was getting conflicting reports.
 
Last edited:
Well, the old hinged sensor came out just fine on the port side, but the 20" rigid stainless steel shaft wouldn't fit at an angle with the available space. I could just barely get the tip of the rod in, but the retaining clip at the bottom was too big to clear. Even if I could clear the clip, when I got it in far enough to have to drop the flange below the cockpit floor I am pretty sure it would have stalled out there. So, its remove the DC panel and cut the foam panel. Probably am going to save that for the off season. I have one accurate sensor in and since both engines consume fuel at about the same rate, I am in good shape for now.
I finally installed the port side fuel sender from Royce. Turns out I didn't need to remove the DC panel/battery switch panel after all. Actually, I couldn't. After I took out the four screws holding that panel, the cabling going to the battery switches on the bottom had no flex and no slack. So I gave up on that approach and just cut three sides of a square out of the foam panel above the sender and then bent it down to gain access to the open space above it. There was more than enough open space above that foam cutout to push the top of the new sender through at an angle, line it up vertically and then drop it down into the opening of the tank. I then folded the cut foam back up into place. It will probably actually just hold itself up there but next time out I am going to seal the three cut sides with some HVAC foil tape. In summary, here was the whole install process:

1. Attached ring connectors to the wire ends of the new senders using heat shrink connectors
2. Disconnected connections to existing sender and removed the existing sender by removing the 5 hex head screws
3. On starboard side, just angled the new sender in
4. On port side, cut out the foam in the area above the sender and pushed the sender through that hole to align it and drop it down into the tank
5. Reused the hex head screws and plastic washers for the five holes to secure the new sender to the tank
6. Connected the ground wire ring connector directly to the grounding stud on top of the tank next to the sender
7. Used a short stainless steel machine screw/washer/nut to connect the red signal wire from the boat to the signal wire of the sender
8. Coiled up the excess sender wire and tie wrapped everything as neatly as I could.

Below are pics of port side. On the second picture you can see where I simply pushed the cutout back up - it holds itself in place. Wires from sender are the red and black wires on the left. Black goes to the ground post and red goes to a "lug" I made to connect it to the boat's signal wire.

IMG_0721.jpg

IMG_0722.jpg
 
Last edited:
Welcome back Bill. Did figuring out that sender install have you tossing and turning all during vacation!?

Thanks for leading the charge on this one. I'll be doing it probably early next spring, since I guess during the winter will full tanks probably isnt the best plan!
 
Welcome back Bill. Did figuring out that sender install have you tossing and turning all during vacation!?

Thanks for leading the charge on this one. I'll be doing it probably early next spring, since I guess during the winter will full tanks probably isnt the best plan!
Ha! I wish I had time to think about that sender install. Spent 11 of the 12 days doing hard labor finishing off a kitchen/dinning room addition. But on that 12th day I got to run the 175 Sport on the local Hilton Head waterways all day with my brother. Saw an amazing number of Sea Rays (of all sizes) considering its a salt water environment dominated by center console fishing boats.

My next project is to remove the cabin door cover, the cabin door itself, and replace the tracks and trucks. So if anyone has the detailed formula for that one on a '02-'07 300DA, post it.
 
1. Have never gotten to the point that my motors wouldnt turn over so no help here.

2. Never thought about the emergency start boosting for the generator turning over. Aside from a logistics challenge (emergency start on the helm & generator switch on electrical panel or from bilge) I would assume that would work, at least in my setup. (4 batteries wired into 2 banks, one for port and one for starboard/generator).

3. So earlier this season I changed out my charger to a Pro Mariner 1240P smart charger and replaced all 4 of my flooded cell group 27s to group 31 AGMs. Although no one had any feed back on here about the brand, I went with "Autocraft" AGMs from Auto Zone. These are AGM tractor batteries which they had in my local store but not on the website.

Although intially concerned, I checked (and double-checked) the warranty before giving it a go. They have a 2 year full-replacement warranty and a 3rd year pro-rated replacement warranty. So while they are SIGNIFICANTLY less expensive than all the other brands mentioned (especially when you piggy back some of the sale upons), they have one of the best warrantys I could find which is a good backup plan. I hope not to have to exercise the warranty coverage, but will report back if I do, and how much of a hassle it is/was. So far I've been very pleased, with both the batteries and charger which I replaced myself.

4. I have 4 batteries wired into two banks. The batteries for each bank are "cross wired" to appear to the charger as one big battery as opposed to two individual batteries in that bank. I can snap a picture to show you what I mean if that's not making sense. It's how my boat was originally wired anyway, not a mod from me, but was also recommended by the tech support guys at Pro Mariner.

James

Edit - It seems if you elect to check into the autocraft warranties with different stores over the phone trying to confirm what you are told, you will get varying reports, or at least I did. That said, I saw what was listed in the store's computer WRT the warranty for the batteries when I was purchasing them in person. I felt better then, but almost had backed off the idea when i was getting conflicting reports.

James - Thanks for great feedback as always. I have heard I needed to replace charger to go to AGMs, not sure if that is in the cards for me. Interesting that I have 3 battery setup, when many seem to have 4. It looks like factory setup (no tray, space or wiring connections for 4th) but who knows.

I did some tests last night and it would seem that left battery switch powers port motor and cabin DC panel loads (fridges, cabins lights, etc) and right battery switch powers starboard motor and helm power (stereo, cockpit lights). This shoots my theory about my two battery setup powering ALL house (non motor loads). Do you know if your setup mirrors this?

Also, it does look like emerg cross over would just link both banks together so could start gennie if there was enough battery juice left. Another thing I will confirm with my guy.

Would like to devise a somewhat fool proof plan to NOT get stranded on the hook when running fridges, kids movies, lights and I have had too much vodka.... (sleeping over, not behing the helm).

Best,
Jason

ps. Did you find candelabra adapters yet?


Jason,
I got mixed messages about needing to replace the charger or not replace it when switching to AGMs. My gut feeling is that it would have been fine with the original charger, especially since I do not leave mine on charge all the time at the pier. Since I'm on a lift, I dont usually have anything running during the week, and will just spin by the boat on Friday morning to plug it in and turn on the fridges/charger to top off before heading out. I went the extra step of upgrading the charger for my own sanity factor in protecting the battery investment, and also to upgrade from 30 to 40Amp output capacity per promariners recommendation to get the larger batteries back up to speed more quickly. Was not much extra, so I went with the bigger charger.

Seems that with the 4 group 31s (and prior group 27s) I've never run low on charge while on anchor, but I'll run the generator for an hour or two a day when on the hook, if necessary just to top off. The new promariner charger is nice because you can monitor how much amperage is going into the batteries and what their voltage levels are. (May get the remote monitor eventually so I dont have to open the hatch for the bilge to peek at the status.) The new charger also has a multi speed cooling fan, so you barely ever hear it unlike my old one.

To be honest I've not tracked down what all is on which bank. That's been on my project list, but I've spent too much time playing, and doing other projects so far. I just keep an eye on the charge levels and run the generator whenever necessary, usually in the evening before hitting the rack while cooling down the cabin with the AC. I'm still not comfortable running the generator over night.

Ideally, I'd like to have one battery dedicated to the generator so there would never be a risk of getting stranded. Haven't looked into how to make that happen and at what cost at this point. For now, I just pay more attention to charge levels which only costs me my own attention, no $$. :)

James
 
Last edited:
My next project is to remove the cabin door cover, the cabin door itself, and replace the tracks and trucks. So if anyone has the detailed formula for that one on a '02-'07 300DA, post it.

When our boat was new, our dealer had to replace the door and trucks under warranty. If you have a cockpit fridge, it has to come out, the bar/sink also was removed. Numerous screws secure it to the cockpit sole...as well as the calk seams. I'm certain the wires to the battery switches were disconnected once the fridge was removed. Once the bar is removed, the door cover is held in place with more screws and calk. When the cover came off, I couldn't believe how much saw and fiberglass dust and had been left behind at the factory. There was so much trash in the track the truck's bearings never stood a chance.
 
When our boat was new, our dealer had to replace the door and trucks under warranty. If you have a cockpit fridge, it has to come out, the bar/sink also was removed. Numerous screws secure it to the cockpit sole...as well as the calk seams. I'm certain the wires to the battery switches were disconnected once the fridge was removed. Once the bar is removed, the door cover is held in place with more screws and calk. When the cover came off, I couldn't believe how much saw and fiberglass dust and had been left behind at the factory. There was so much trash in the track the truck's bearings never stood a chance.
YIKES!!!

I am first going to try removing the four screws holding the door to the trucks on the top and the three screws holding the door to the slide on the bottom, to free the door from all its attachments. Then see if I can bend and angle the door out. Once its out I'll figure out a way to get the screws out that are holding down the tracks back under the cover. I give this approach a 35.8% chance of success.
 
Bill, its worth a try...I was stunned when I saw our new boat scattered all over the dock. It was worth it though, the new door fit perfect, and the door slid, and still does with my pinky.
 
YIKES!!!

I am first going to try removing the four screws holding the door to the trucks on the top and the three screws holding the door to the slide on the bottom, to free the door from all its attachments. Then see if I can bend and angle the door out. Once its out I'll figure out a way to get the screws out that are holding down the tracks back under the cover. I give this approach a 35.8% chance of success.
You can make it 100% as i have done it this way - it was a while ago but as i remember the upper screws on the port side were hardest to on/off - i used a short screw gun bit and an open end wrench to turn it as i could not fit my offset screwdriver in there - once unscrewed it "tilted" out quite easily.....
 
You can make it 100% as i have done it this way - it was a while ago but as i remember the upper screws on the port side were hardest to on/off - i used a short screw gun bit and an open end wrench to turn it as i could not fit my offset screwdriver in there - once unscrewed it "tilted" out quite easily.....

How in the hell did you line up the screws to the trucks during reassembly on the side that required the screw gun bit? Damn, you must have eyes in the tips of your fingers!
 
I spent the day at the Sea Ray factory for the Homecoming and rode boats all day and took a plant tour. Here are some pics of what our 300DA has become - the 330 Sundancer. You will recognize the layout as the same, all upgraded materials. They took the "sidewalks" off and access to the bow is now up through the windshield. So there is extra space on the port side to fit a full length shelf with sink at the back.
026.jpg
031.jpg
030.jpg
029.jpg
028.jpg
027.jpg
 
That is awesome.
 
OK, thinking about winterization. I know, I know, too early but this is the first time for me and want to be ready. Season will end for us in Northeast in late October (ok, the Admiral will be done by then!).

Silly question, maybe.... Once I pull batteries out to store for the winter, how do I lower the engine hatch back down?
 
I spent the day at the Sea Ray factory for the Homecoming and rode boats all day and took a plant tour. Here are some pics of what our 300DA has become - the 330 Sundancer. You will recognize the layout as the same, all upgraded materials. They took the "sidewalks" off and access to the bow is now up through the windshield. So there is extra space on the port side to fit a full length shelf with sink at the back

I saw a 2010 310 Sundancer the other day.... like the walk through windshield and extra space you gain through losing the gunnel "sidewalks". Looked like integrated swim platform is bit short, drives stick out a bit far for my taste, would make me nervous with kids jumping around.

As usual, Sea Ray continues to impove lots of things, love the teak (looking) stairs and vberth looks bit roomier.

You and what, $150K+, it all can be yours!
 
OK, thinking about winterization. I know, I know, too early but this is the first time for me and want to be ready. Season will end for us in Northeast in late October (ok, the Admiral will be done by then!).

Silly question, maybe.... Once I pull batteries out to store for the winter, how do I lower the engine hatch back down?
Do you have the battery adapter that plugs into the DC socket at the helm? Just hook that up to one of your batteries and plug it into the socket. That will feed 12V to the 12V lines. Then lower the hatch as you normally do. Here is a picture of it (easily home made if you don't have one):

IMG-20120308-00063.jpg
 
Last edited:
Do you have the battery adapter that plugs into the DC socket at the helm? Just hook that up to one of your batteries and plug it into the socket. That will feed 12V to the 12V lines. Then lower the hatch as you normally do. Here is a picture of it (easily home made if you don't have one)

Thanks Bill. Boat did not come with one but get what I need to buy/build now. Thanks much.
 

Forum statistics

Threads
113,248
Messages
1,429,275
Members
61,128
Latest member
greenworld
Back
Top