New Generator Install in a 380DA

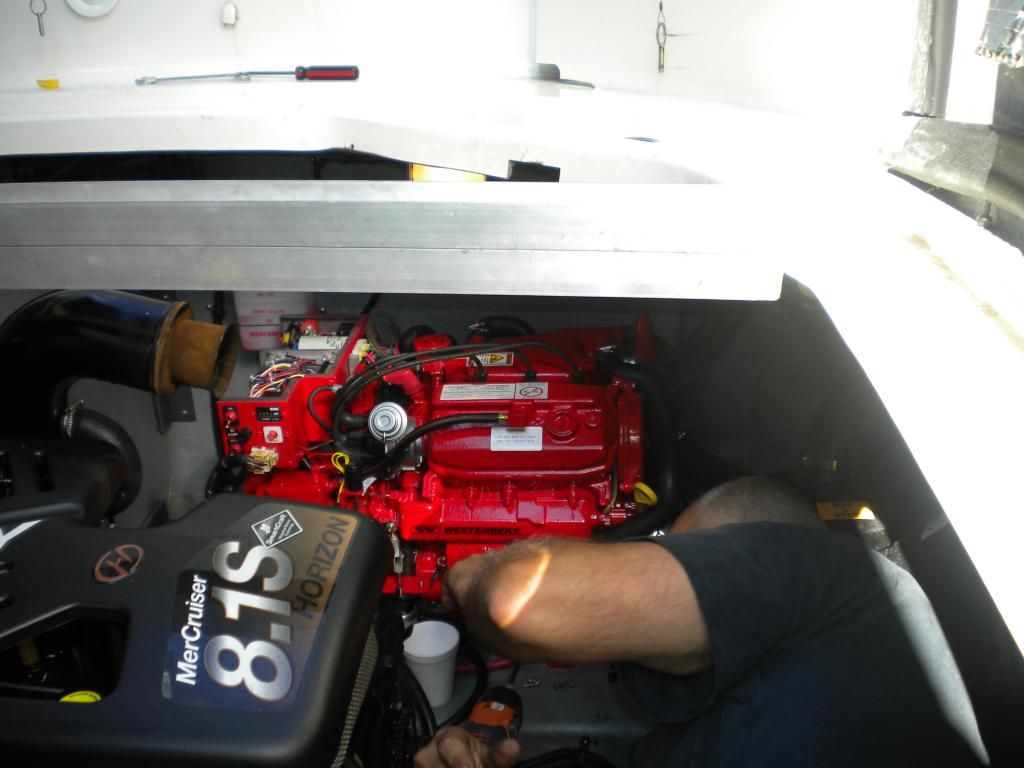
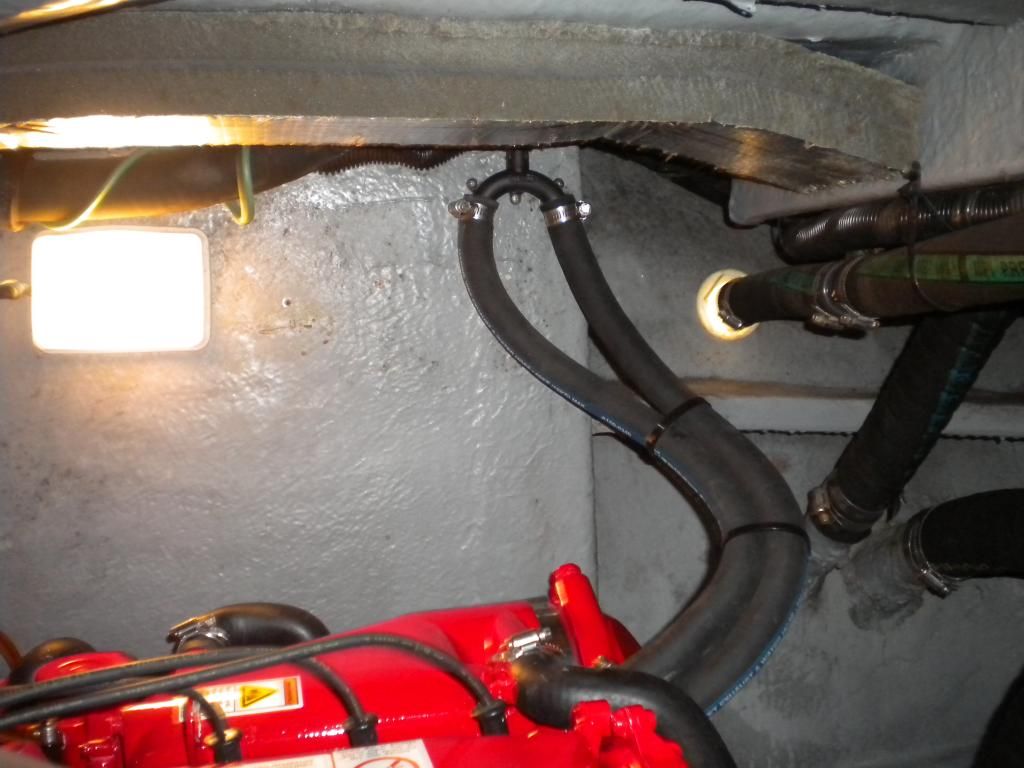
rondds I am glad you go *** to go so well, I have a favor to ask if you have it available, do you have a picture of the old and new perhaps taken from between the two boats motors, which gives one a better view of the differences between the low profile and the old? We now have a good picture history of removing a Westerbeke from the 380. That is exactly the same way they removed mind. And one other issue to check for any others who may have to remove theirs. Check the area under the pan the generator is setting on to see if is soft or has any rot issues. This is the time to repair it if any weakness is found as well as the rubber mounts for the generator.

I am glad you were able to do this without any more hassles then necessary, as Larry says, "Get er done!"

Hey this makes my 2000th post here. :smt038:smt043

I don't understand this***? I must of had a typo? Should of been, "I am glad you got it to go so well"
 
Last edited:
Dave/Ken
Not sureI understand which part you are referring to (Engine cover support bracket?).

The aluminum rail that the deck panels are supported by.
 
This piece

rail.jpg
 
Something sweet about a genny with 2 hrs run time on it """"""
 

Attachments

  • image.jpg
    image.jpg
    90.6 KB · Views: 258
Pseudo
Your answer to my question about taking off the manifold (over on the 380 thread) was a game changer. Not having to remove the manifold and all the crap attached to it easily saved 2 hours. Pulling hoses and a fiberglass muffler was definitely the call!

Digging through my pix of the generator BEFORE and this is all I found. I took probably 20 pix but none from a pulled back position. These pix were mainly taken leaning into the area where the generator sits.

BTW, the "shelf" had no soft spots thank heaven. This is an area that stays dry. I understand that the 410DA is more susceptible to getting water in this area (from rain??) but the old gen had zero rust. It has been sprayed in certain spots but I saw no signs of rust repair.

I can tell you dimensionally, the LP gen is lower, but wider. Meaning, if you look at it from the belt side, it may be an inch or two wider. That's why we had a bit of trouble getting it down in the hole. Wound up taking off the exhaust nozzle. There is just a TON of space to get to stuff on this new one. I can check oil w/o pulling the day hatch, which requires removing the seat. The plugs are right on top of the motor and the heat exchanger, though on the stbd bulkhead side, is readily accessible for zinc replacement.

The aluminum support rail never came off. I didn't think it would need to b/c of the way I envisioned extraction and install and we agreed to leave it in until proven otherwise. Great place for tools.

Here's the best I've got...

DSCN1846_zps8888e5bd.jpg


Old and new in the same shot...
DSCN1987_zps8330eafb.jpg


OLD


d3999a31-618c-486a-85c8-231fe5299f6a_zps9ba383fc.jpg


NEW
DSCN2004_zpsbe72f6a6.jpg


Space above and behind...

DSCN2008_zps7c3c8242.jpg


[video=youtube_share;GBNeqIP4GYk]http://youtu.be/GBNeqIP4GYk[/video]
 
Thanks, there is a bit noticeable difference if you look at the two photos and the space below the bilge light.
 
Yep. We did move the bilge light to make room for the hoses for the anti-siphon, but we didn't change its height. Just moved it forward about 9".
 
Carter

Permanently? No.

Did I leave the bolts out? Yes. Filled the holes with some silicone to keep water from dripping in the bilge.
 
Well now I see, but that was not on my mind when I apparently did the typo...not that the subject does not come to mind time to time.
 
This is an old but EXTREMELY helpful write up. Thank you Ron and thank you Clubsearay!
 

Forum statistics

Threads
113,173
Messages
1,427,896
Members
61,086
Latest member
MrWebster
Back
Top