

NJMatt50
Member
- Apr 28, 2009
- 225
- Boat Info
- 2005 Sundancer 420. Sea lift platform, Axiom Pro, FLIR.
- Engines
- Cummins 480ce
I Found that the windlass was loose at the top deck of my 340. After further inspection I found that the reason this was the case was due to water intrusion around the windlass and foot switches. I was going over options and decided to tackle this myself and with the help of a buddy of mine. I have taken pics along the way to show what we did. Be sure to re-bed your hardware ever so often!
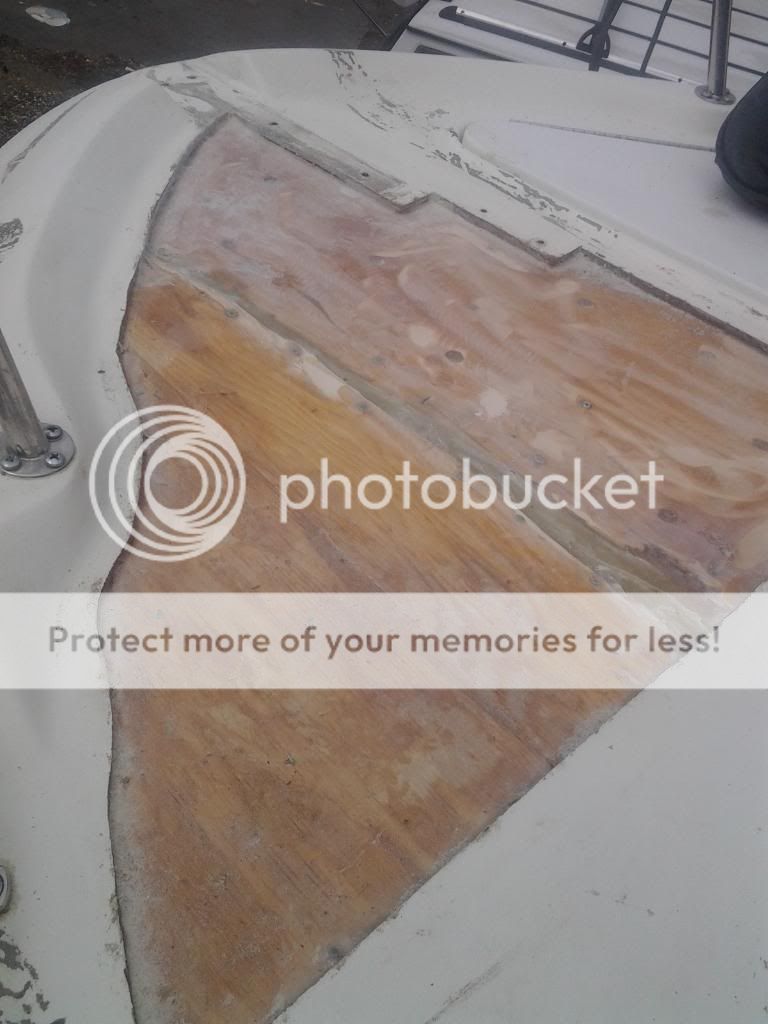
Area thought to be rotted upon inspection.

Starting to cut using the fein tool - notice we made the cut between the anchor bow rail and cleat. This way it will bolt back together later.

Surprise! -This looks really bad. It looks worse than it is. There was no wood left around the foot switches.

Cleaned up -All the rot is cleaned out. Also made a lip about 1.5 inches under the existing deck.

Wood added - 3/8" Best outdoor Home Depot ply added to anchor area. This was thicker than the area by the foot switches to support the windlass load. I keyed the wood under the existing area dug out on the sides. The wood was epoxied down using West Systems product.

Windlass plywood - 1/2" Marine ply added on windlass side. Again note that this is keyed past where the bow rail and cleat are bolted up. This will make for everything to be bolted together when complete. The bottom corner was tucked in as well for support. Also made some holes in the wood for the epoxy to flow down a level.

Foot switch side wood - Another 1/2 piece of wood was added and keyed under the existing lip. This could not be "tucked" under the lip with 1 piece. Therefore this had to be done in 2 and fiberglassed in between.
Top Deck replaced - Once this all was dry we then were able to fit the top back flush with the rest of the deck. A little sanding was needed to make a proper fit. This was super strong after that West System epoxy dried up.

Template made - So instead of dealing with the seams of the top deck I decided to go with synthetic teak. I made a template from cardboard of exactly what I wanted. Sent it to TT Custom Marine.

Holes drilled and sealed up - Before I glued the teak down I drilled most of the holes and used 4200 sealant around the areas prone to water intrusion.

Complete!!! - All hardware installed and sealed up. I think the teak makes for a good look.

All in all this took a few weekends. Was a good deal of work. Finally can use my windlass again.
Area thought to be rotted upon inspection.

Starting to cut using the fein tool - notice we made the cut between the anchor bow rail and cleat. This way it will bolt back together later.

Surprise! -This looks really bad. It looks worse than it is. There was no wood left around the foot switches.

Cleaned up -All the rot is cleaned out. Also made a lip about 1.5 inches under the existing deck.

Wood added - 3/8" Best outdoor Home Depot ply added to anchor area. This was thicker than the area by the foot switches to support the windlass load. I keyed the wood under the existing area dug out on the sides. The wood was epoxied down using West Systems product.

Windlass plywood - 1/2" Marine ply added on windlass side. Again note that this is keyed past where the bow rail and cleat are bolted up. This will make for everything to be bolted together when complete. The bottom corner was tucked in as well for support. Also made some holes in the wood for the epoxy to flow down a level.

Foot switch side wood - Another 1/2 piece of wood was added and keyed under the existing lip. This could not be "tucked" under the lip with 1 piece. Therefore this had to be done in 2 and fiberglassed in between.

Top Deck replaced - Once this all was dry we then were able to fit the top back flush with the rest of the deck. A little sanding was needed to make a proper fit. This was super strong after that West System epoxy dried up.

Template made - So instead of dealing with the seams of the top deck I decided to go with synthetic teak. I made a template from cardboard of exactly what I wanted. Sent it to TT Custom Marine.

Holes drilled and sealed up - Before I glued the teak down I drilled most of the holes and used 4200 sealant around the areas prone to water intrusion.

Complete!!! - All hardware installed and sealed up. I think the teak makes for a good look.

All in all this took a few weekends. Was a good deal of work. Finally can use my windlass again.
Last edited:
